

Chat
On this page
Twigex Chat is a built-in messaging system designed for seamless team communication right inside the platform.
Whether you're discussing projects, sharing images, or dropping a quick message to your teammates, Twigex Chat keeps everything in one place, directly connected to your workspace.
- Public channels for team-wide discussions
- Private channels for focused or sensitive topics
- Direct messages between individual users
Chat is always just a click away, so you can collaborate without leaving your work.
When you open Chat for the first time, you'll see an empty view like this, with no channels and no direct messages yet:
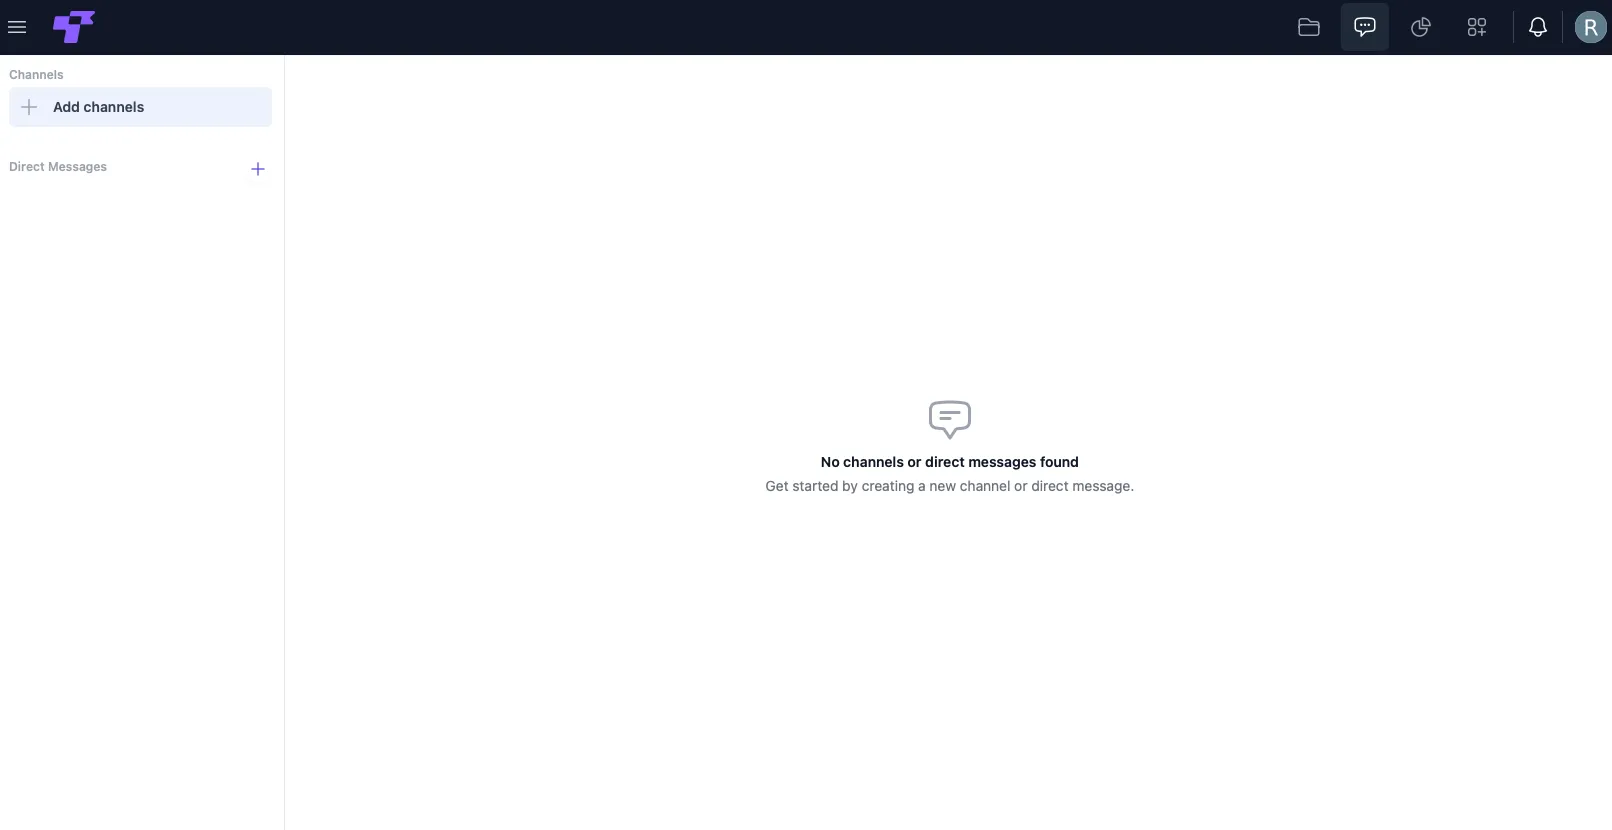
This means you can now create your first communication space inside Twigex.
Create or Browse Channels
Channels are shared conversation spaces where teams collaborate around specific topics, projects, or workflows.
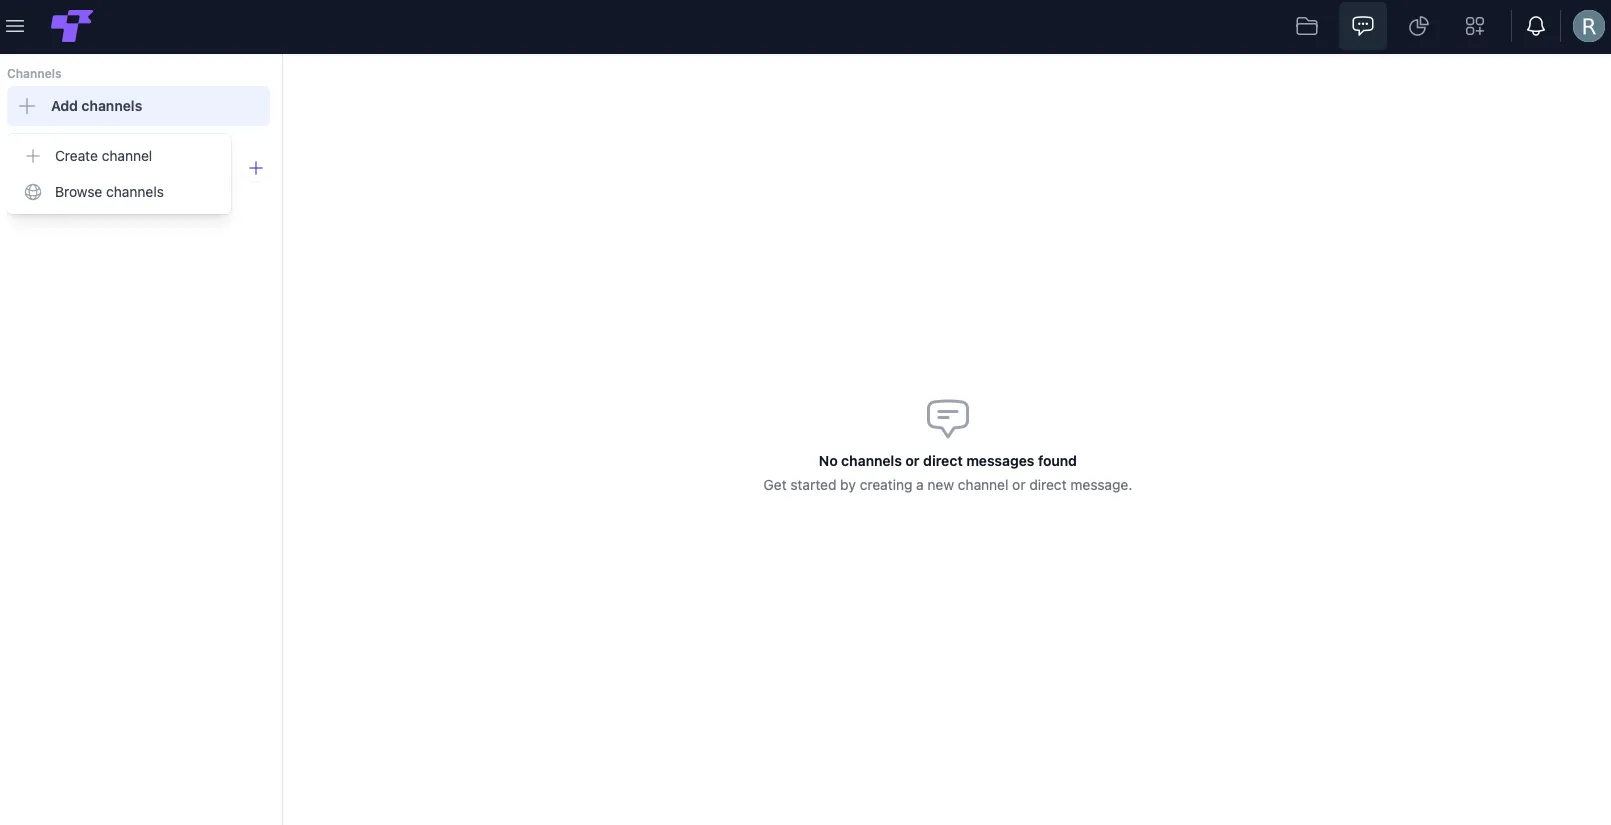
You have two options:
- Browse channels — join channels that already exist in your workspace
- Create channel — start a completely new space for communication
Use channels for things like:
- Project-specific conversations
- Team announcements
- Tracking vacation dates
- Temporary campaign chats
- Any topic you want to keep structured and separate
Browse Existing Channels
If there are existing public channels in your workspace, you can join them instantly using the Browse channels option.
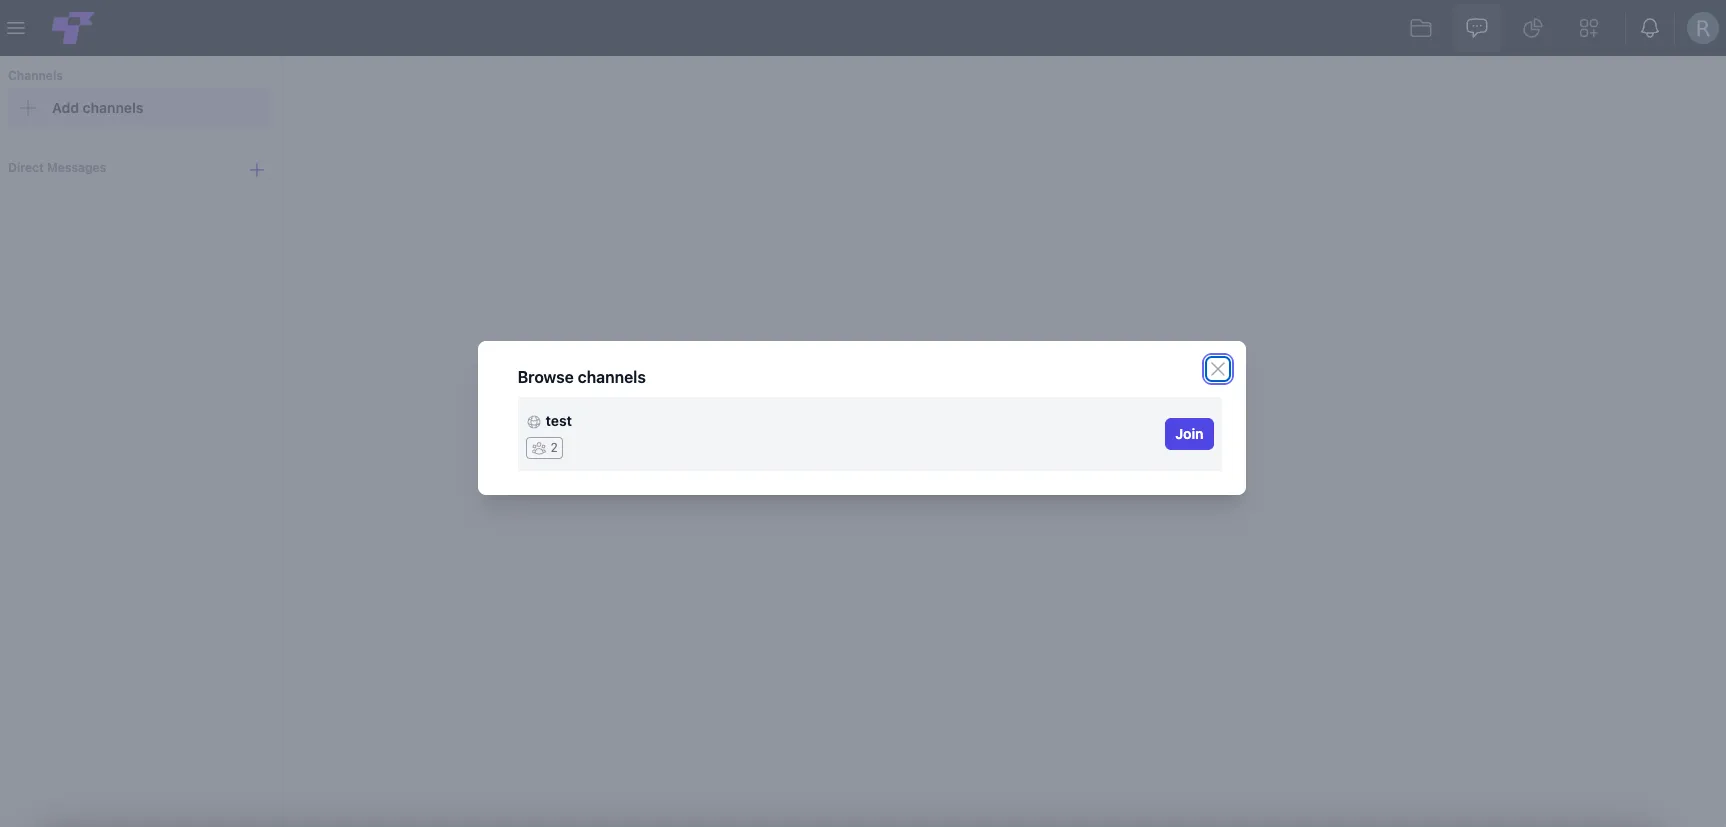
To browse and join a channel:
- Click + Add channels in the left sidebar.
- Select Browse channels.
- A window will appear showing all public channels you can join.
- Click Join next to the channel you want to access.
After joining, the channel will appear in your sidebar and you can start chatting immediately.
Private channels will not appear here - you can only join them if a channel admin adds you.
Create a New Channel
If you can't find what you need in Browse channels, you can create your own space for focused conversations.
There are two types of channels you can create:
- Public channels — visible to everyone in the workspace; anyone can join. Perfect for team-wide communication, announcements, or open discussions.
- Private channels — only visible to invited members. Best for sensitive topics, smaller project groups, or conversations limited to specific people.
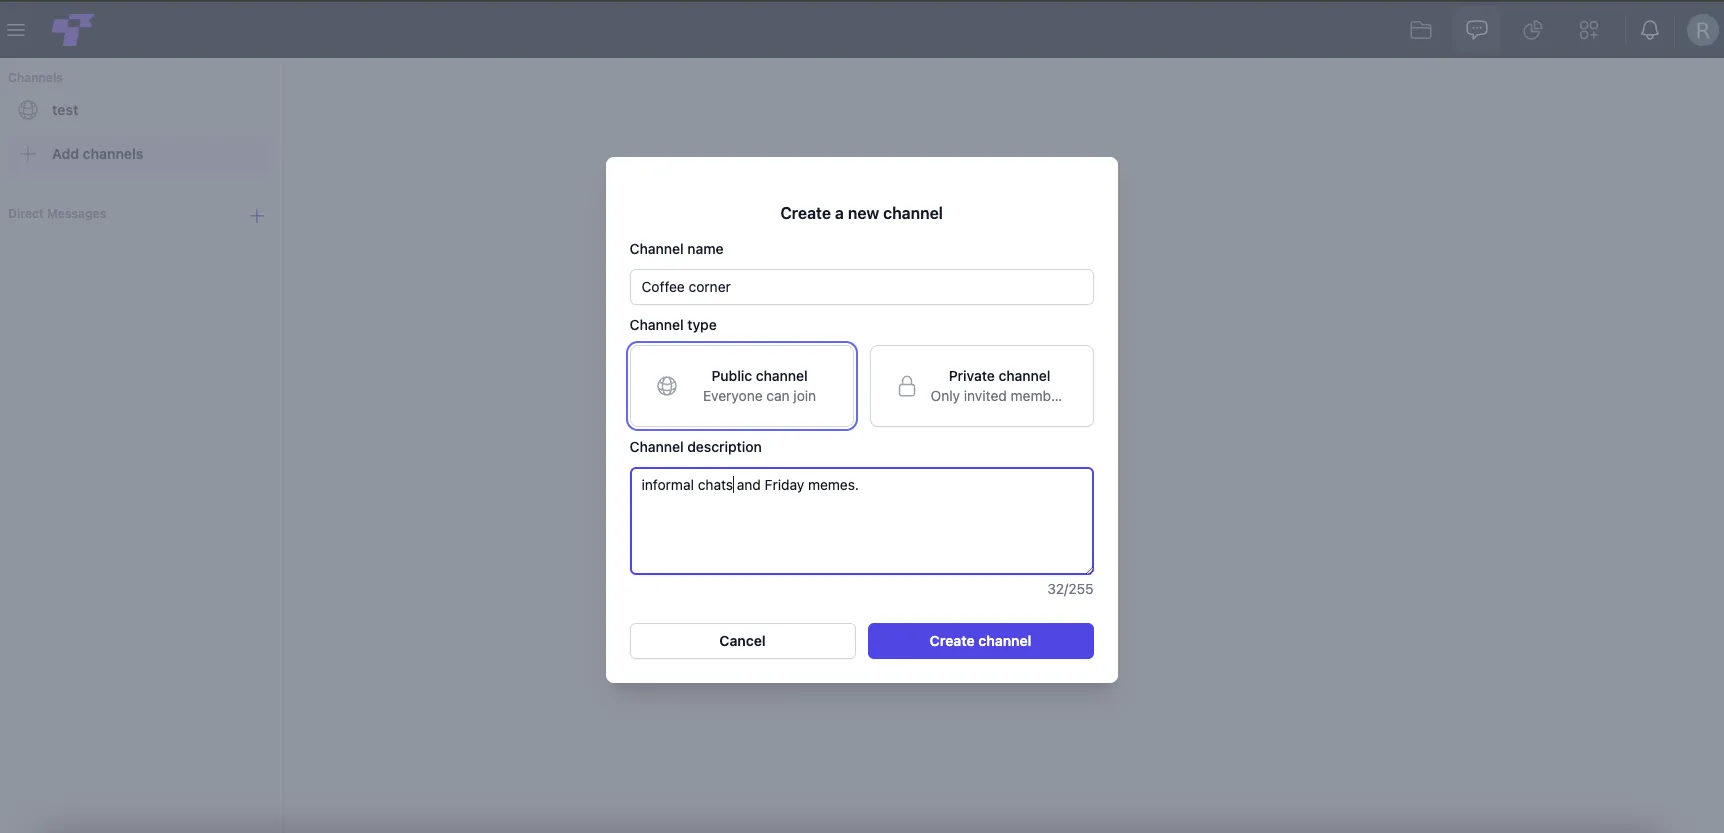
To create a channel:
- Click Add channels in the sidebar and choose Create channel.
- Enter a clear Channel name (for example,
coffee corner). - Choose the Channel type: Public or Private.
- Add a Channel description (optional).
- Click Create channel.
Add Members to a Channel
Besides the Add members to this channel button inside an empty channel, you can also invite users directly from the channel menu.
Using the three dots next to a channel, you can:
- Rename channel — give the channel a new name as topics evolve.
- Add members — invite teammates to join the conversation.
- Leave channel — exit the channel and stop receiving messages.
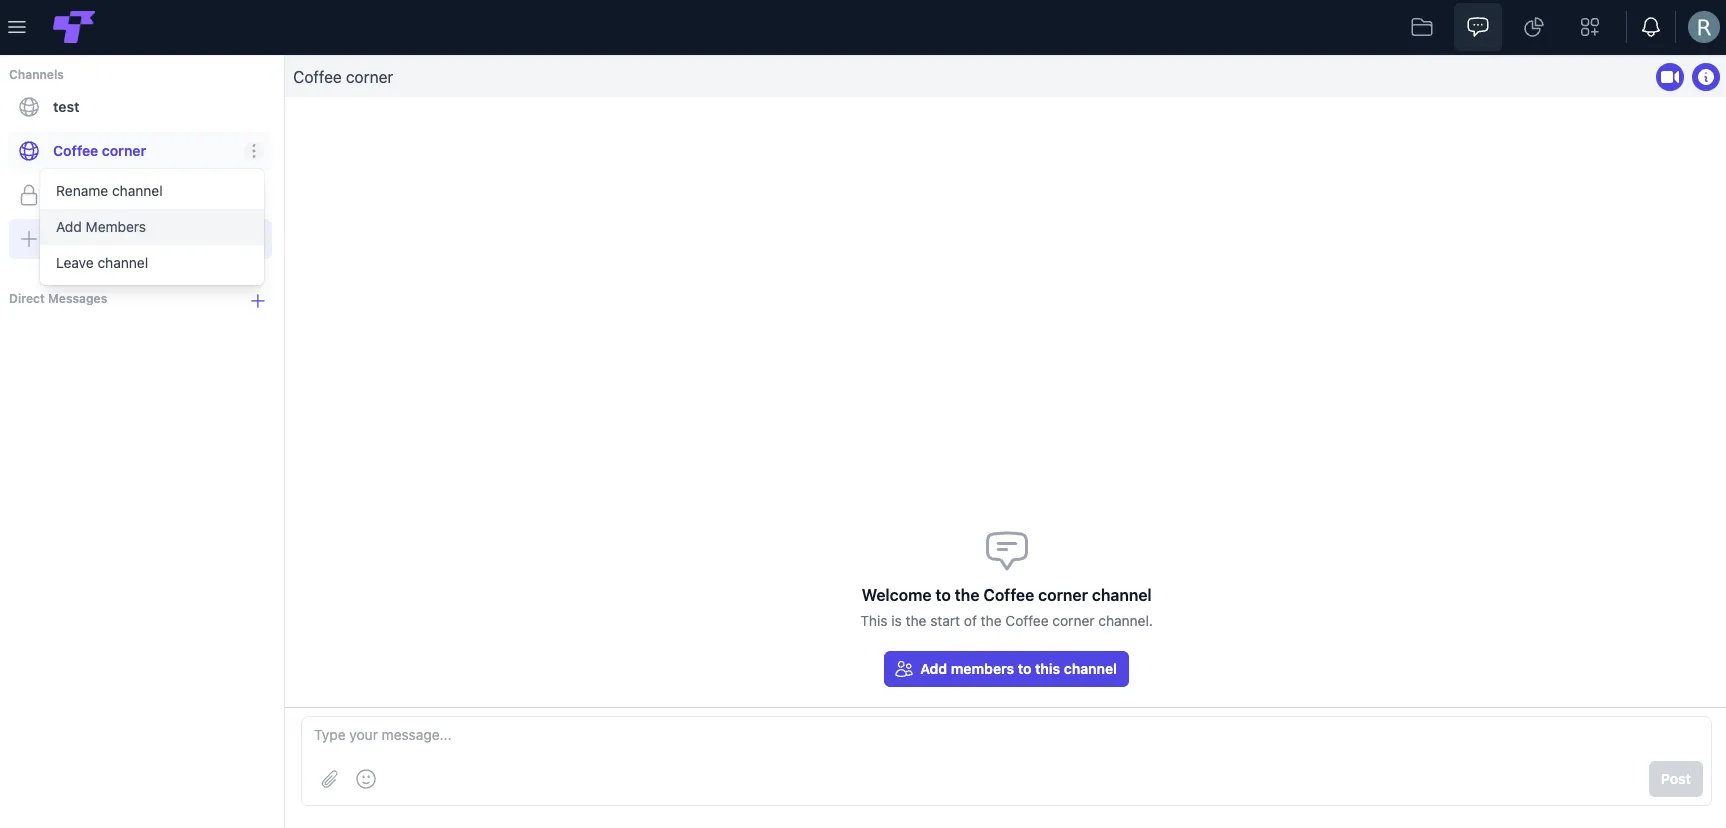
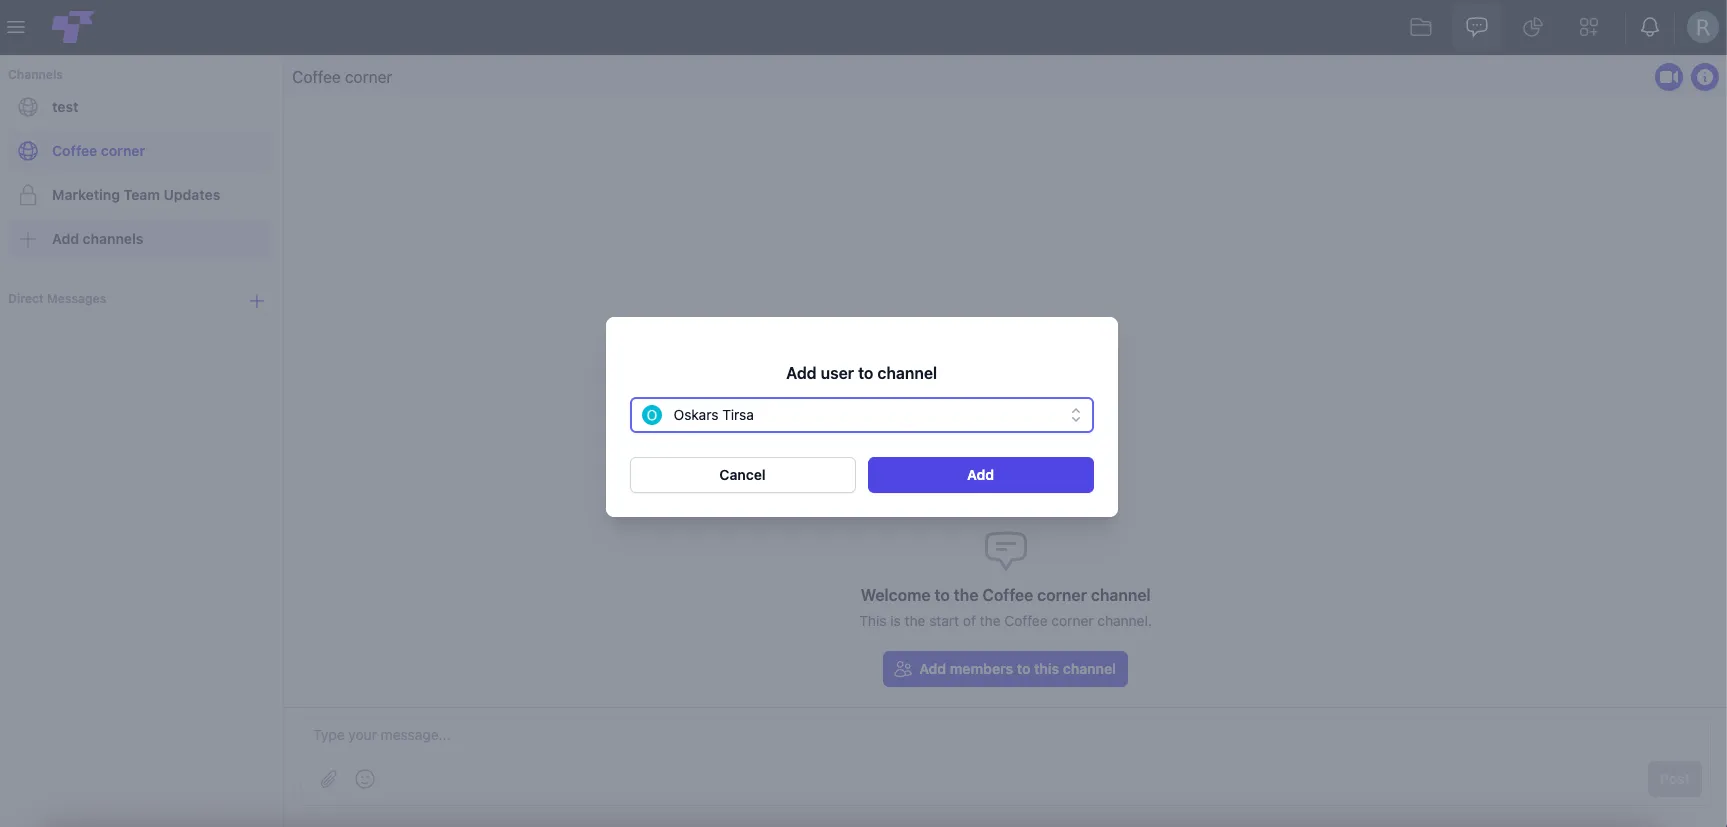
To add a member:
- Click the three dots next to the channel name, or click Add members to the channel if it's new.
- Select Members from the dropdown menu.
- Click Add.
Manage Channel Members
You can also manage members (assign admin role or remove someone) through the Info panel by clicking the ℹ️ Info button in the top-right corner of any channel.
This side panel gives you a quick overview of who is in the channel and lets you manage members and roles.
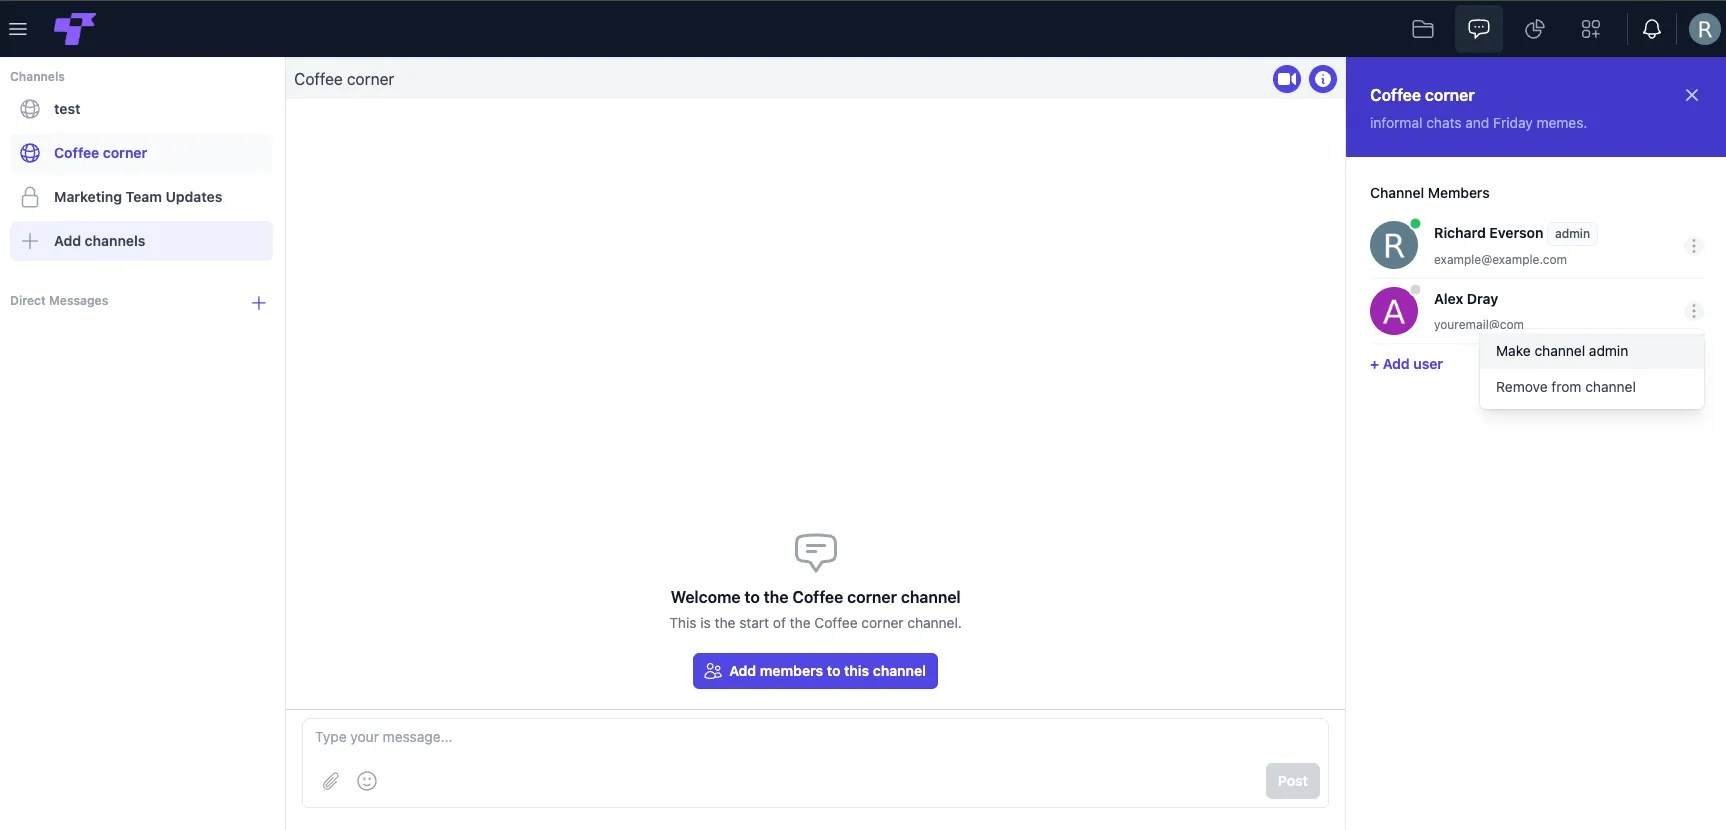
Add New Members
Click + Add user to invite more teammates to the channel.
Manage Member Permissions
Press the three dots next to a user to open member actions:
- Make channel admin — promote the user to manage the channel.
- Remove from channel — remove the user and revoke their access.
Only channel admins can change roles or remove other members.
Direct Messages
If you want to message someone privately, you don't need a channel. Direct Messages let you chat privately with one teammate - perfect for quick questions, sensitive topics, or small decisions that don't need a whole channel.
DMs work just like regular chat: you can send text, emojis, files, and even jump into a video call when needed.
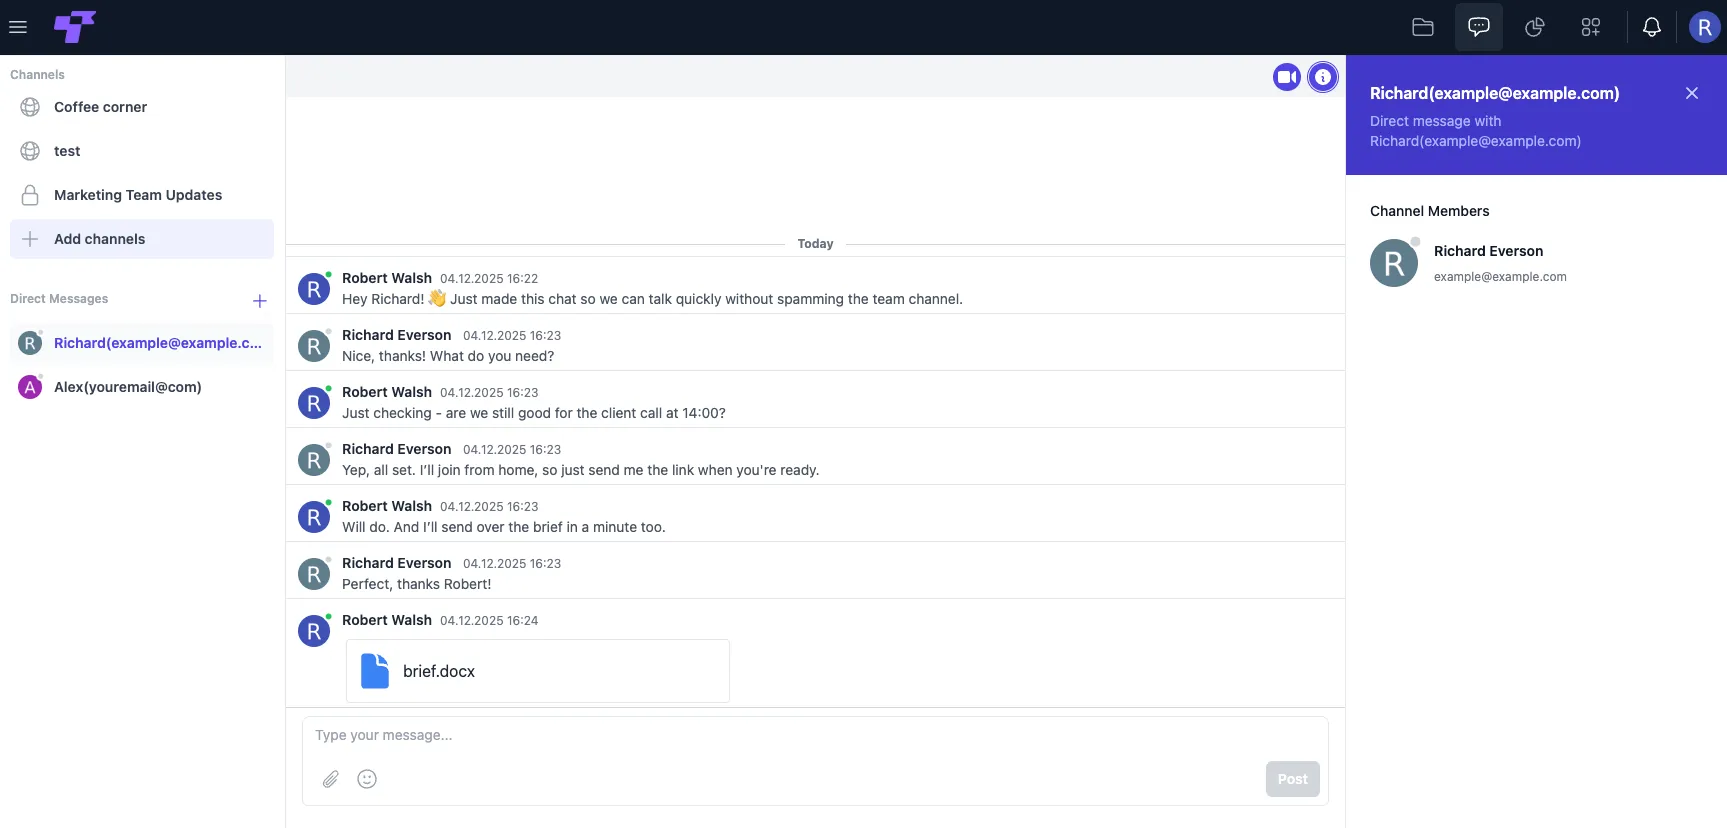
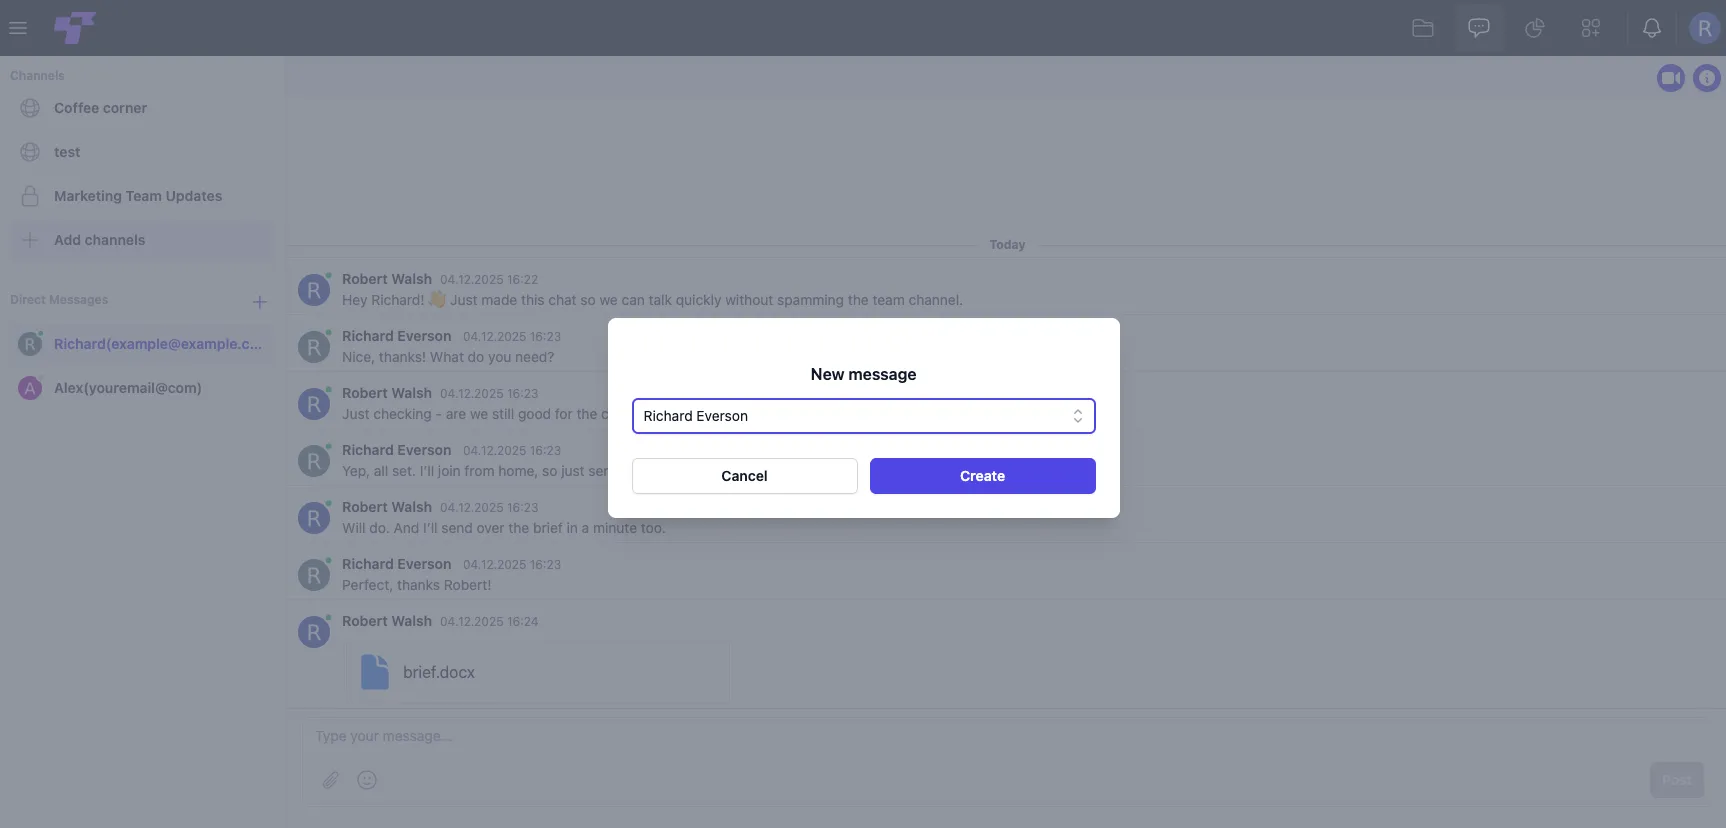
Creating a Direct Message
You can start a new private conversation from the left sidebar.
- In the Direct Messages section, click the + button.
- A pop-up will appear (like in the screenshot below).
- Select the person you want to chat with.
- Click Create to open your private conversation.
Interacting with Messages
In Twigex Chat, you can keep conversations clear and engaging by reacting to messages, replying, or attaching files.
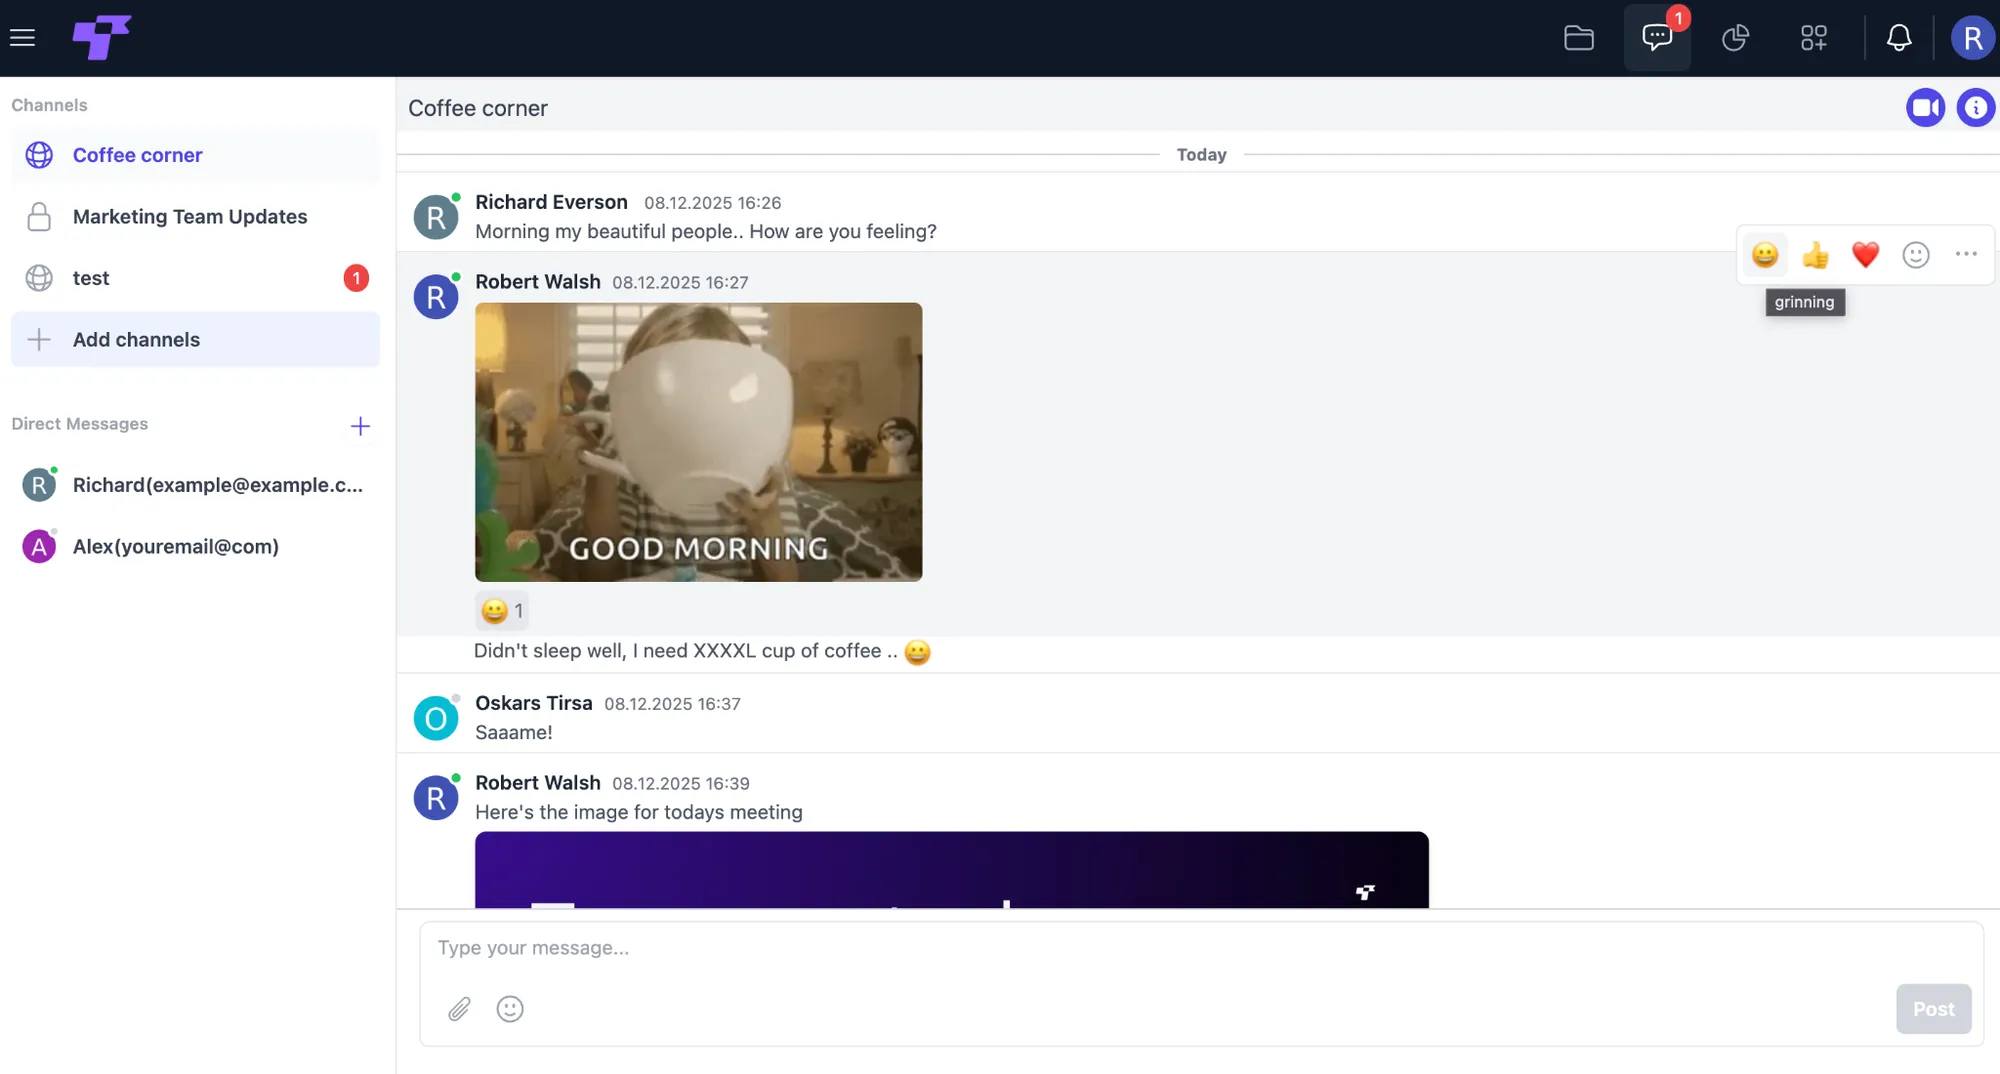
Unread messages are highlighted with a red badge in the sidebar.
Reactions
In any channel, you can respond to messages using emoji reactions: a quick way to acknowledge a message, show support, or just keep the conversation fun.
When you hover over a message, you'll see three frequently-used emojis appear.
These are not fixed: they update based on your recent reactions.
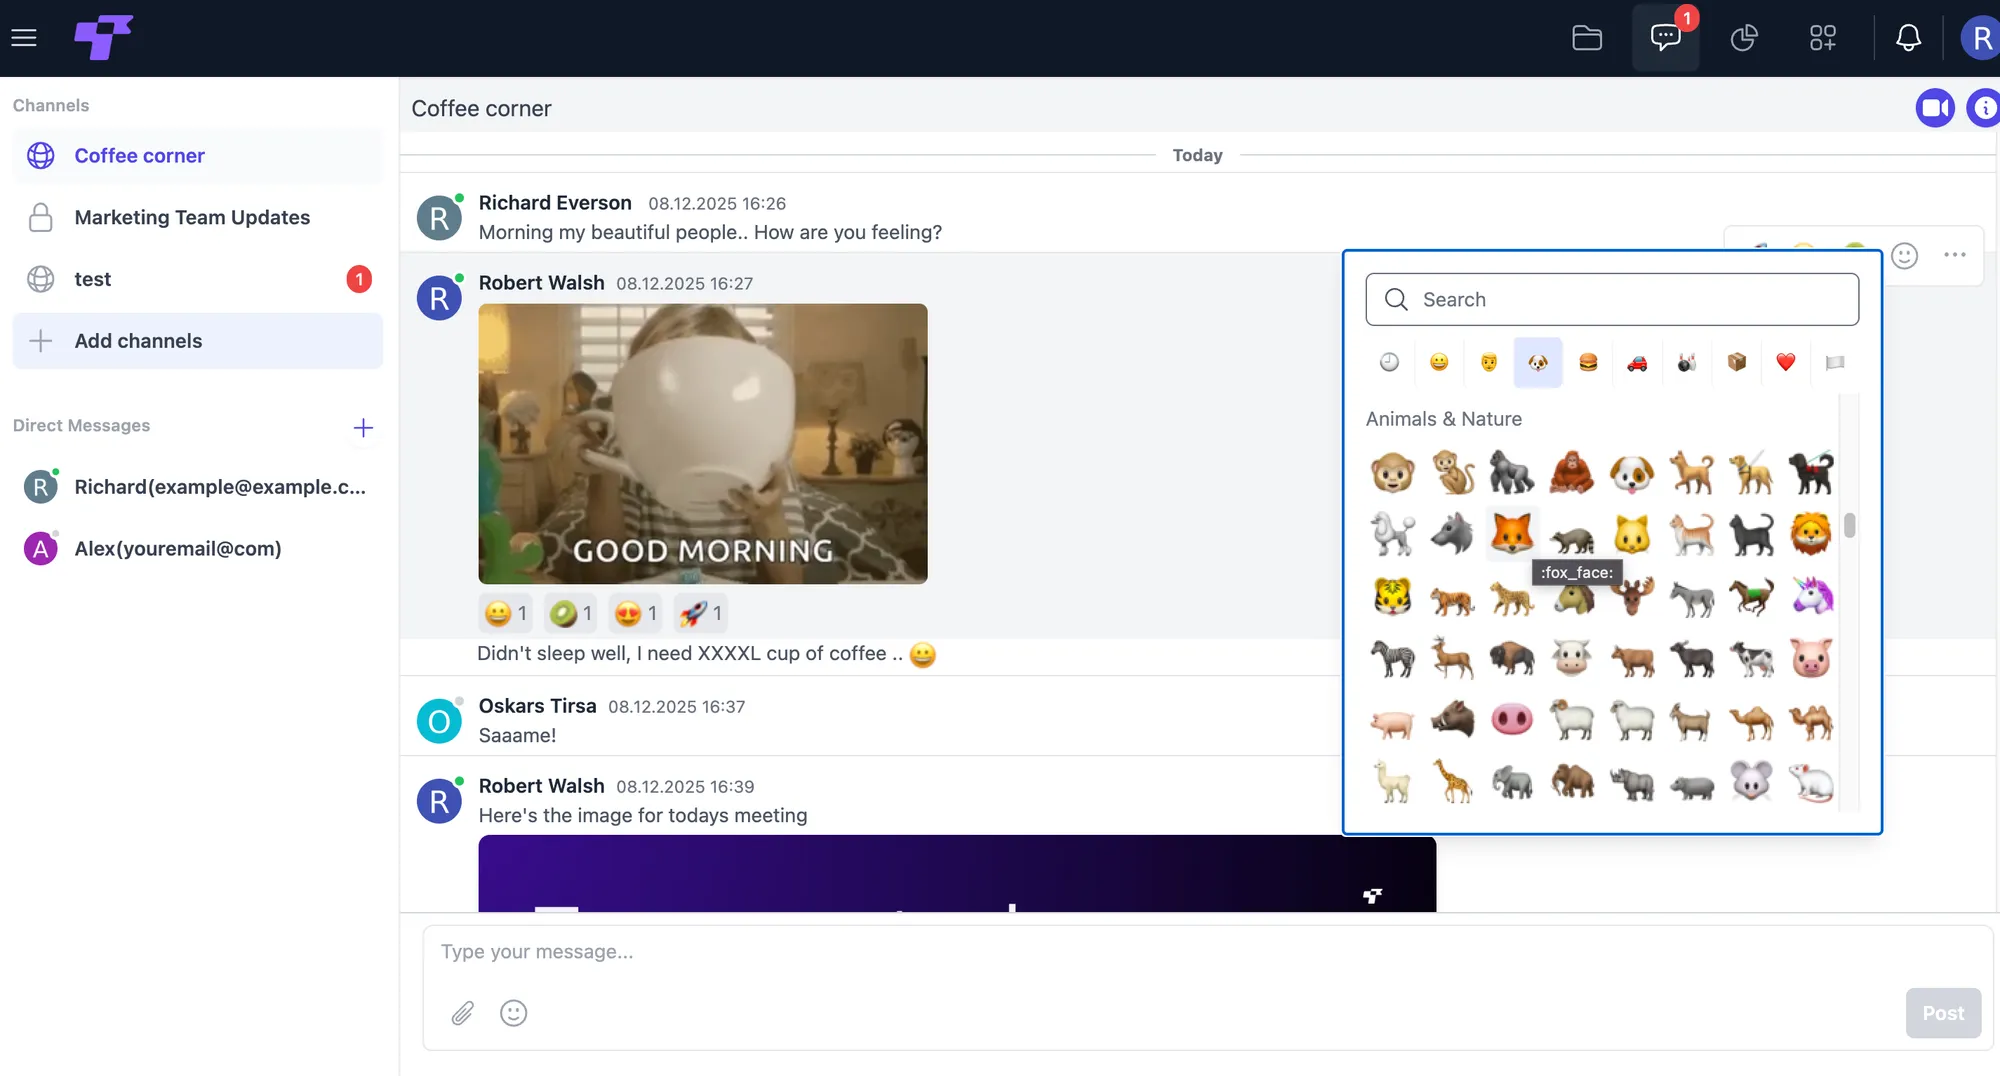
Full Emoji Picker
If you want something different, click the emoji icon to open the full emoji picker.
Managing Your Reactions
- If you click an emoji that you've already reacted with, your reaction will be removed. (The emoji disappears if you were the only person who reacted.)
- If someone else has reacted with an emoji you like, you can simply click that emoji to join the reaction - the counter will increase.
View Who Reacted
Click on any reaction counter (dark grey square, no emoji) to open a pop-up listing all users who reacted with each emoji.
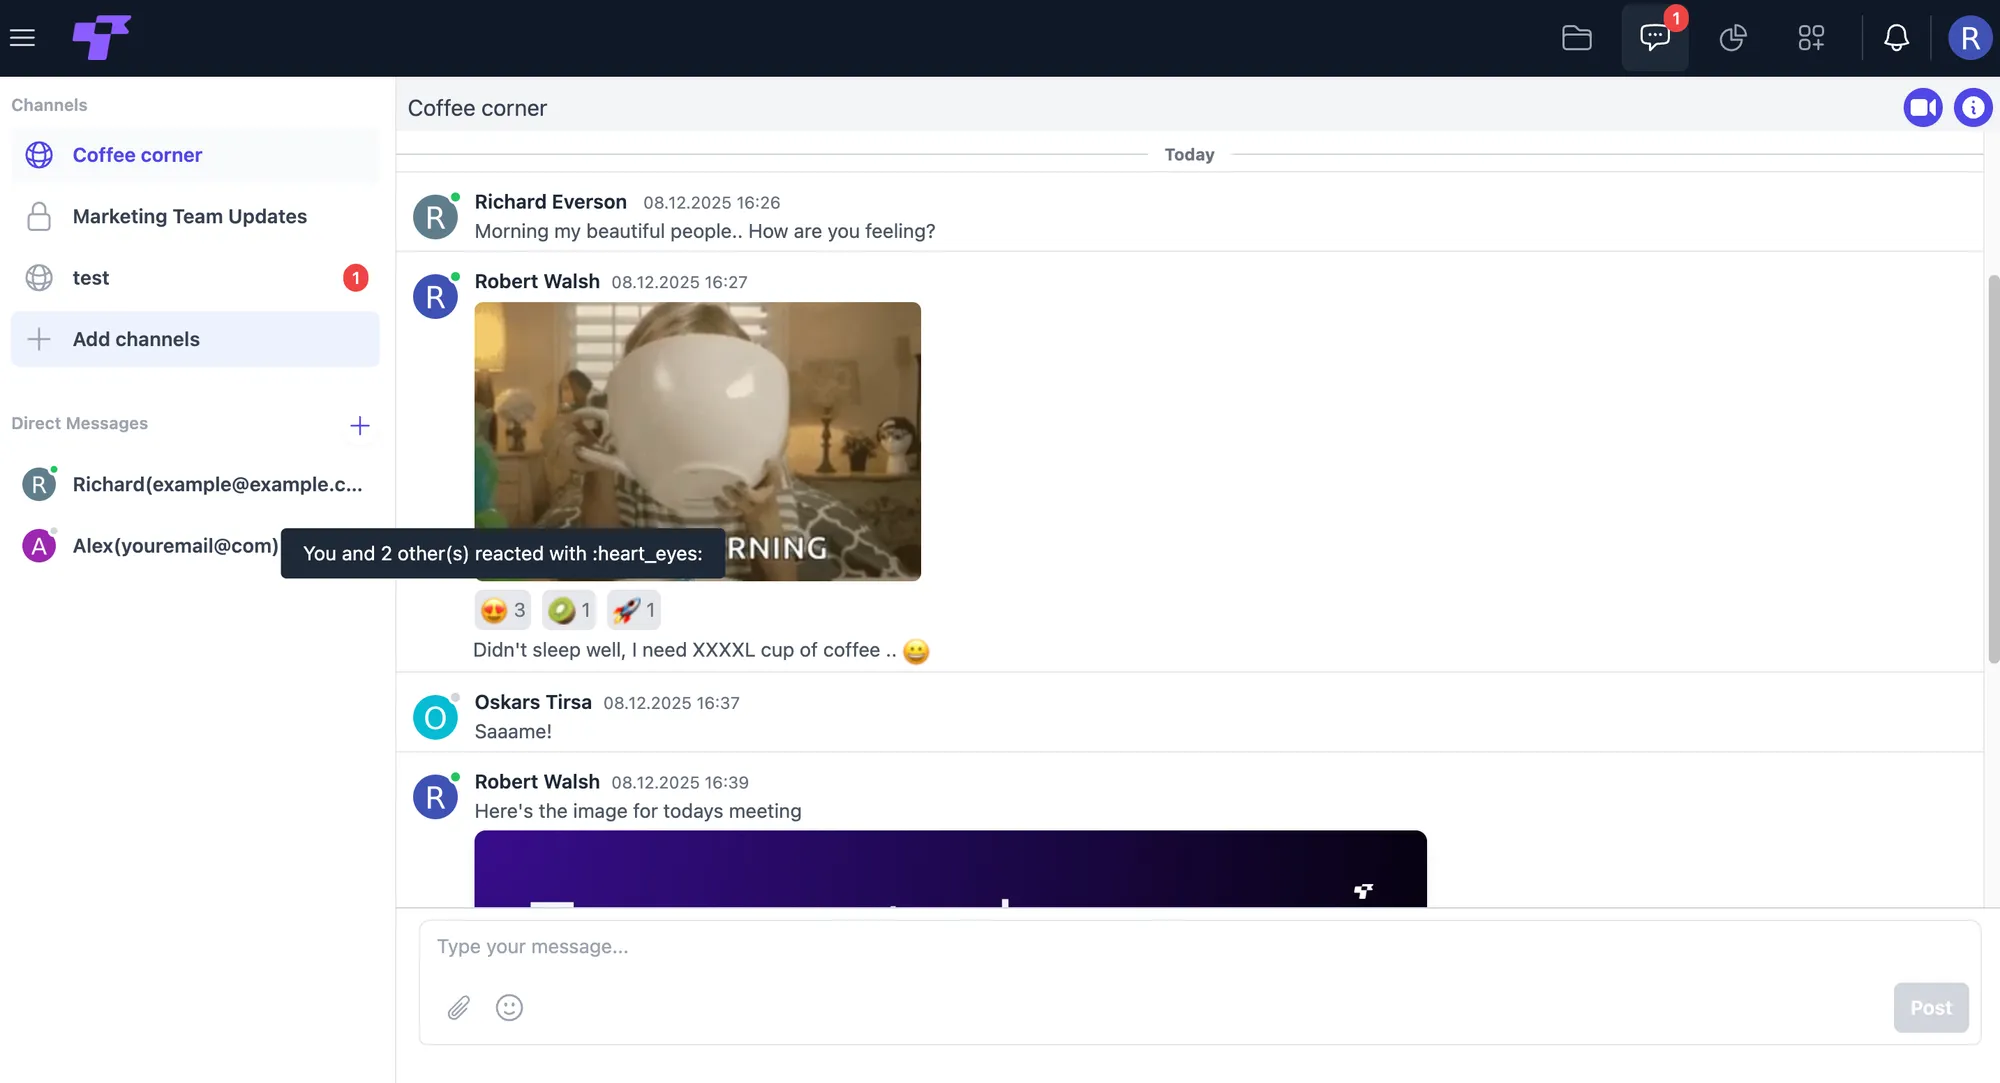
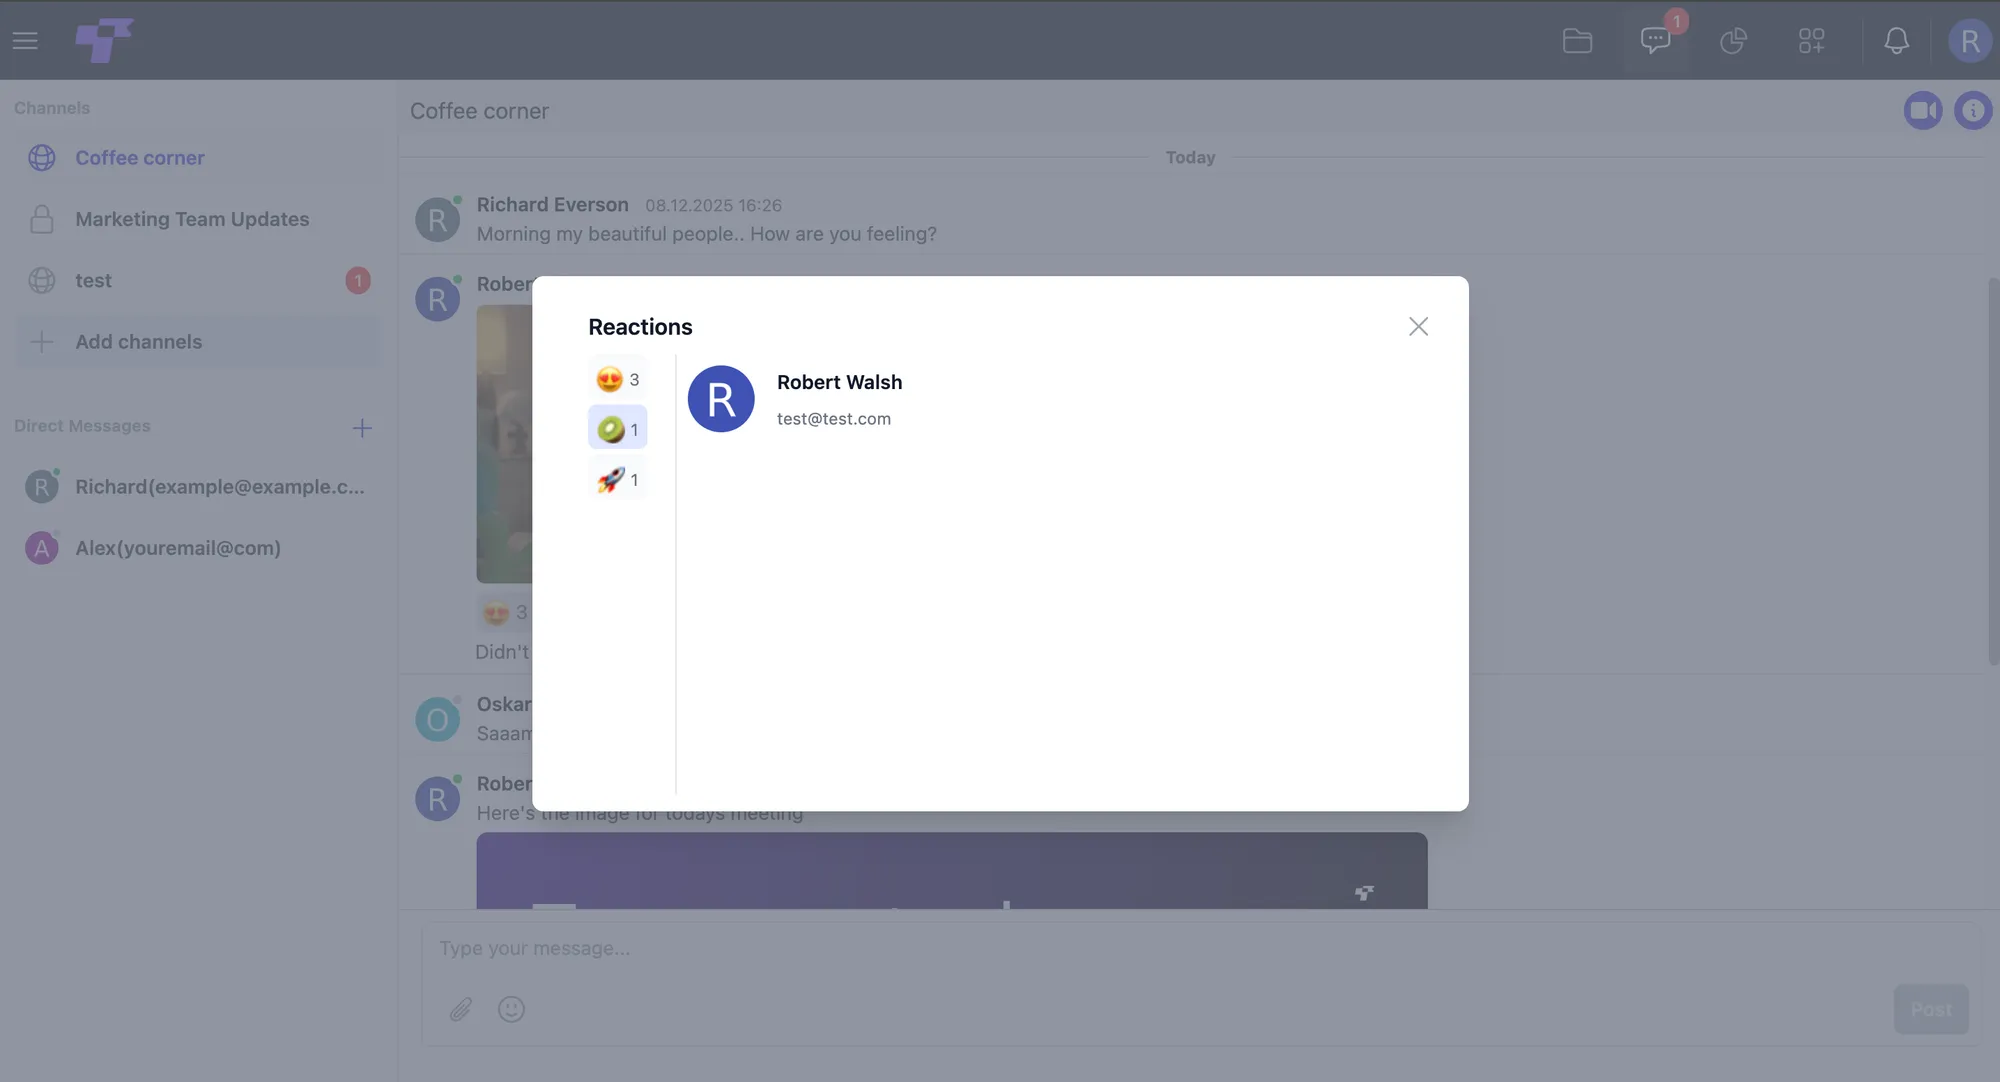
This helps you quickly see who engaged with the message.
Message Actions: Reply, Forward, Edit, Delete
Reply
Replying lets you respond to a specific message and keep the conversation clear.
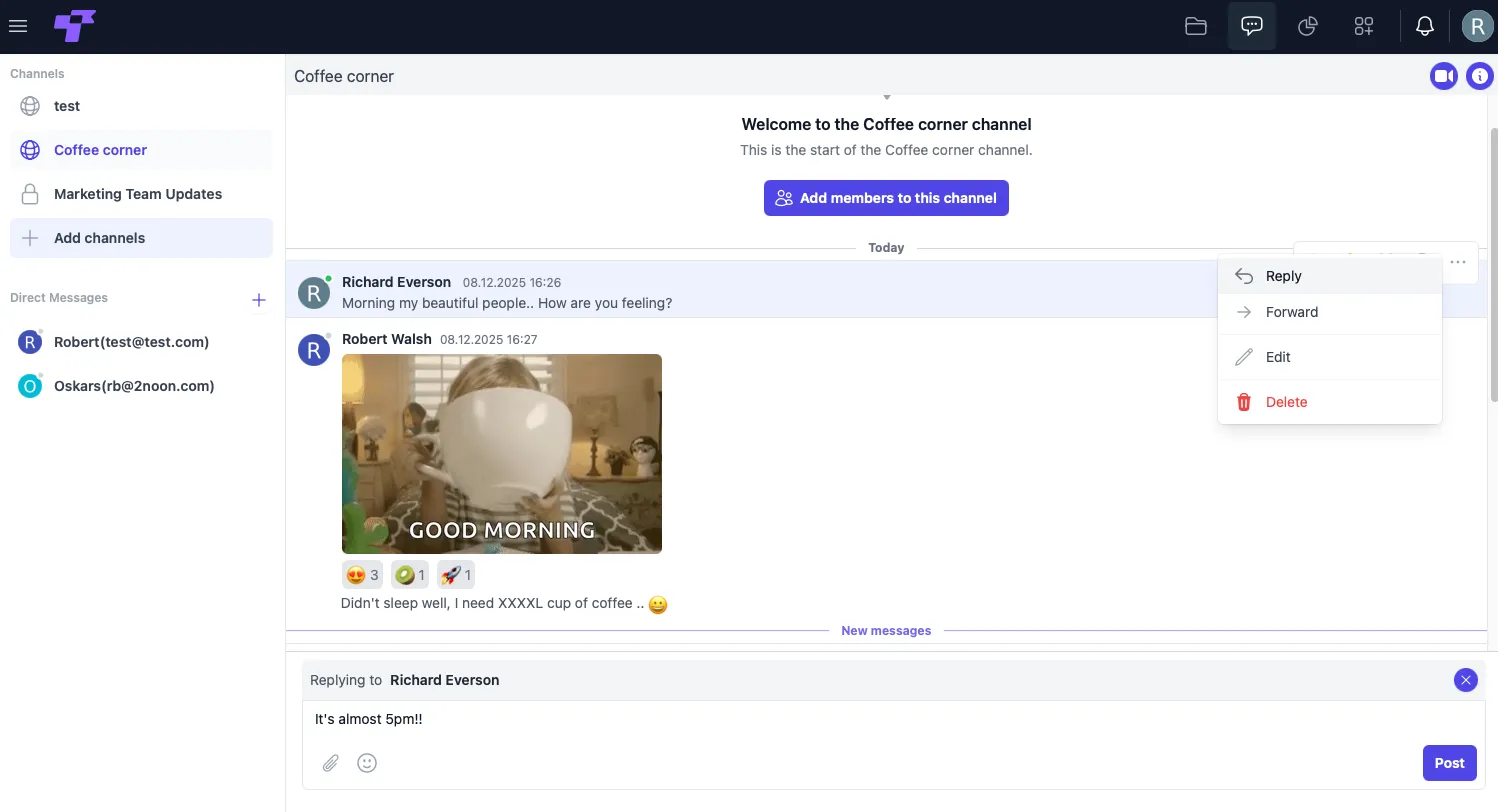
To reply to a specific message:
- Hover over a message and click the three dots (···) on the right.
- Select Reply from the menu.
- Type your message and click Post.
The original message will appear above your input box, showing everyone what you're responding to.
If you click on that highlighted preview, Twigex will automatically scroll up to the exact message being replied to.
Forward
If you need to share a message with another team, channel, or user, you can quickly forward it, no need to copy and paste.
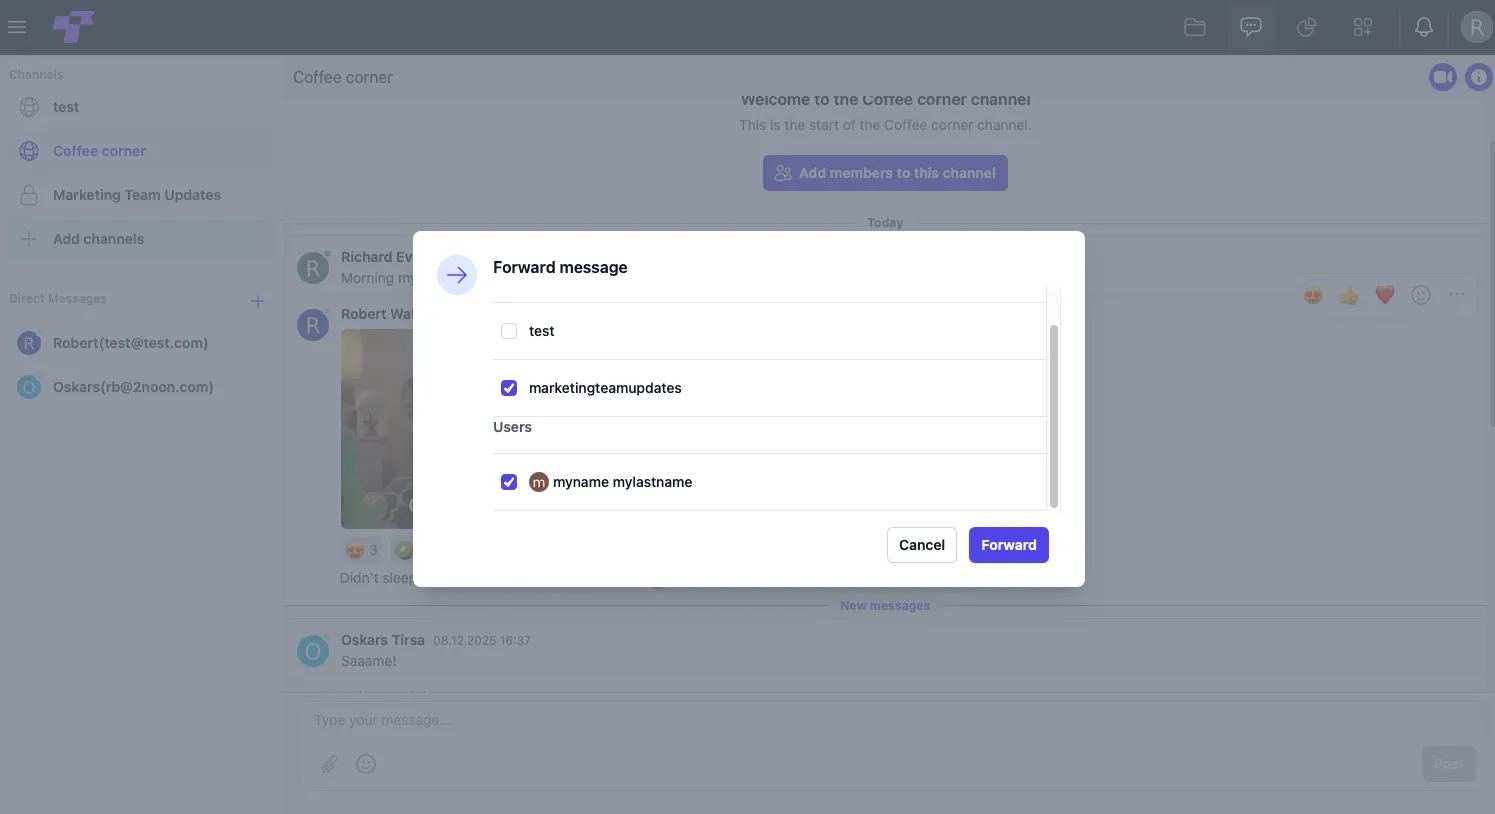
How to forward a message:
- Hover over any message and click the three dots (···).
- Select Forward from the menu.
- A pop-up will appear with a list of:
- Channels you can forward to
- Individual users you can forward directly to
- Select one or multiple destinations.
- Click Forward to send the message.
Edit
If you made a typo or want to rephrase something, you can easily edit your own messages.
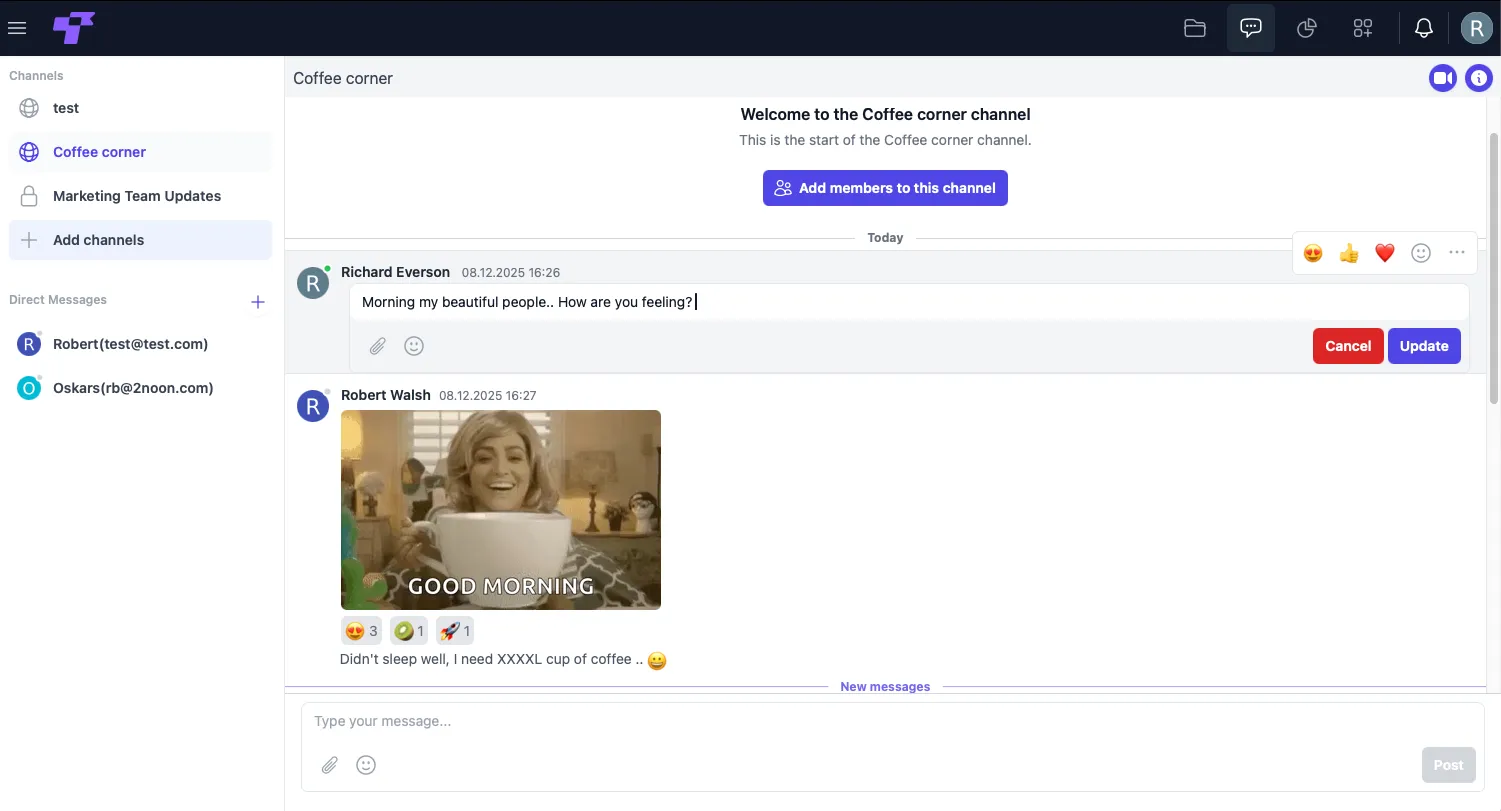
How to edit a message:
- Hover over your message and click the three dots (···) on the right.
- Select Edit.
- Your message will turn into an editable text field.
- Make your changes, then click Update to save (or Cancel to discard the edit).
Delete
If you sent something by mistake or want to remove a message completely, you can delete it at any time.
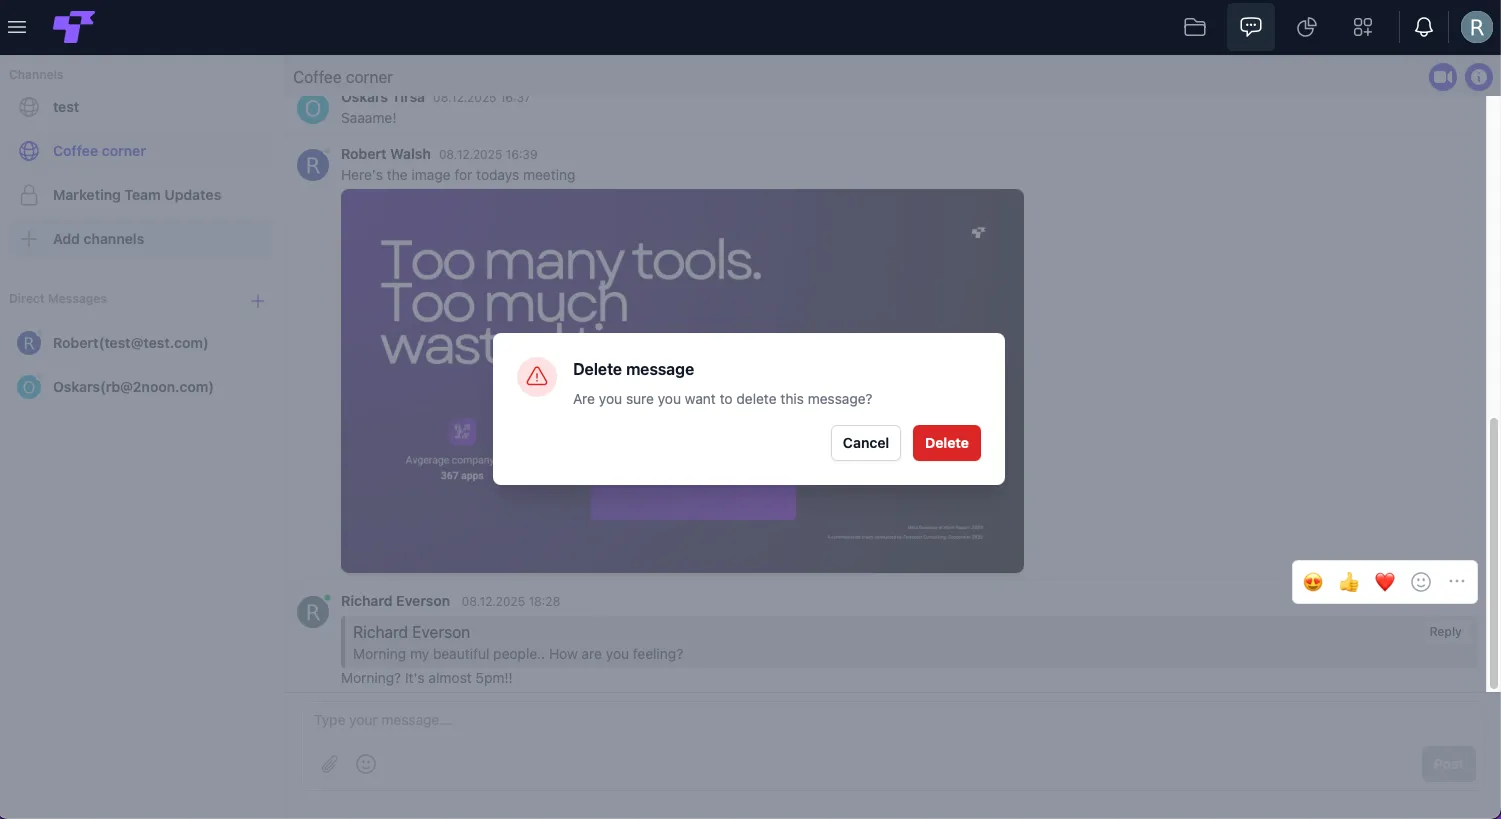
How to delete a message:
- Hover over your message and click the three dots (···) on the right.
- Select Delete from the menu.
- A confirmation window will appear asking if you're sure.
- Click Delete to remove the message permanently (or Cancel to keep it).
Deleted messages cannot be restored, so make sure before confirming.
Sending Files, Images & GIFs
Attach a File
Twigex Chat supports attaching multiple files, images, or documents directly to your message - perfect for sharing designs, briefs, reports, screenshots, or anything else your team needs.
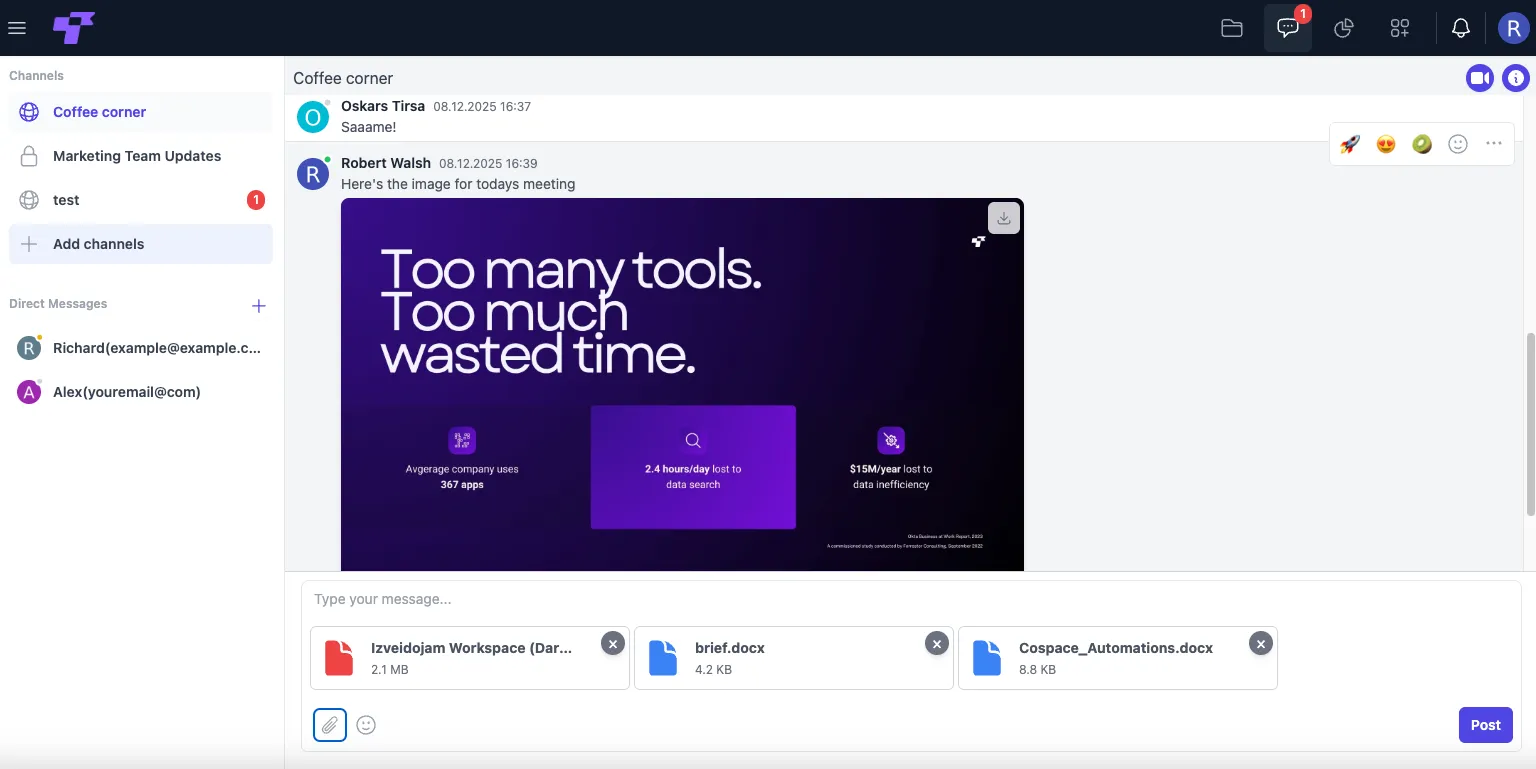
To attach files or images:
- Click the paperclip icon below the message box.
- Select one or more files from your computer (images, PDFs, DOCX, ZIPs, etc.).
- Type a message if needed and click Post.
Viewing and Downloading Attachments
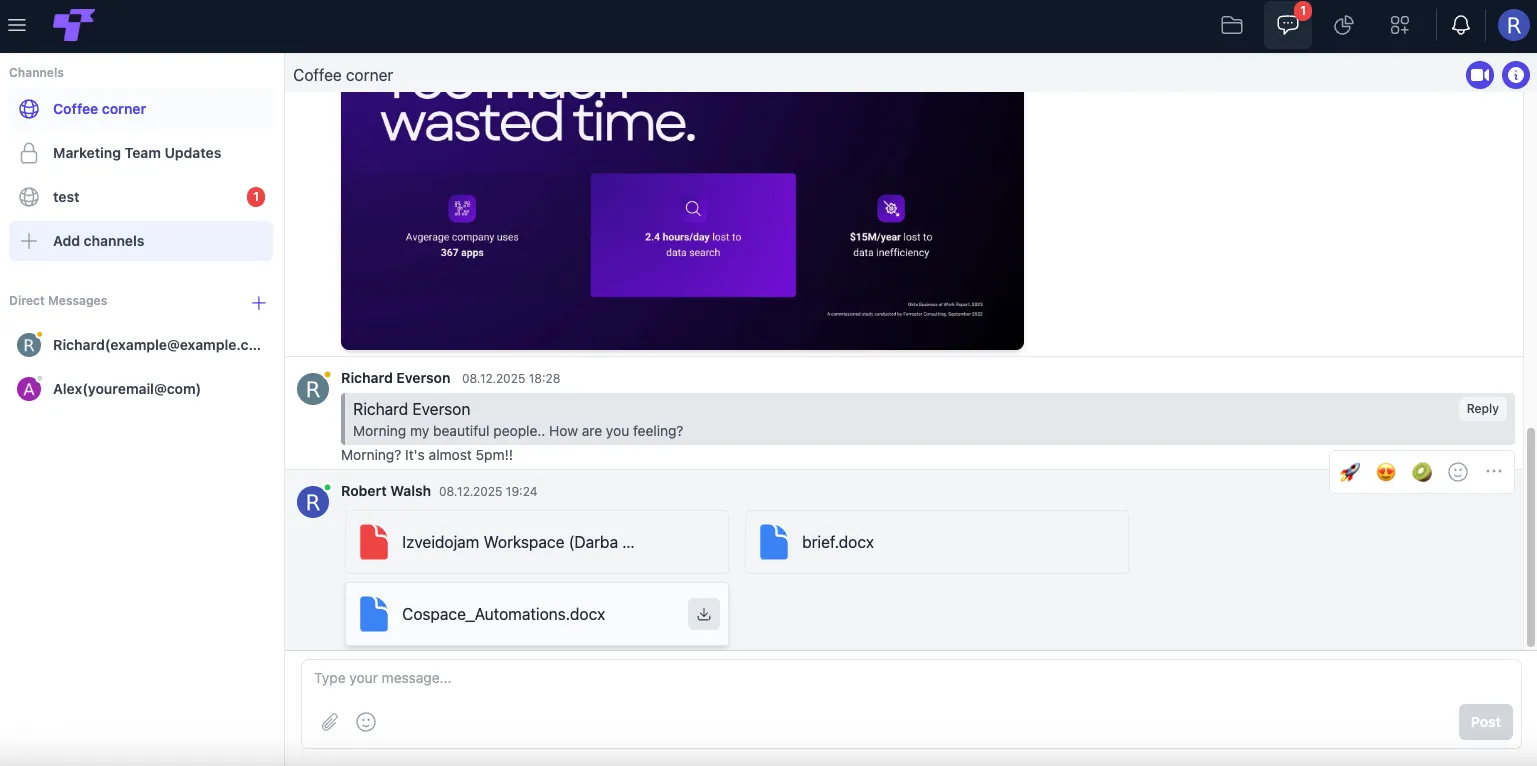
Once a file is sent, all members can:
- Download the file using the download icon.
- Open it directly in preview (PDF, images, Word documents, etc.) without leaving Twigex.
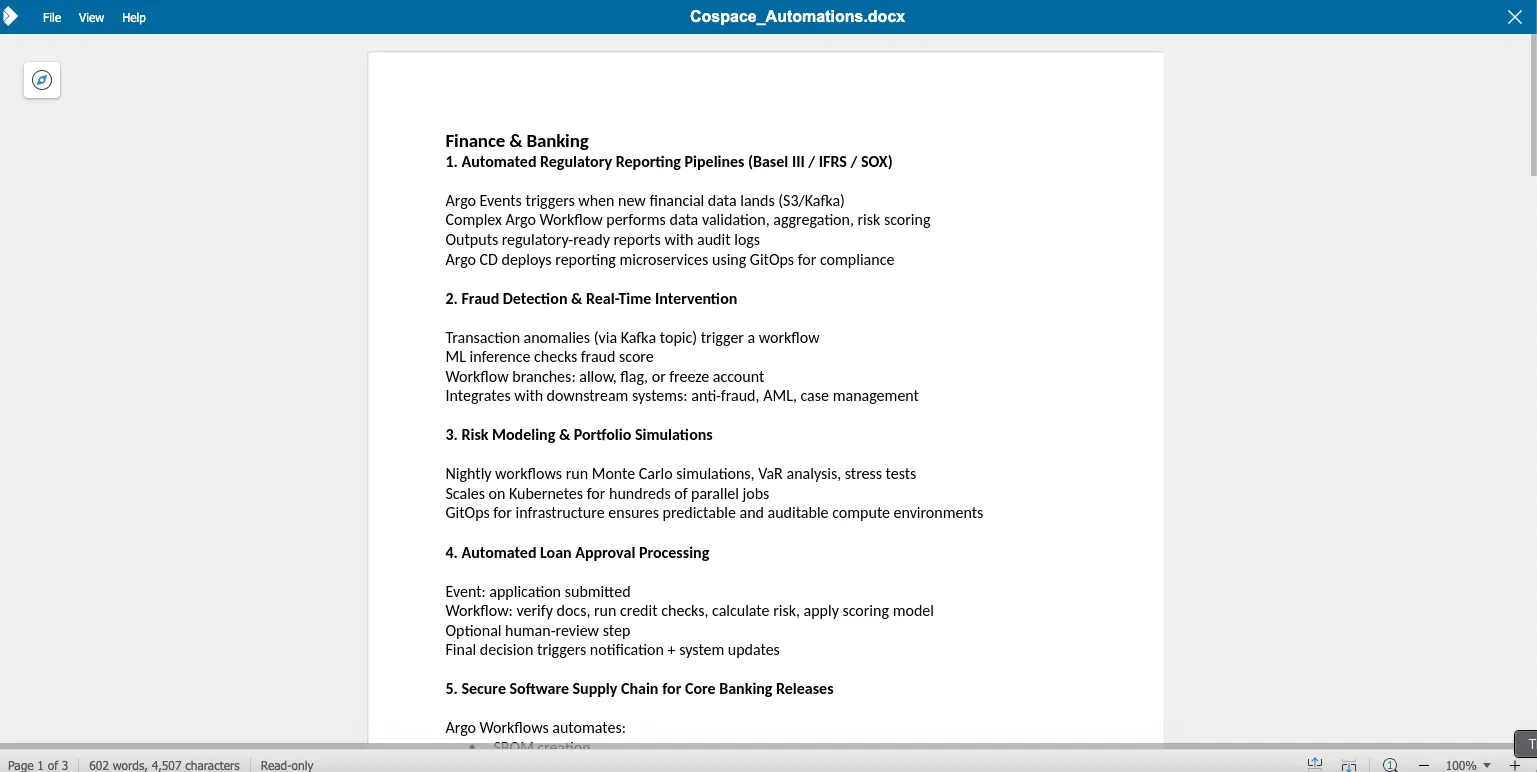
Clicking a file opens a full-screen preview where you can scroll, zoom, or download the file if needed.
GIFs
Bring conversations to life with GIFs, perfect for quick reactions, jokes, or expressing how you feel.
You can find the GIF picker next to the attachment (paperclip) icon in the message box (the same as the emoji picker).
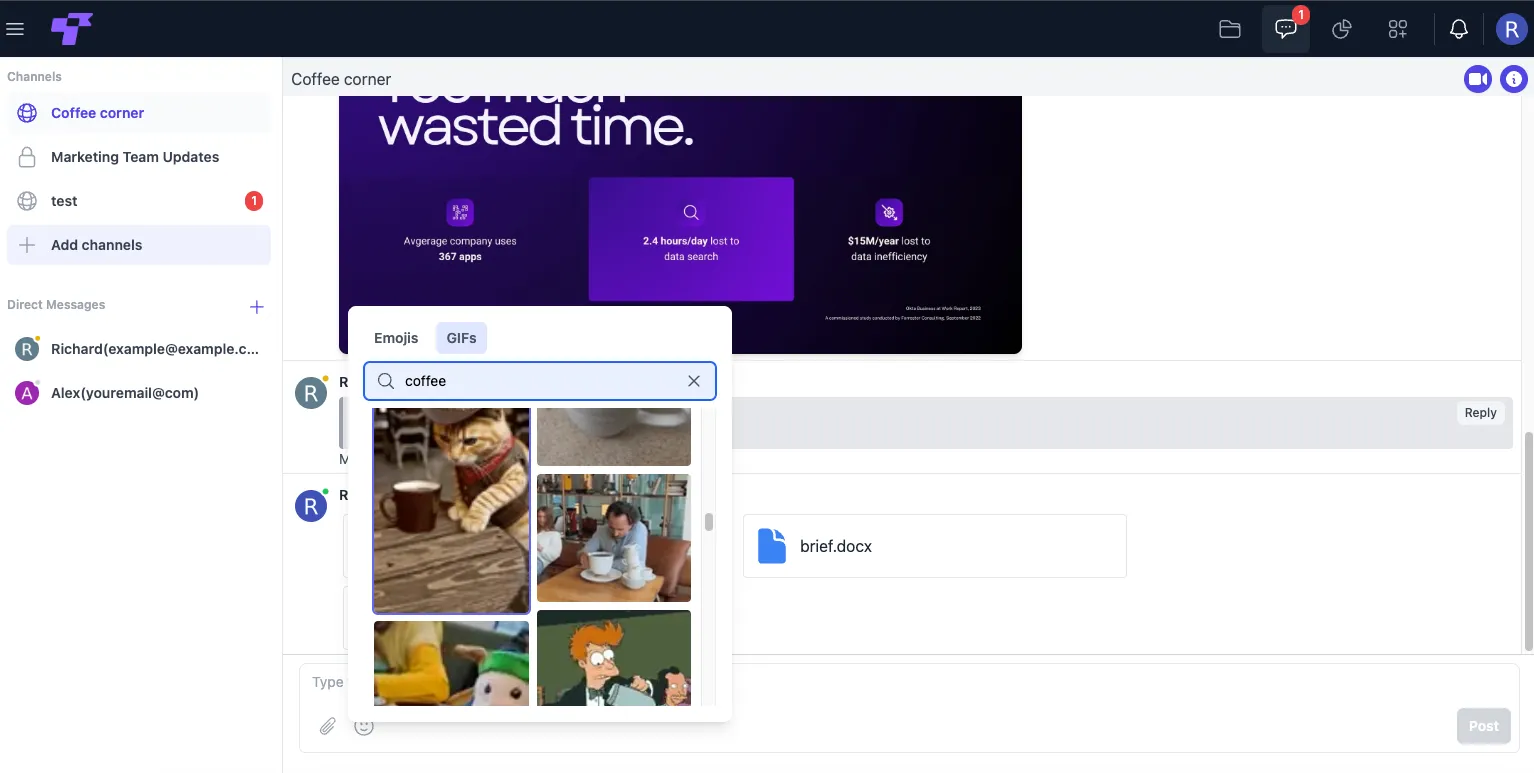
How to add a GIF:
- Click the smiley face icon next to the attachment icon.
- Switch to the GIFs tab.
- Use the search bar to find a GIF (e.g., coffee, happy, sleepy).
- Click on any GIF to instantly insert it into your message.
- Hit Post to send.
The GIF will appear directly in the chat, just like images and emojis.
Video Chat
Twigex lets you jump into video calls right inside any chat or channel. To start one, just click the camera icon at the top right.
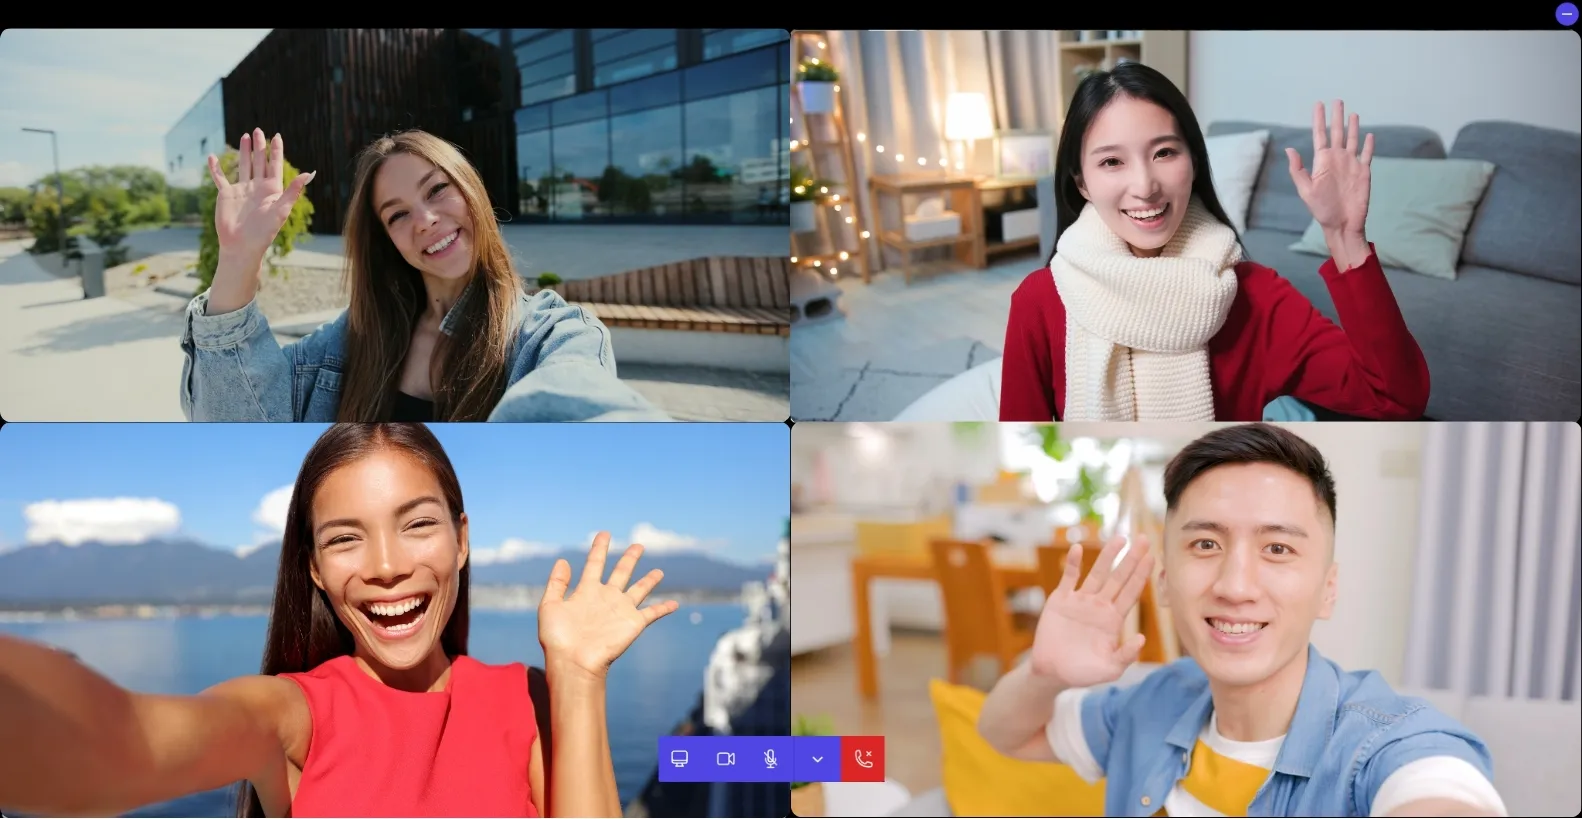
Once you're in a call, you'll see these controls at the bottom:
- Screen share — lets you show your screen or a specific app window.
- Camera — turn your webcam on or off.
- Microphone — mute or unmute yourself.
- Red phone button — ends the call.
In the top right corner of the video screen, there's also a minimize button.
Use it to shrink the call view so you can continue working in Twigex while staying connected to the conversation.