
Settings
On this page
Twigex settings are divided into two groups:
- User settings – available to every user
- Admin settings – available only to system administrators
Admin settings appear in the left sidebar under Admin settings once a user is assigned the system_admin role.
This means regular users will see only their personal settings, while administrators will see both personal and admin-level configuration options.
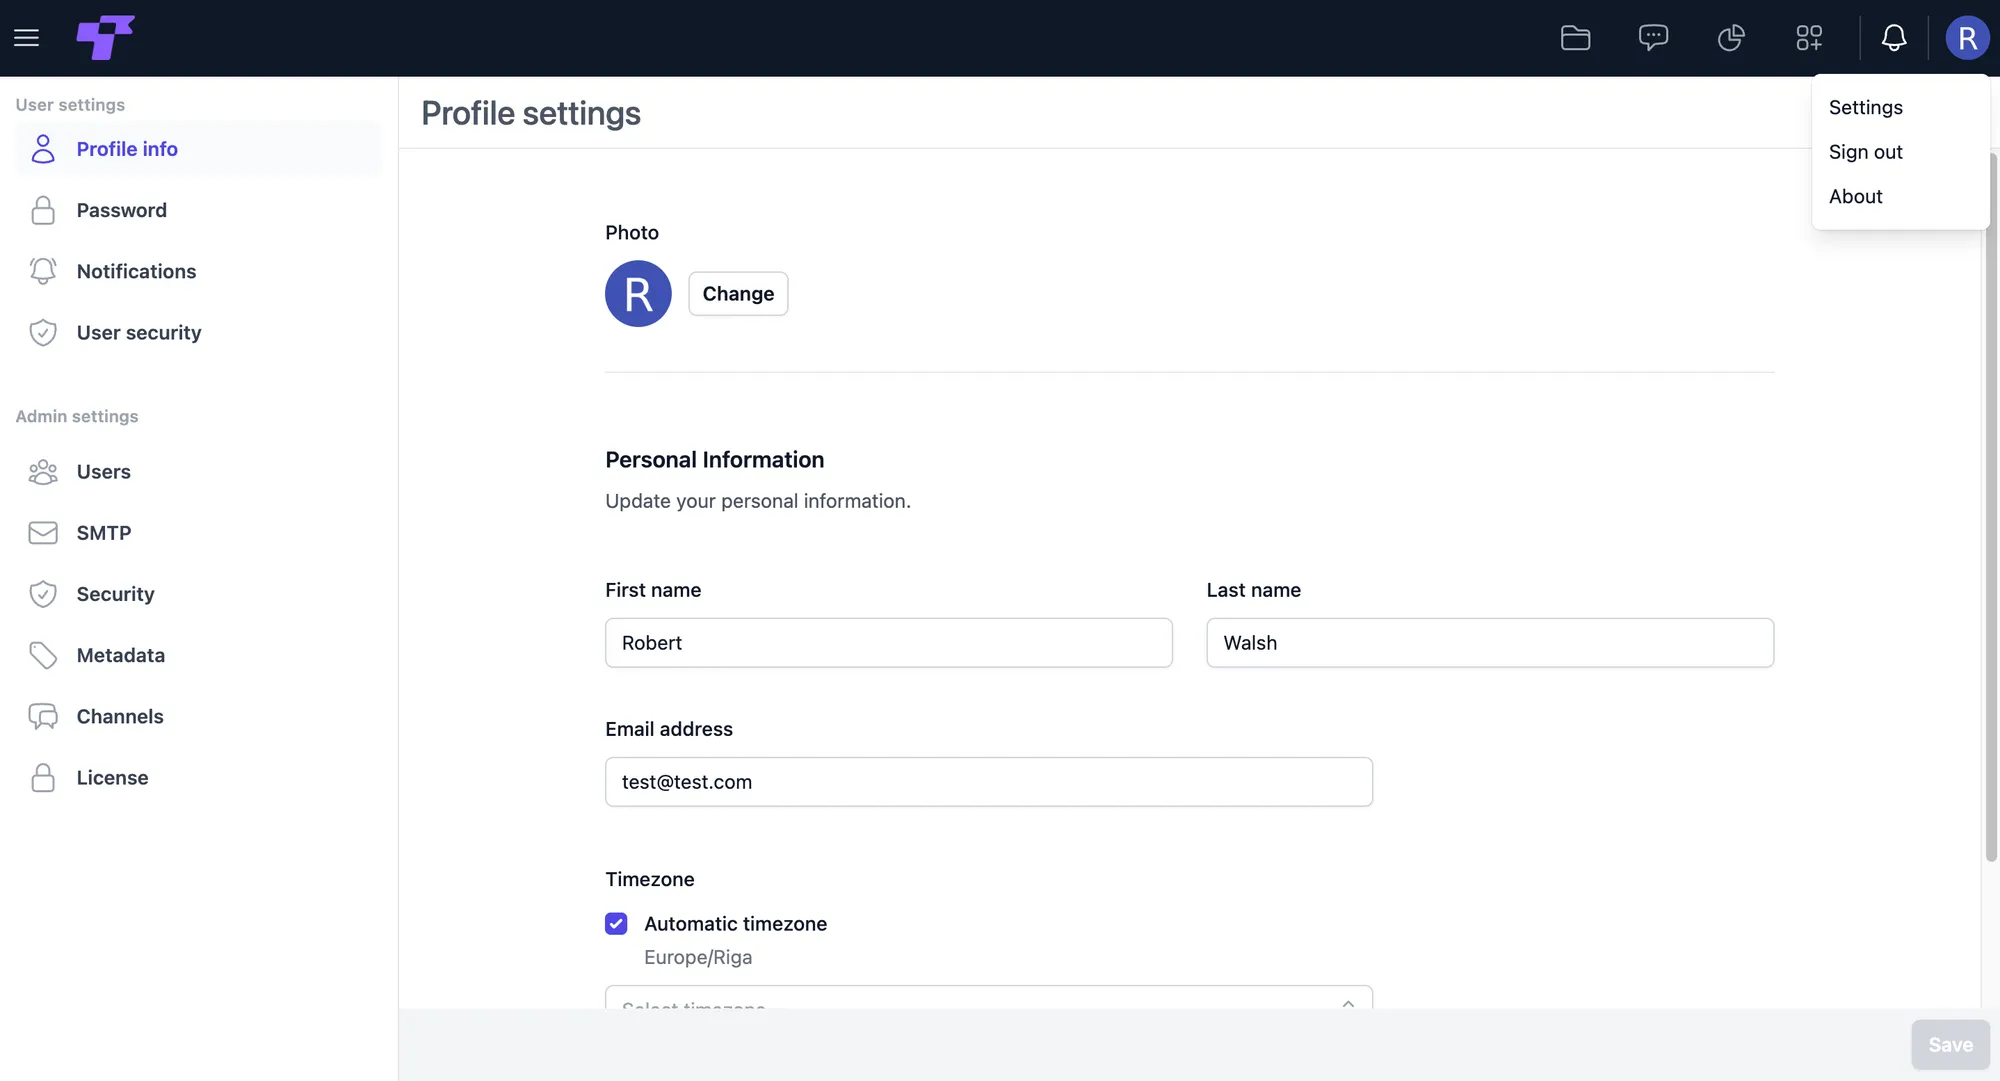
How to access your settings
- Click your profile icon in the top-right corner of Twigex.
- From the dropdown menu, select Settings.
User settings
Profile info
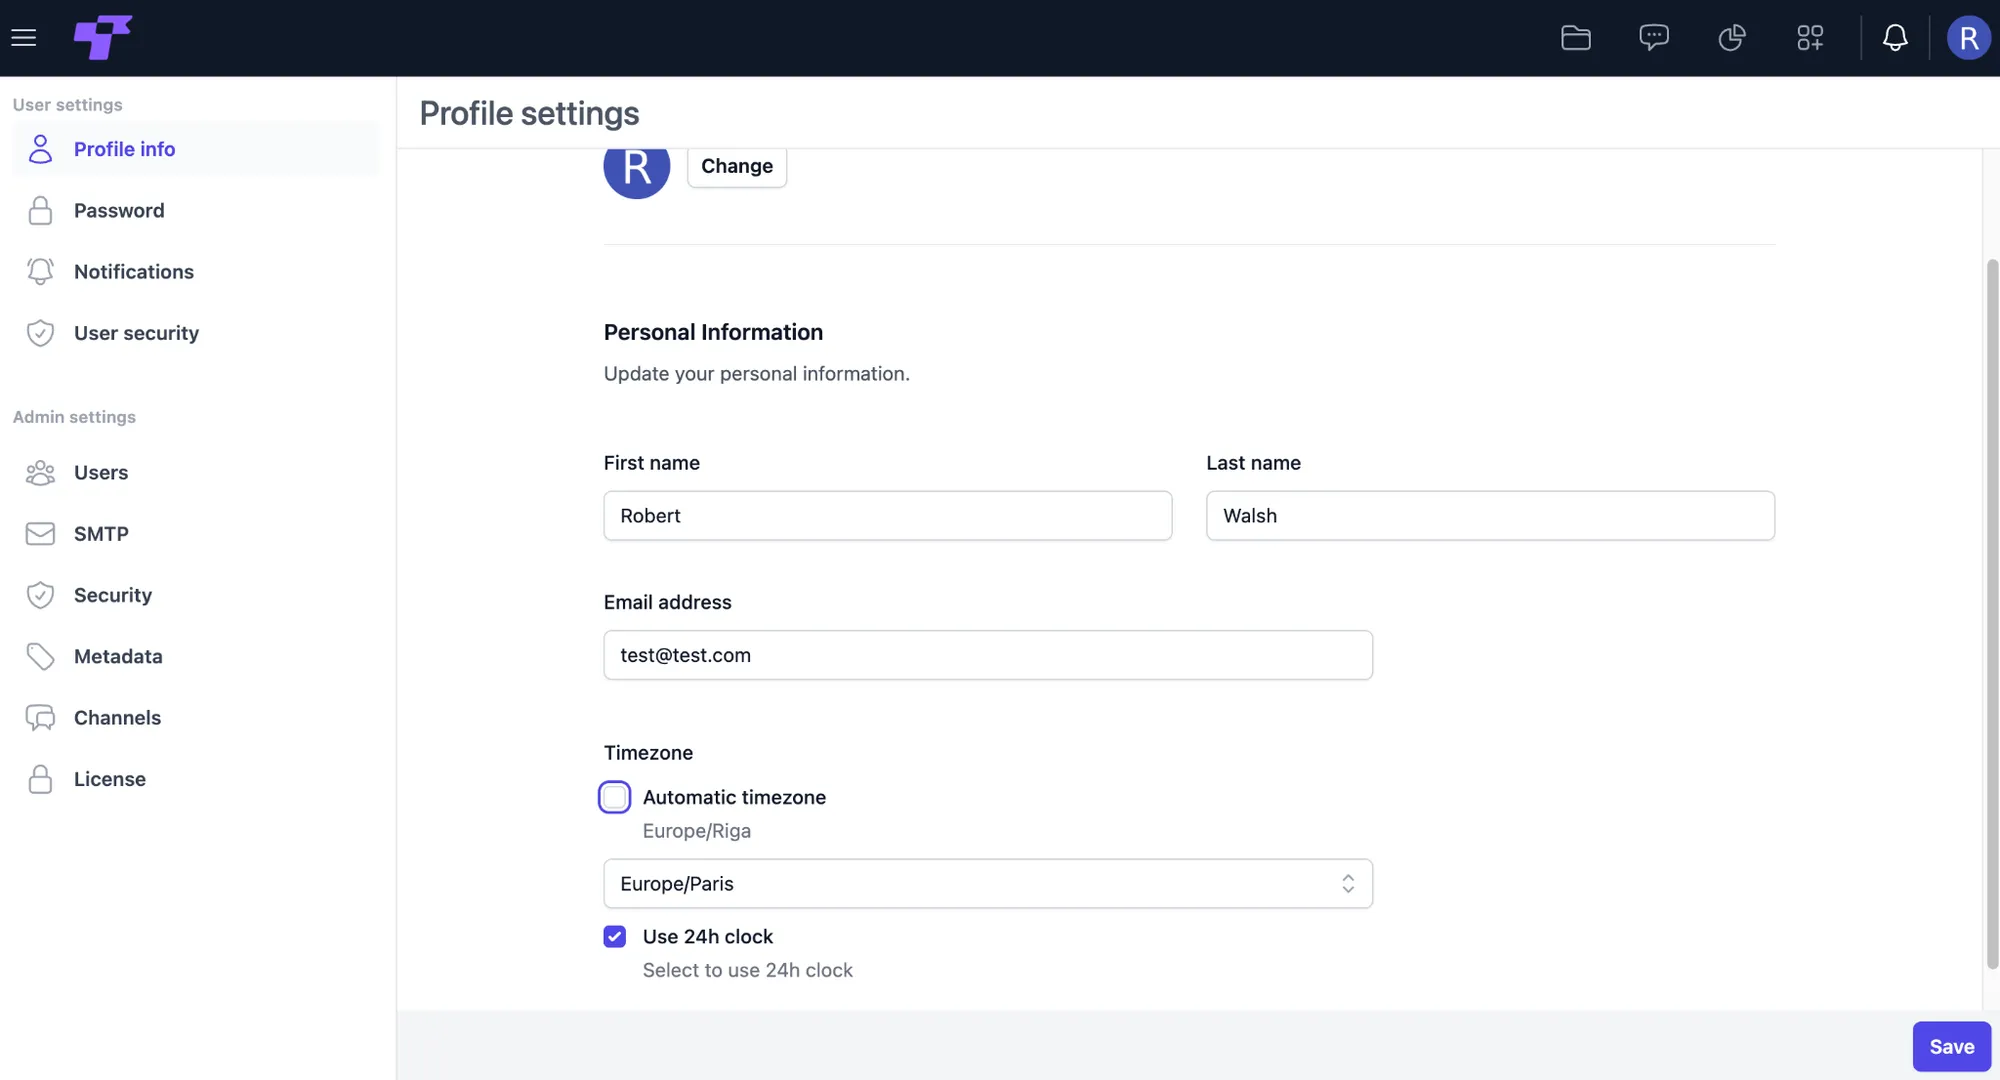
You can update your profile details, such as:
- Profile Picture: Click the "Change" button next to your profile picture.
- Personal Information:
- First Name & Last Name: Edit your display name.
- Email Address: View or update your registered email.
- Timezone Settings:
- Automatic Timezone: Enable or disable automatic timezone detection.
- Manual Timezone Selection: Choose a specific timezone from the dropdown list.
- 24-Hour Clock Format: Toggle between 12-hour and 24-hour time display.
Click "Save" to apply the updates.
Password
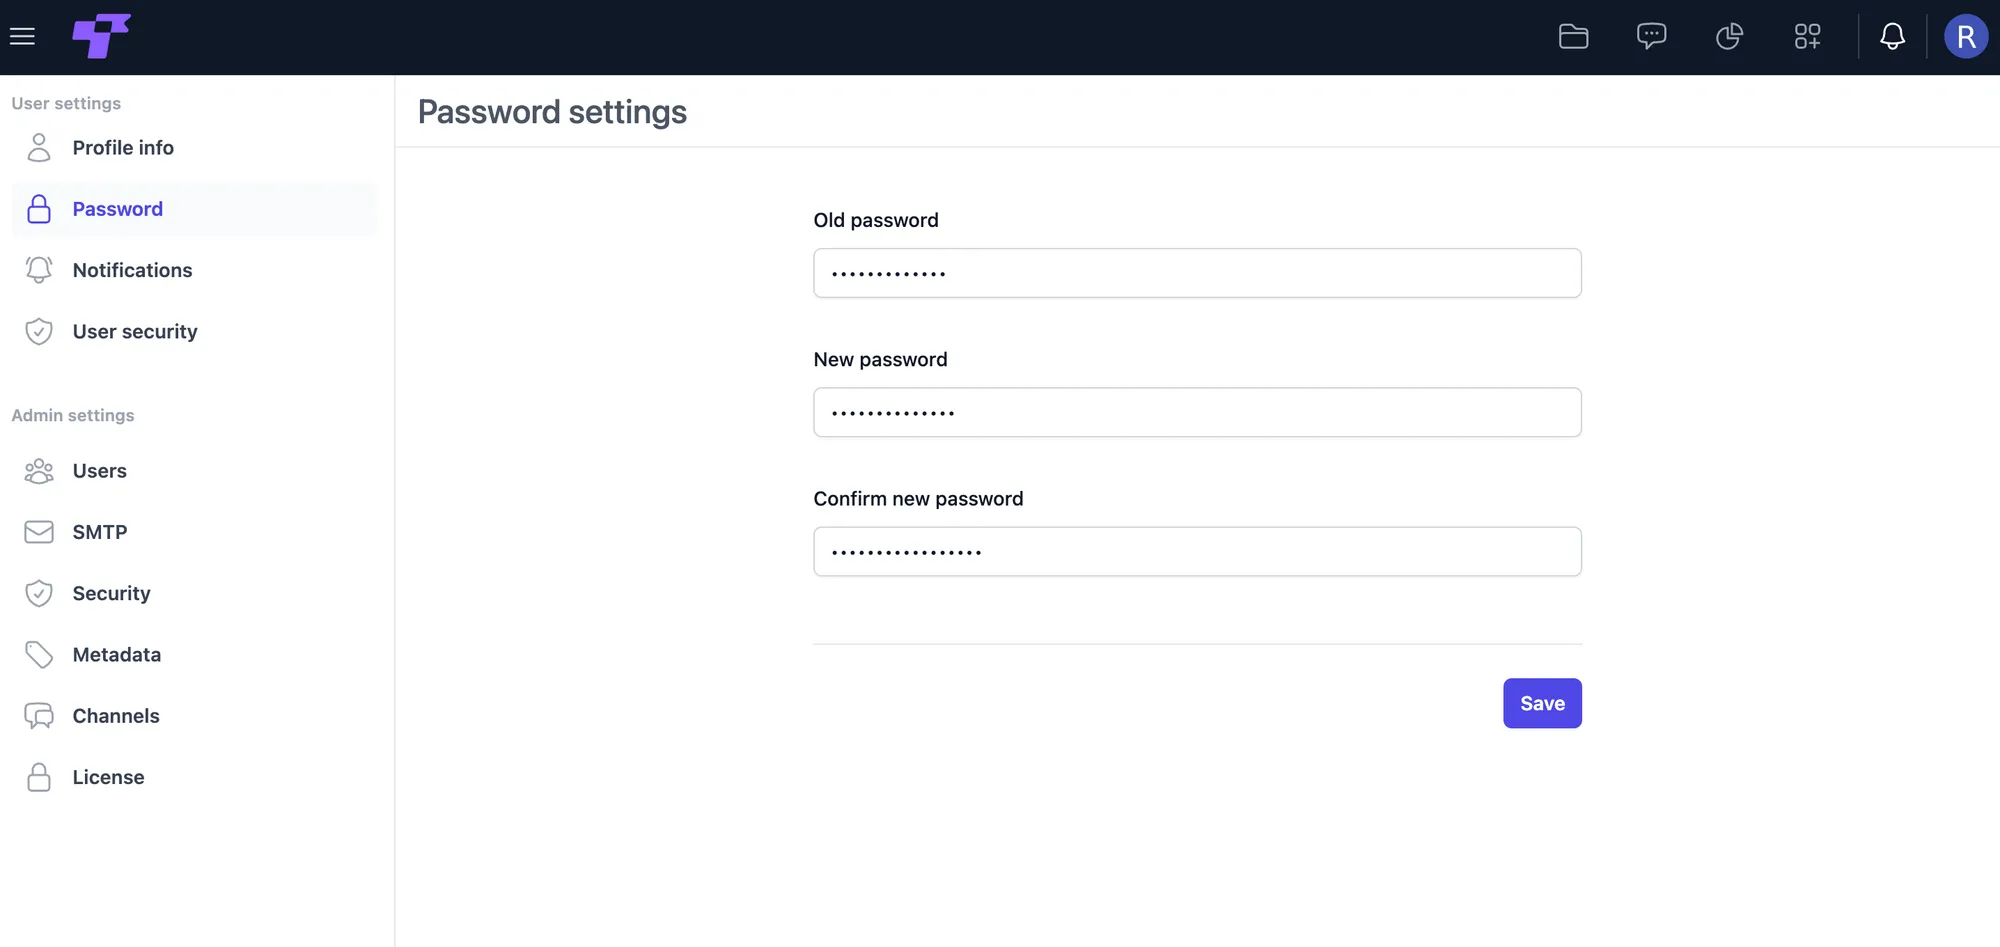
You can update your password anytime from the Password settings.
- Enter your current password.
- Type and confirm your new password.
- Click "Save" to update.
If you forgot your password, you can reset it from the Sign In page:
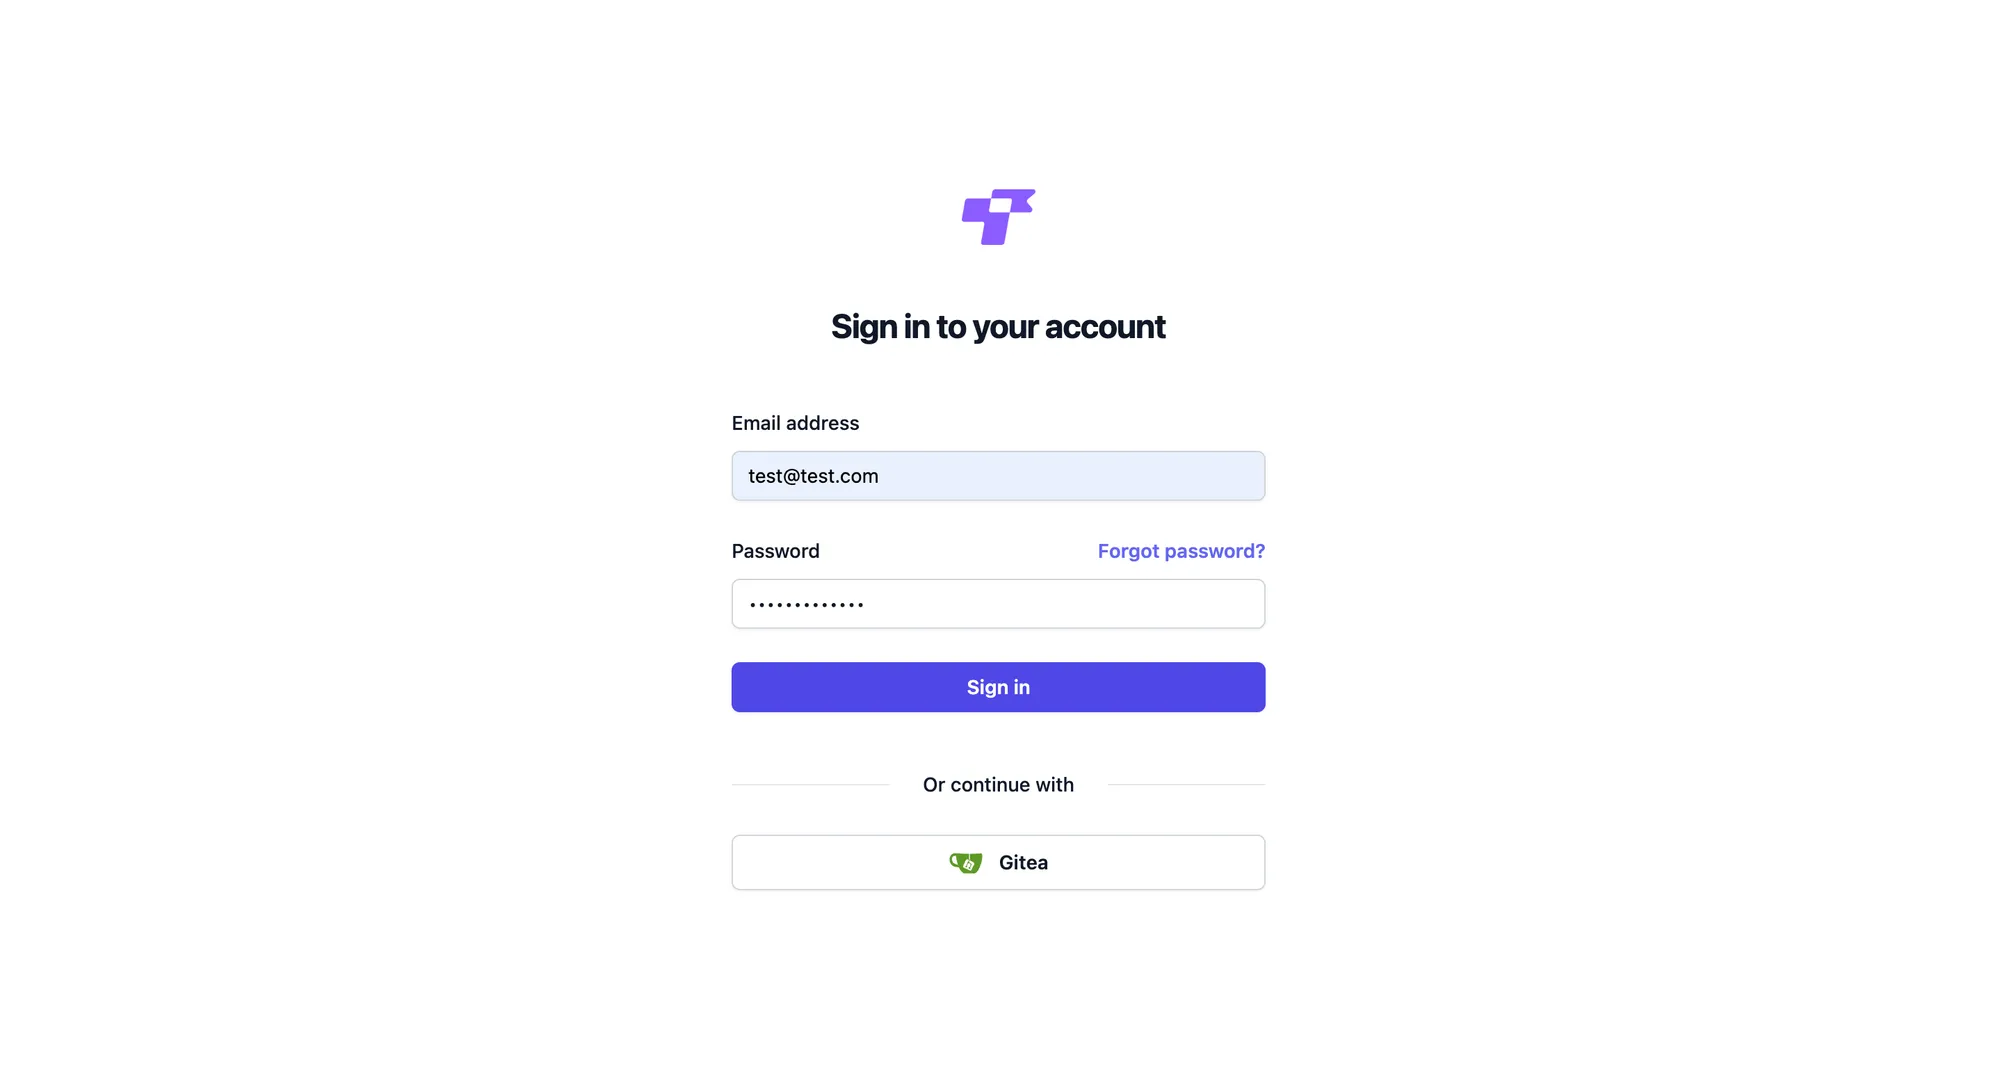
- Click "Forgot password?" below the password field.
- On the next screen, enter your email address and click "Reset password".
Check your inbox for an email with a reset link. If you don't see it, check your spam folder.
- Click the link in the email to open the password reset page.
- Enter a new password, confirm it, and save the changes.
Return to the Sign In page and log in with your new password.
Notifications
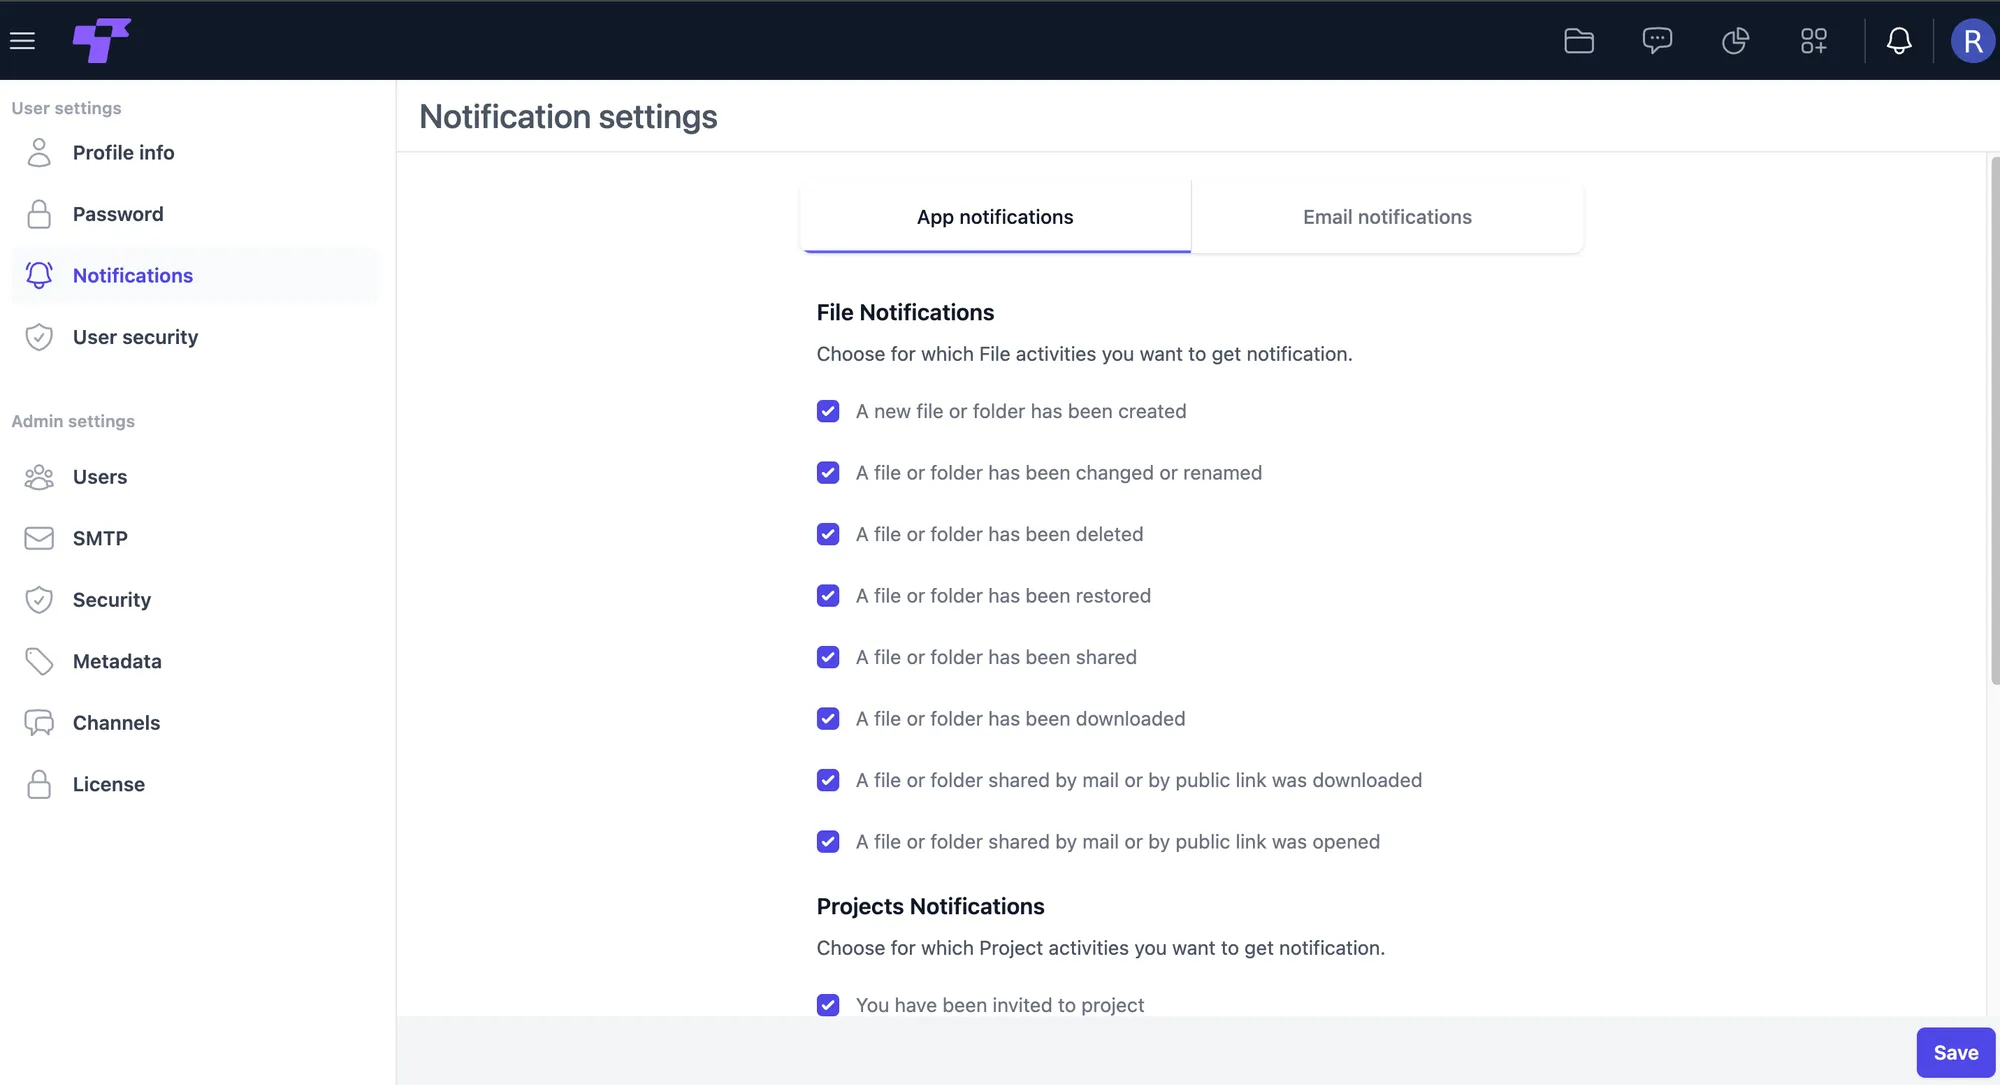
The Notification settings page lets you choose which updates you want to receive inside the app and by email.
Choose notification type
- Click "App notifications" to receive notifications within the app.
- Click "Email notifications" to receive updates via email.
Select file activity notifications
Choose which actions related to files and folders should trigger a notification. You can toggle each option on or off. These settings apply to activity in all shared workspaces you have access to.
- A new file or folder has been created
- A file or folder has been changed or renamed
- A file or folder has been deleted
- A file or folder has been restored
- A file or folder has been shared
- A file or folder has been downloaded
- A file or folder shared by mail or public link was downloaded
- A file or folder shared by mail or public link was opened
Select project activity notifications
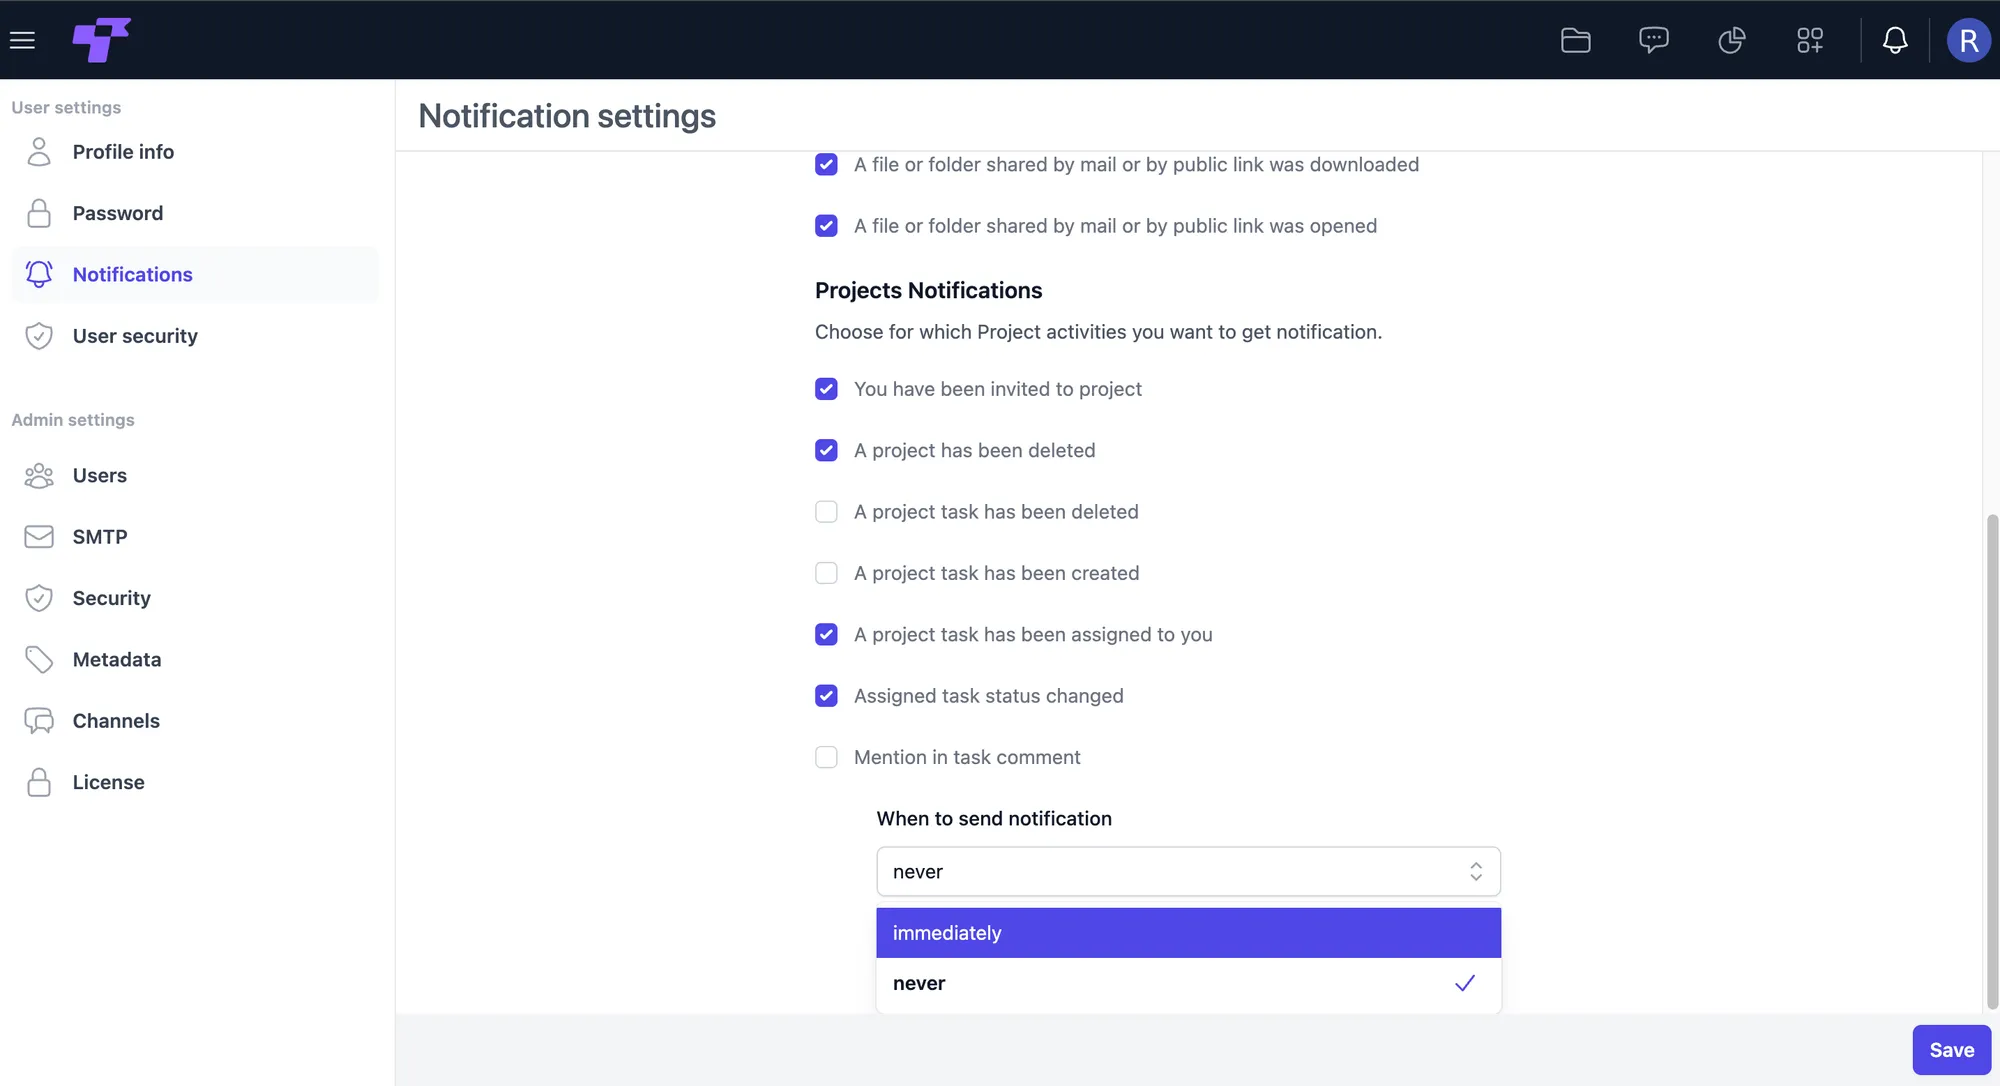
Select which project-related actions should notify you:
- You have been invited to a project
- A project has been deleted
- A project task has been deleted
- A project task has been created
- A project task has been assigned to you
- An assigned task's status has changed
- You were mentioned in a task comment
Set notification timing
At the bottom of the page, choose when notifications should be delivered:
- Immediately – you will receive alerts as soon as an event occurs.
- Never – no notifications will be sent for the selected actions.
The timing applies to both app and email notifications.
User security
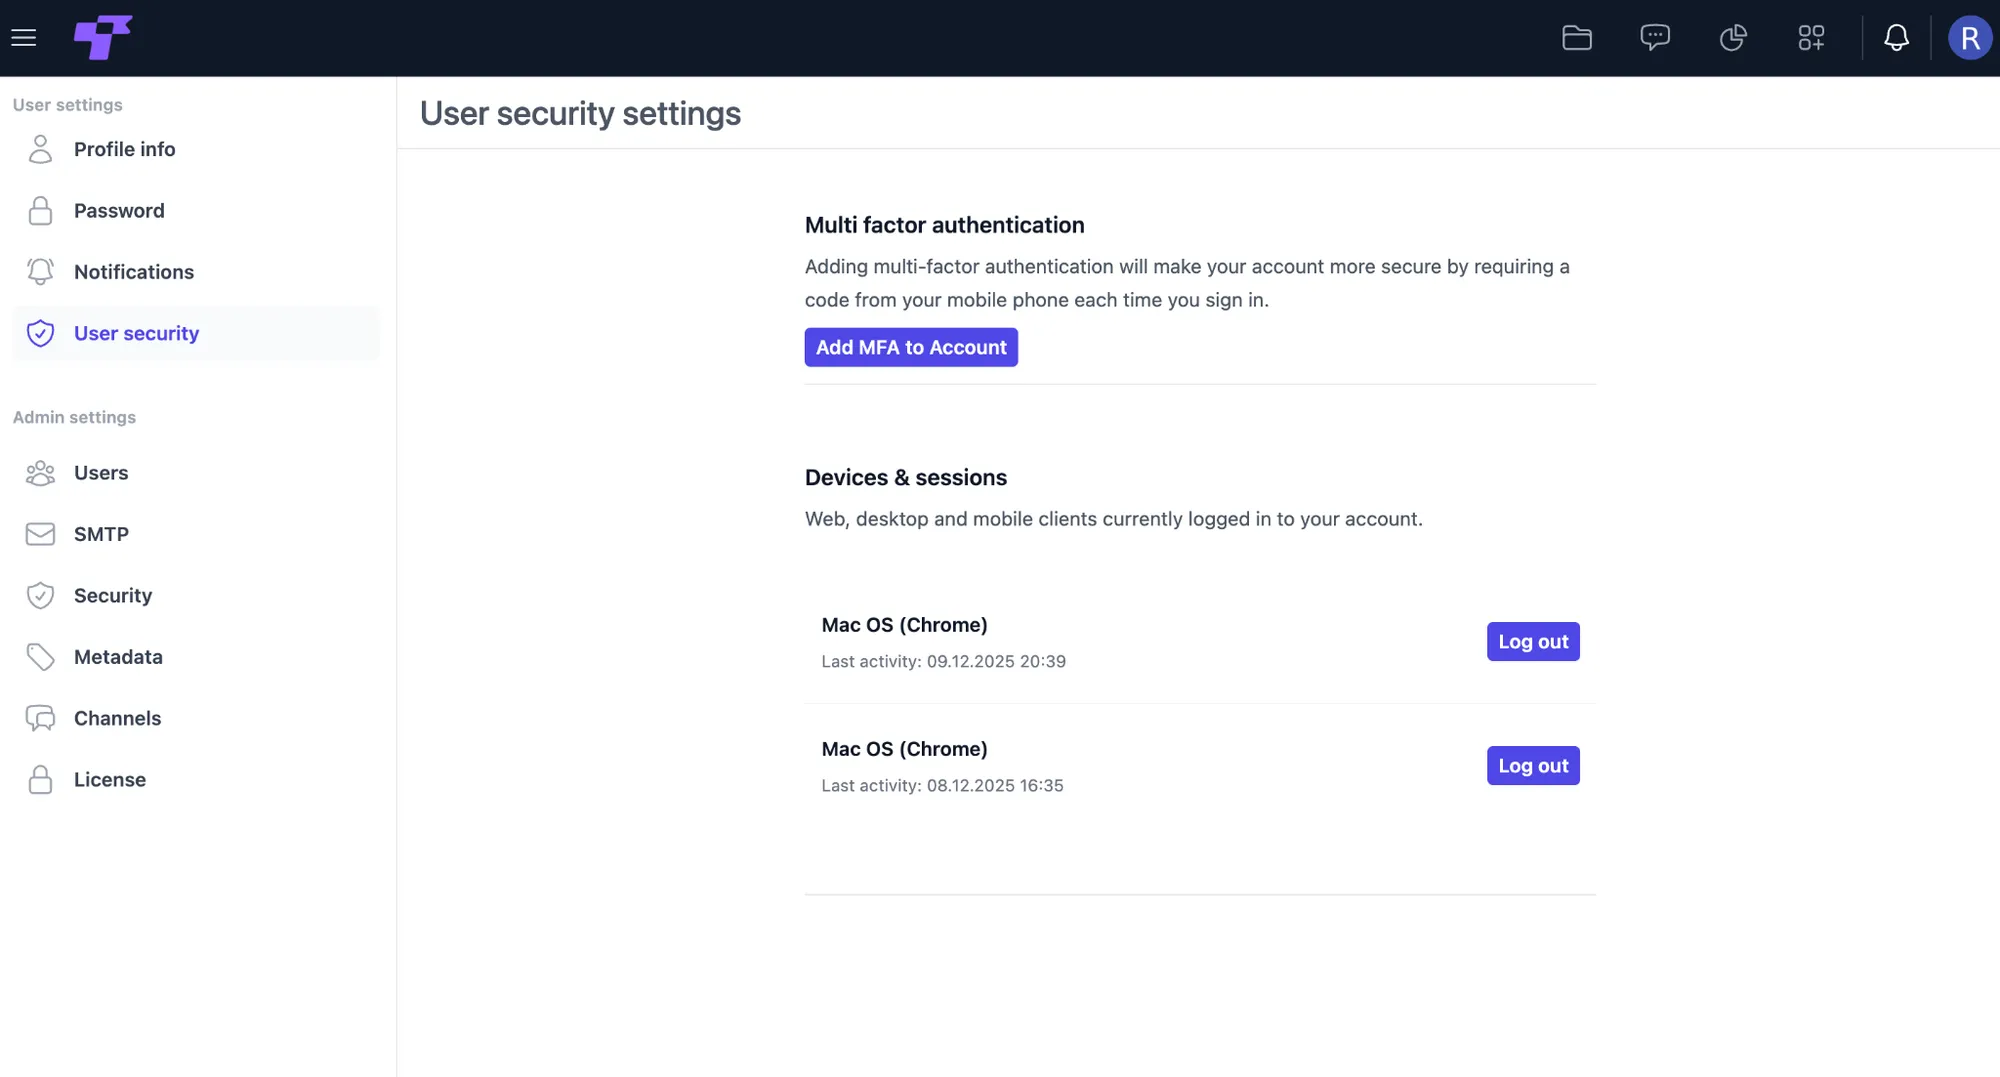
The User security section allows you to manage login protection, active sessions, and multi-factor authentication settings for your account.
Devices & sessions
View a list of all devices currently logged into your account. Each session displays the device type, browser, and last activity timestamp.
Click the "Log out" button next to a device to sign out from that session.
Regularly reviewing and managing active sessions helps keep your account secure.
Multi-factor authentication (MFA)
Enhance your account security by enabling MFA, which requires a verification code from your mobile device each time you sign in.
- Click "Add MFA to Account" to begin setup.
- Scan the QR code using Google Authenticator (available on the App Store or Google Play).
- Enter the generated code in the provided field.
- Click "Save" to complete activation.
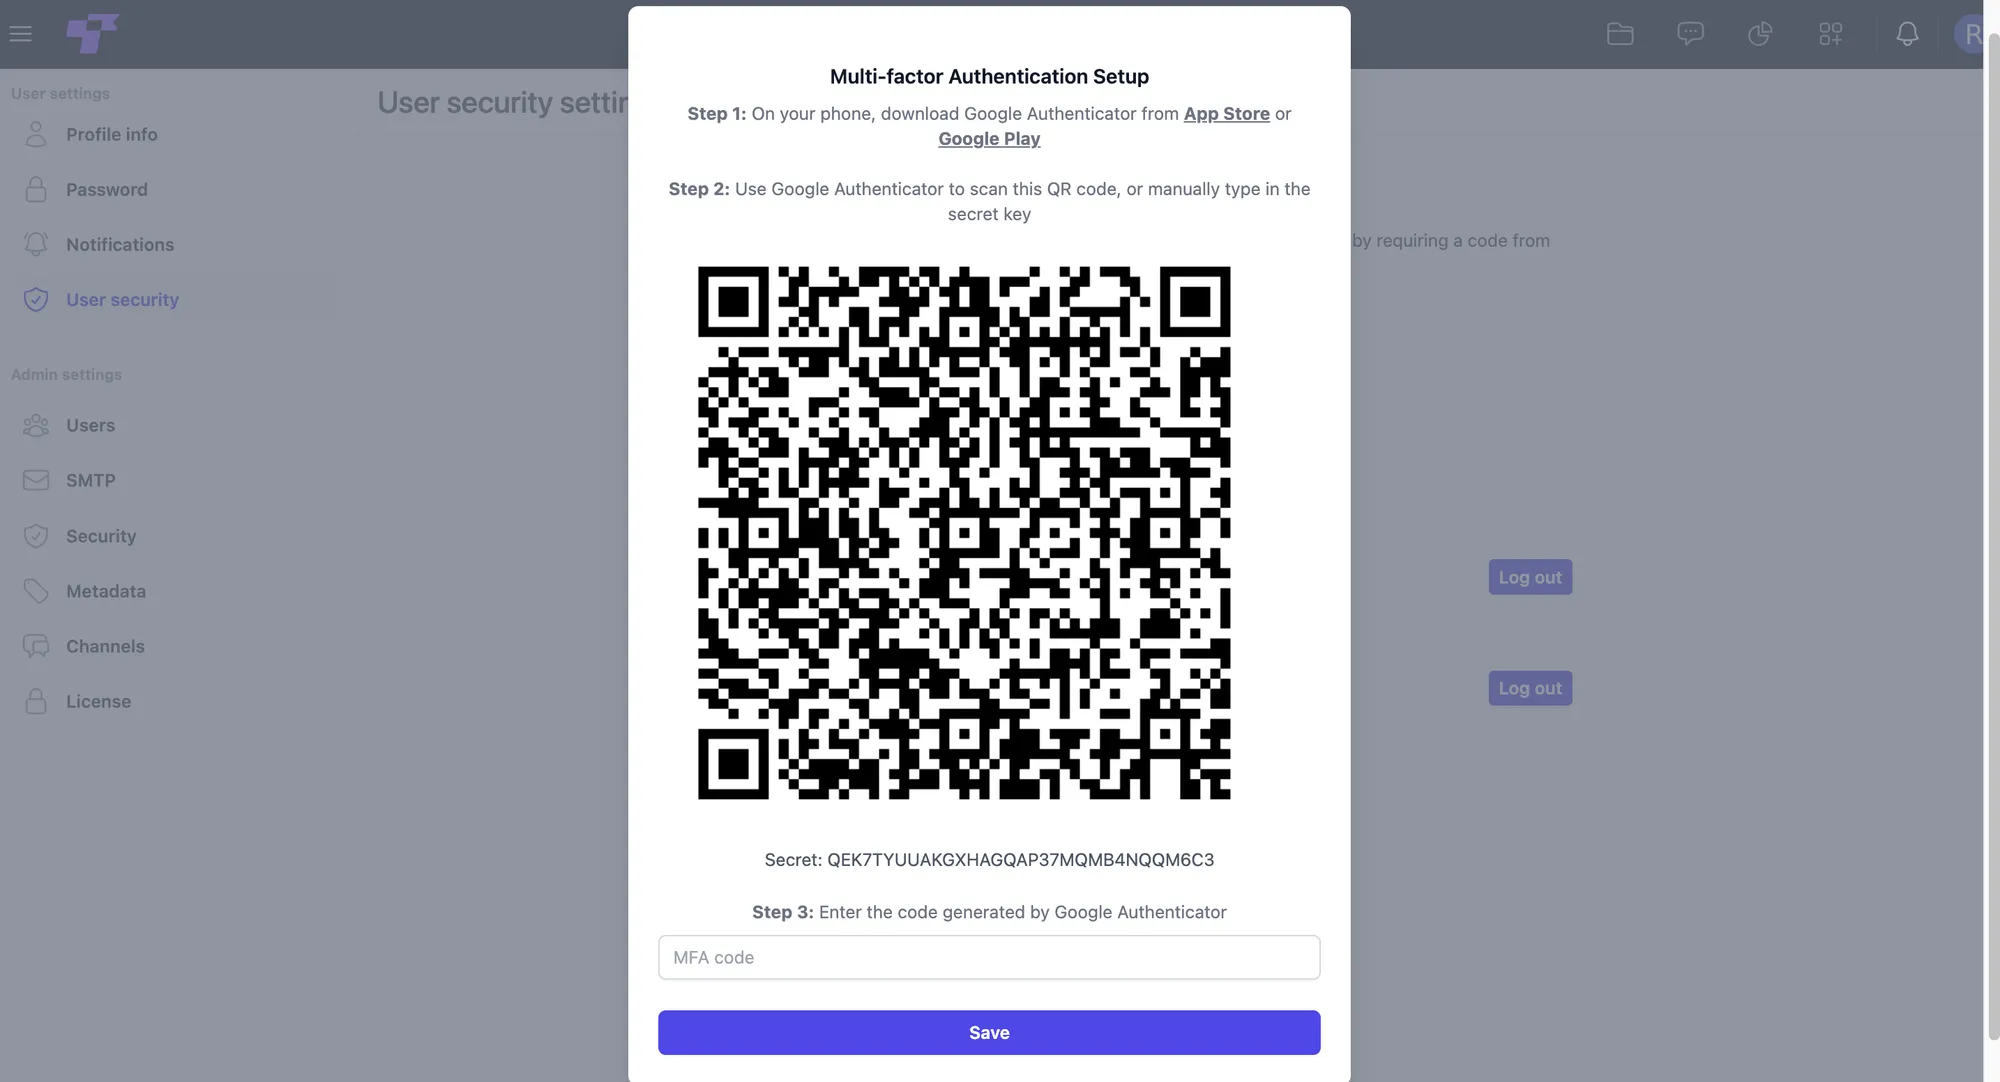
If the device providing the second factor is lost or damaged, an administrator can temporarily disable multi-factor authentication for that account.
Administrator settings
Administrator settings allow system admins to manage users, roles, security, and account configurations.
Users
The Users section allows administrators to view, create, edit, and manage all user accounts within the workspace. From here, you can control user roles, storage limits, and account activation status.
Create or edit users
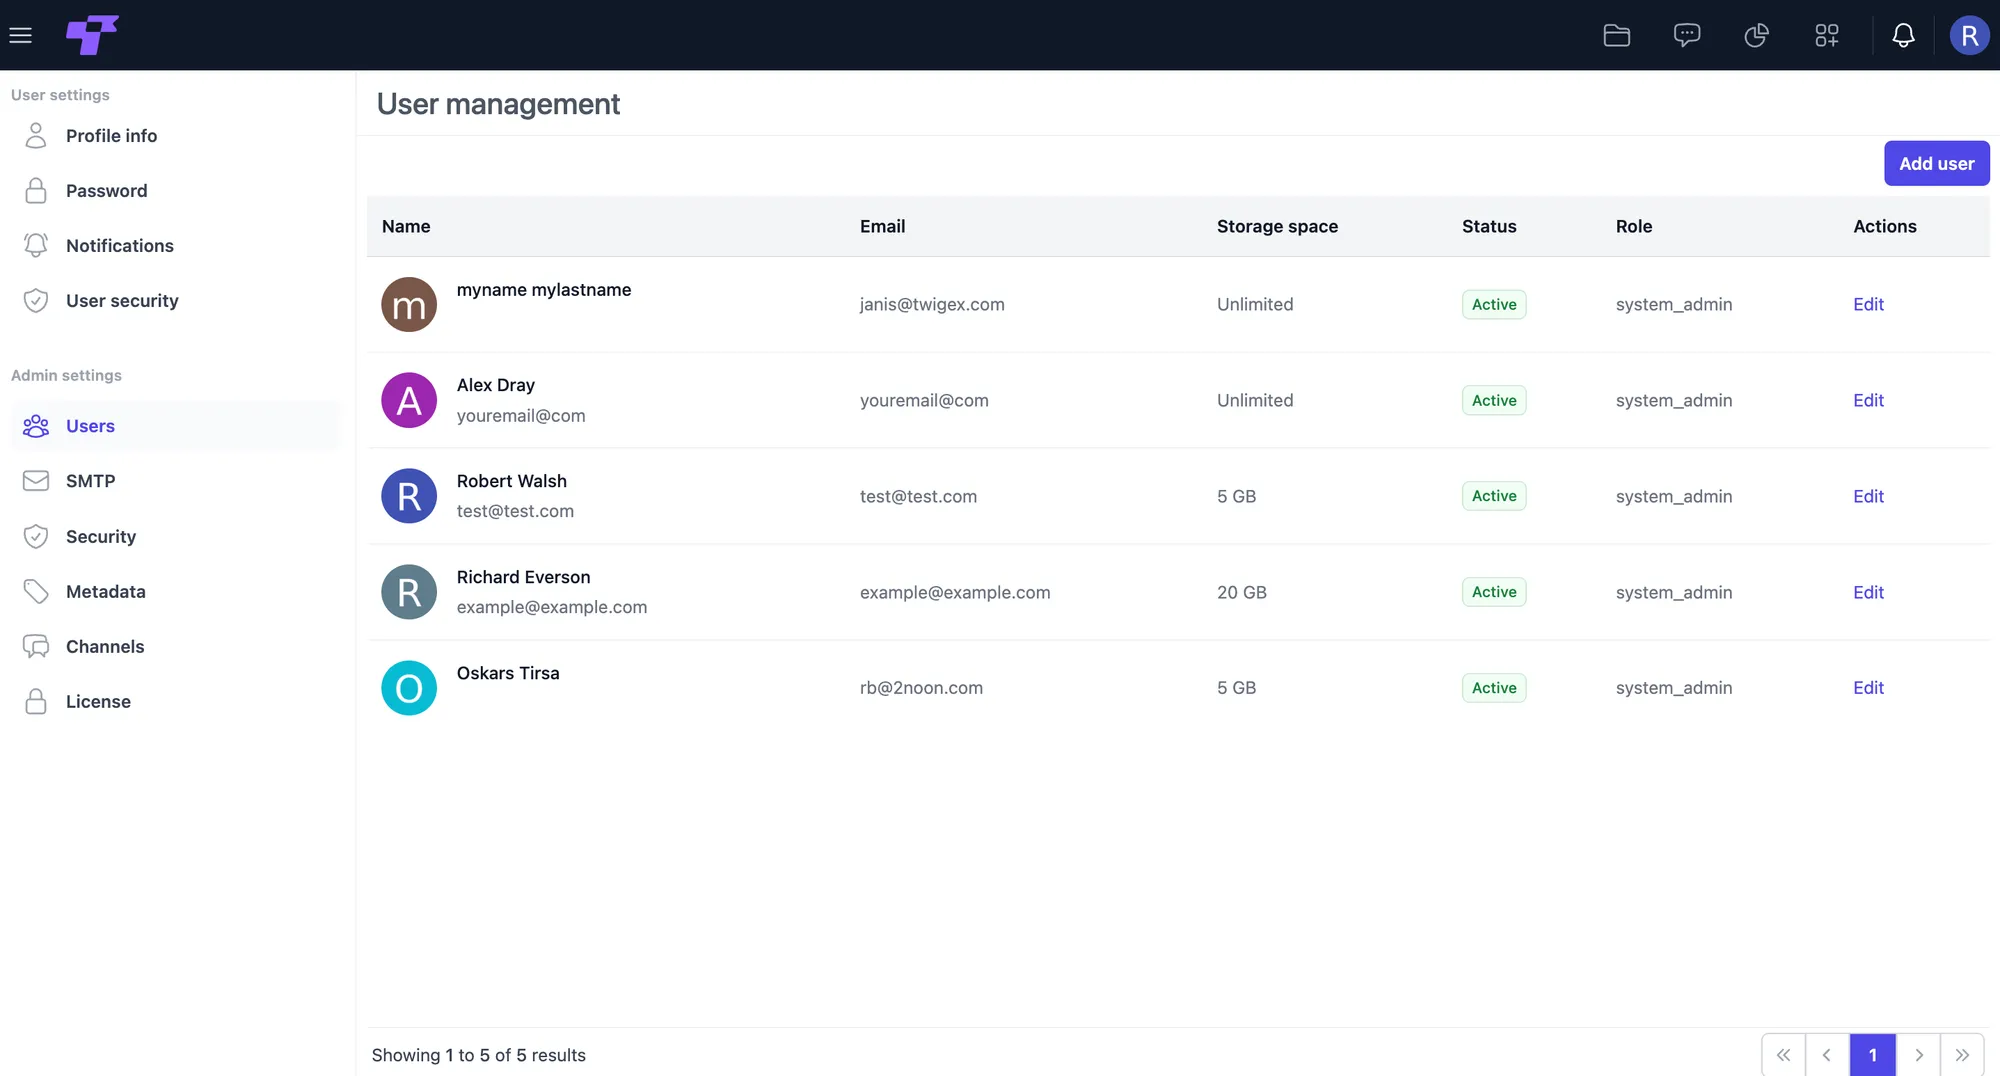
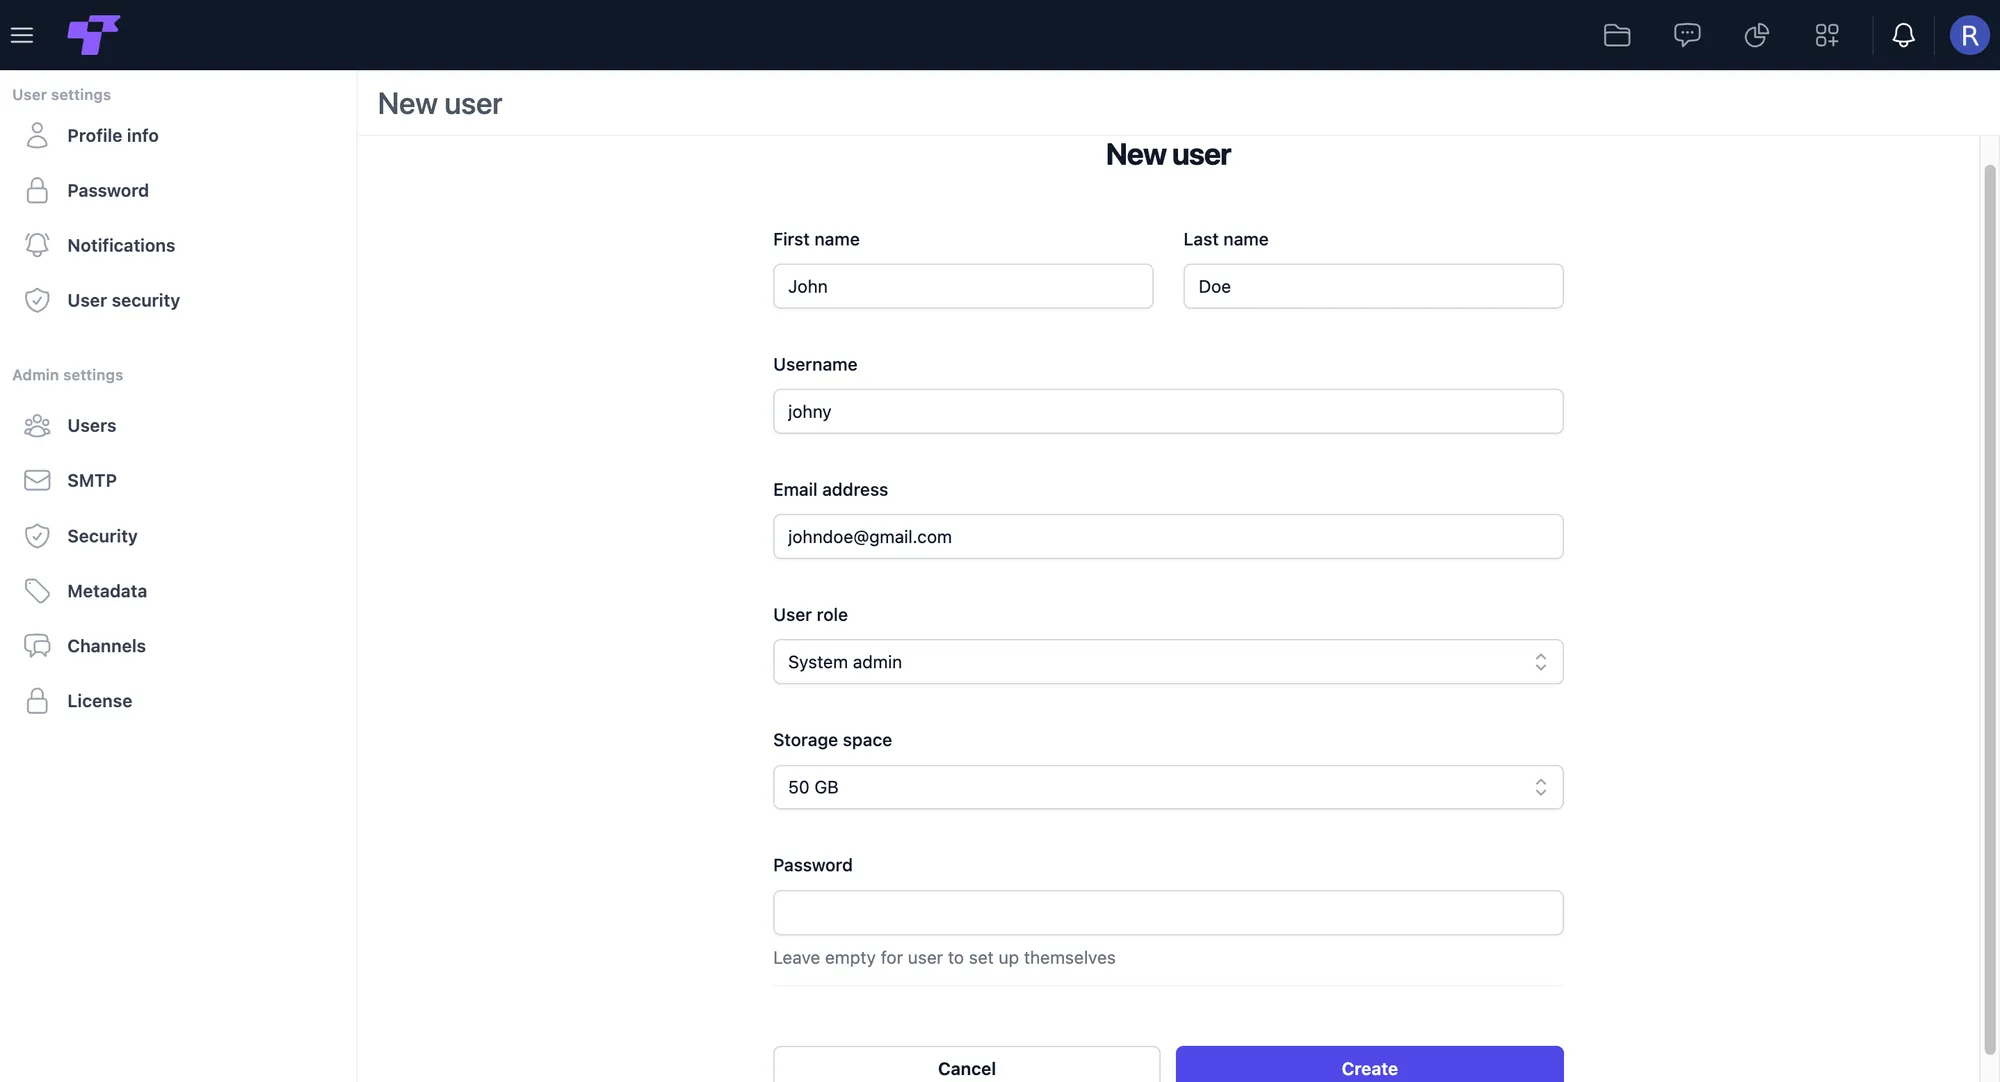
Create a user
- Click the "Add user" button in the top-right corner of the Users section.
- In the new user dialog, add the following details:
- Enter the first and last name.
- Set a username and email (used for login and notifications).
- Choose a role (System user or System admin).
- Select a storage space (5GB, 10GB, 20GB, 50GB, 100GB, or Unlimited).
Set a password, or leave it blank for the user to set their own.
Click "Create" to add your new user.
If you leave the password field blank, the user will receive an email with instructions to set their own password.
Edit a user
To edit a user, click "Edit" next to their name in the Users section.
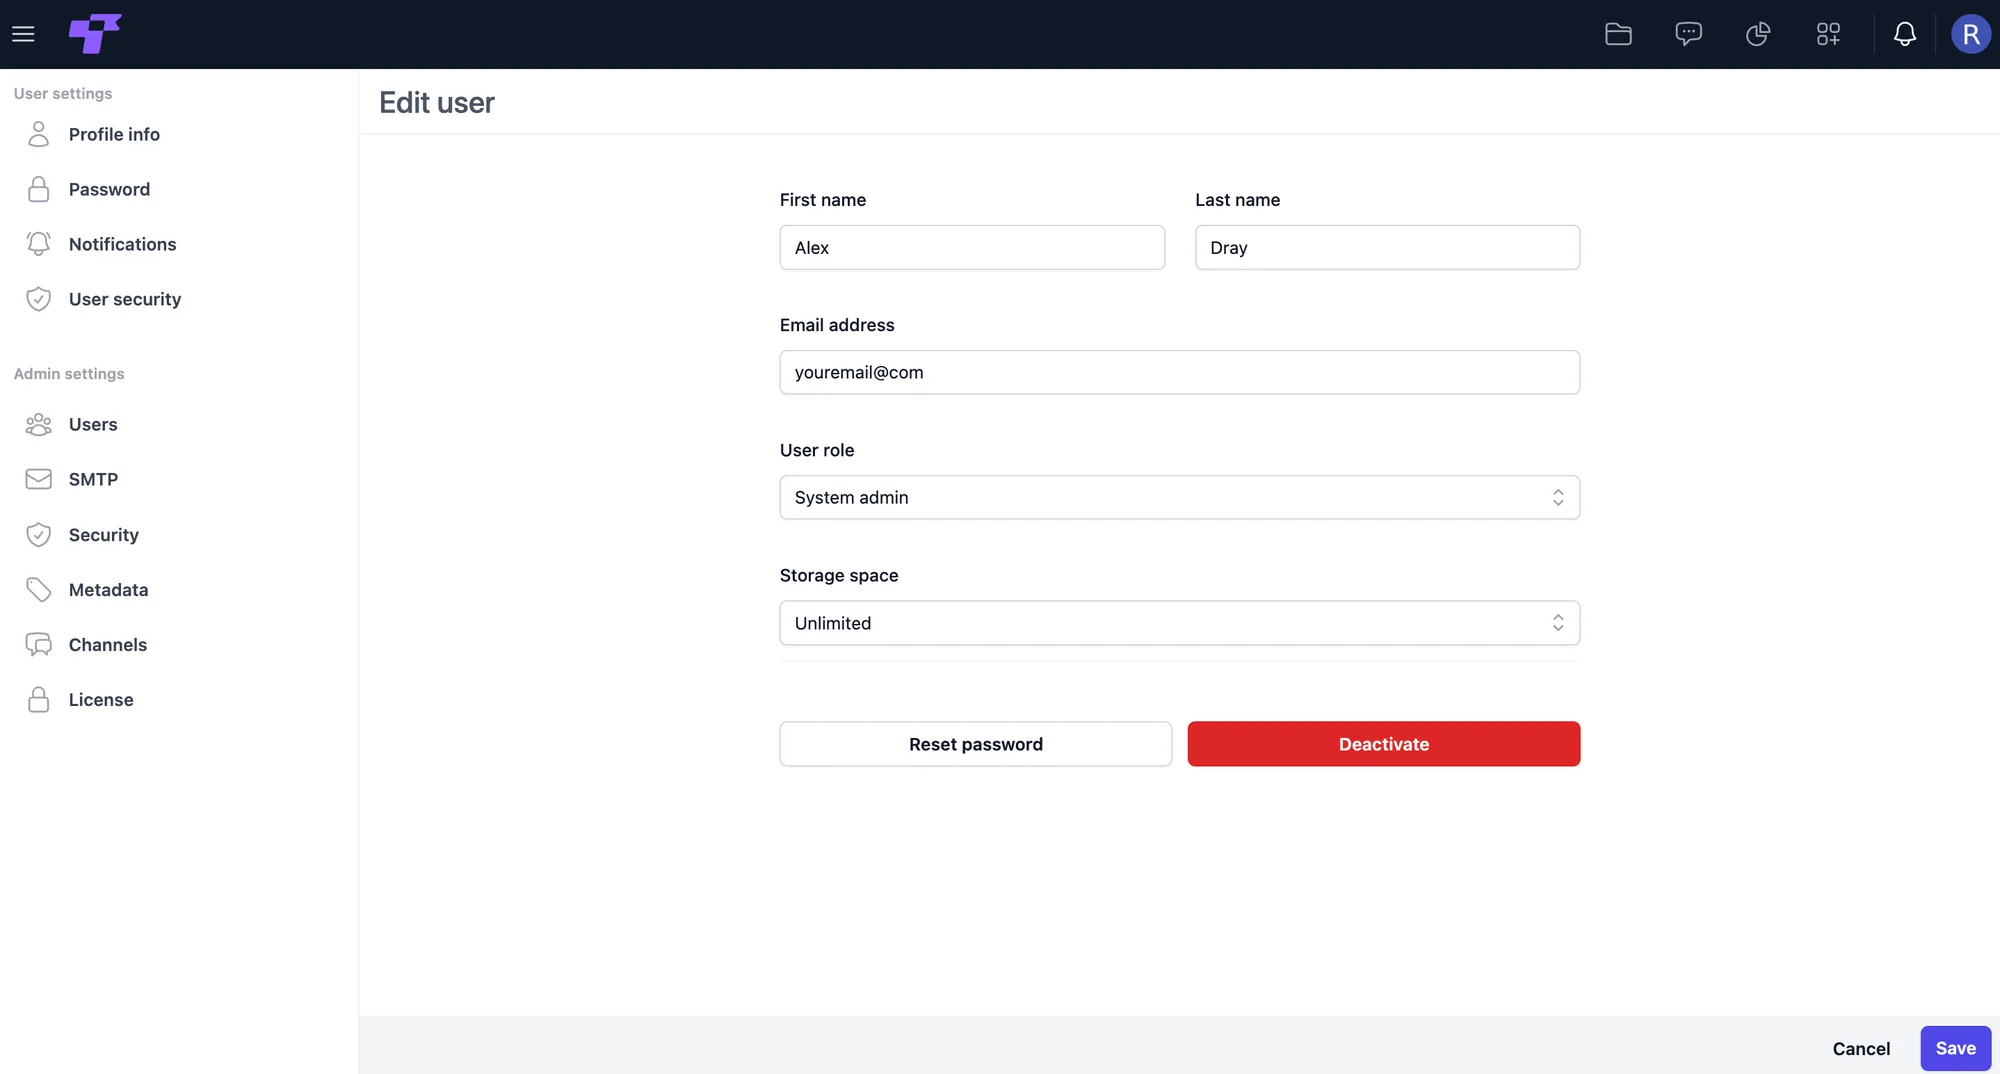
In the Edit User section, you can modify user details, change roles, adjust storage space, reset passwords, or deactivate accounts.
Click "Deactivate" to disable the user's access to the system.
Click "Save" to apply changes.
SMTP
The SMTP (Simple Mail Transfer Protocol) settings allow you to set up your own email server to send emails to users for password resets, notifications, and other system messages.
Steps to configure SMTP
- Select Connection Type – Choose the encryption type (e.g., TLS).
- Enable SMTP Authentication – Check the box if authentication is required.
- Enter SMTP Server Details:
- SMTP Server – Enter the address of your SMTP server.
- Port – Provide the port number used for SMTP communication.
- Enter SMTP Credentials:
- SMTP Server Username – Input the username for SMTP authentication.
- SMTP Password – Enter the corresponding password.
- Click the "Test connection" button to verify the SMTP configuration is working correctly.
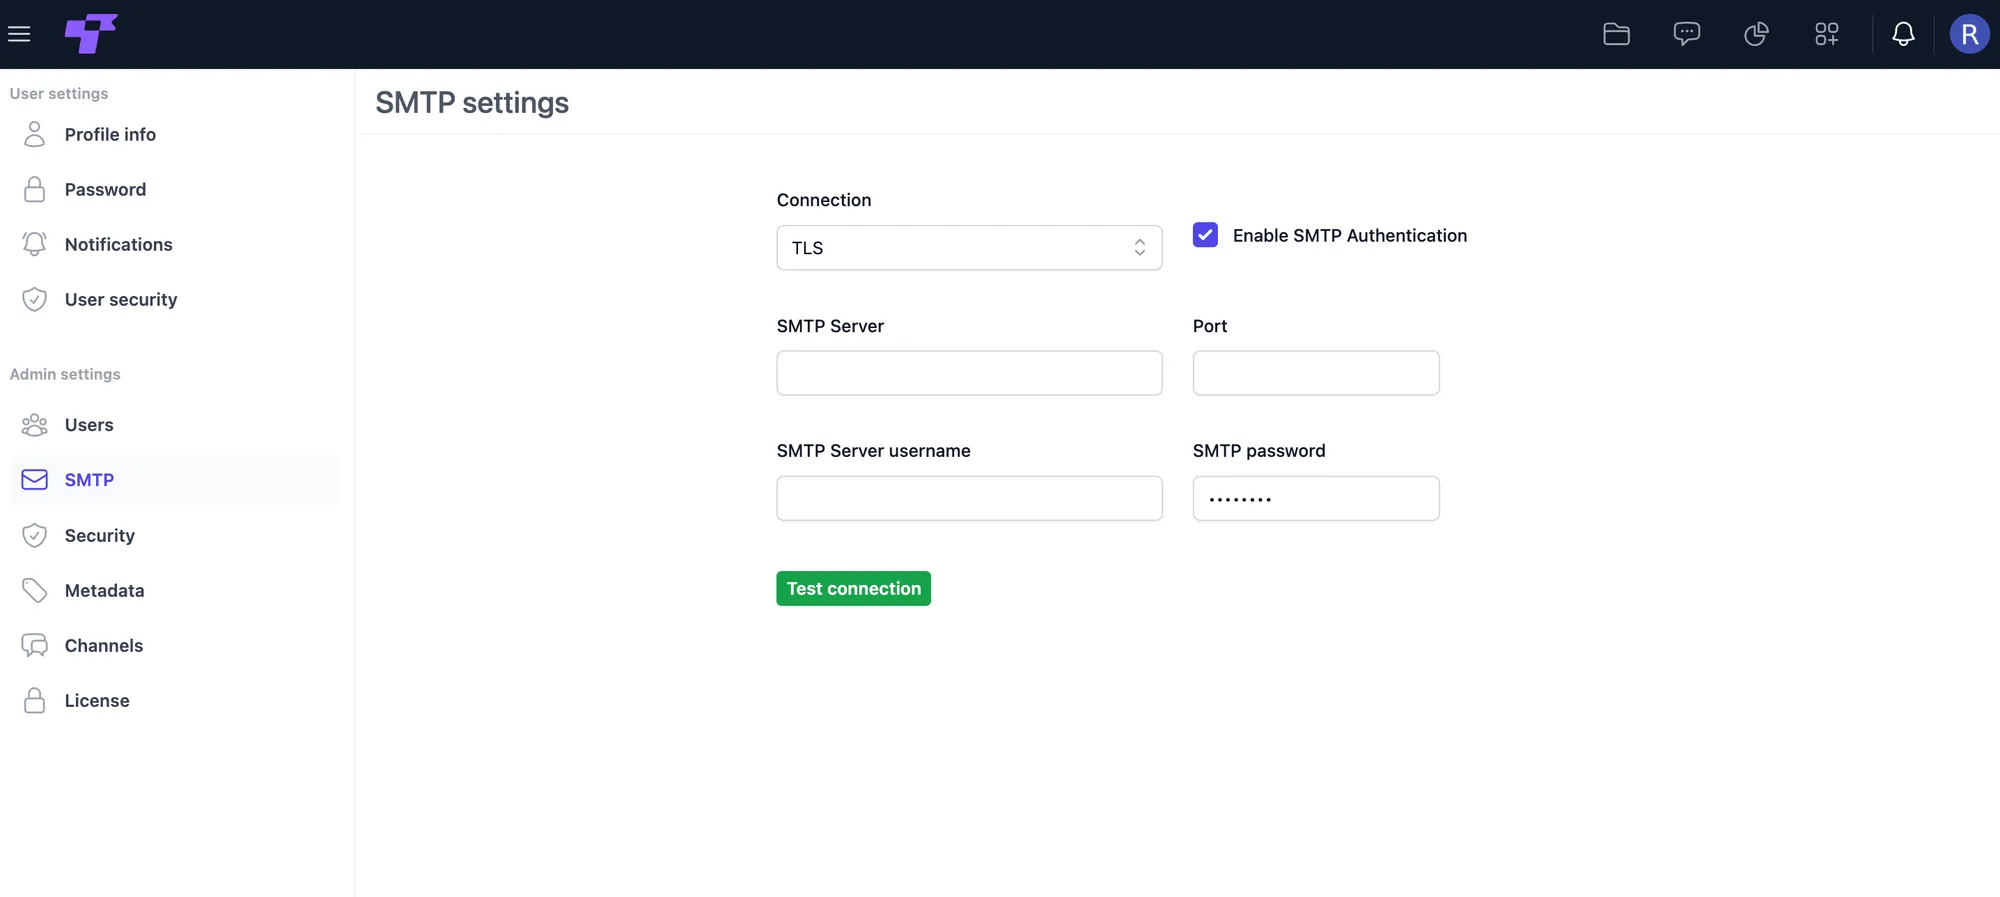
After completing the setup, the system will be able to send emails for notifications and password resets.
Security
The Security section allows you to configure session timeout settings and enforce password policies to enhance account protection.
Session length
- Set the Timeout Period (in minutes) to define how long a session remains active before automatically logging out if there is no user activity.
Password policy
- Choose the minimum password length to enforce stronger security.
- Enable the following password requirements:
- Upper and lower case letters – Ensures passwords include both uppercase and lowercase characters.
- Numeric characters – Requires numbers to be included in the password.
- Special characters – Enforces the use of symbols for added security.
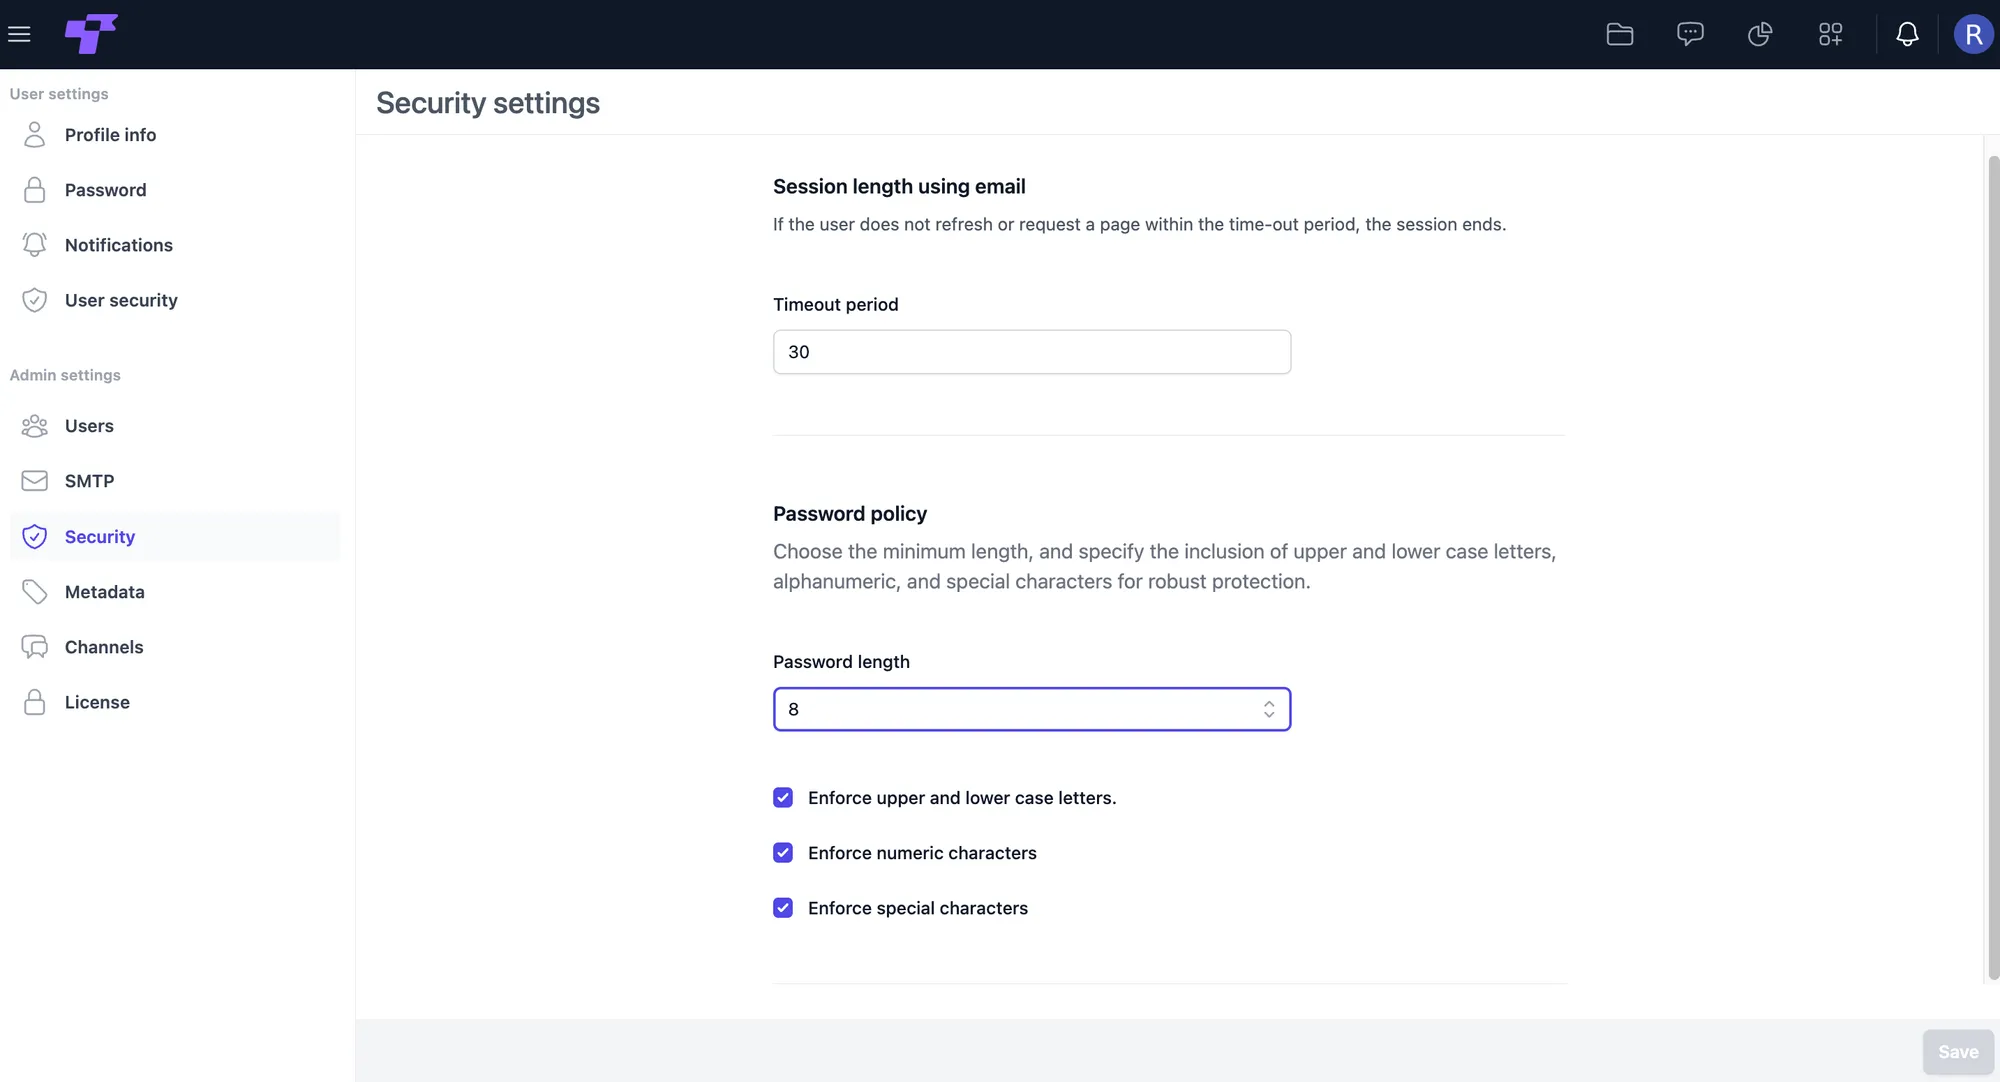
Don't forget to click "Save" to apply the changes.
Metadata
The Metadata section allows users to define and manage custom metadata fields that can be attached to files and folders for improved organization, filtering, and categorization. Admin users can control which metadata attributes are available and whether they are editable by regular users.
- Edit Metadata: Modify existing metadata fields by clicking the "Edit" icon.
- Delete Metadata: Remove metadata fields by clicking the "Delete" icon.
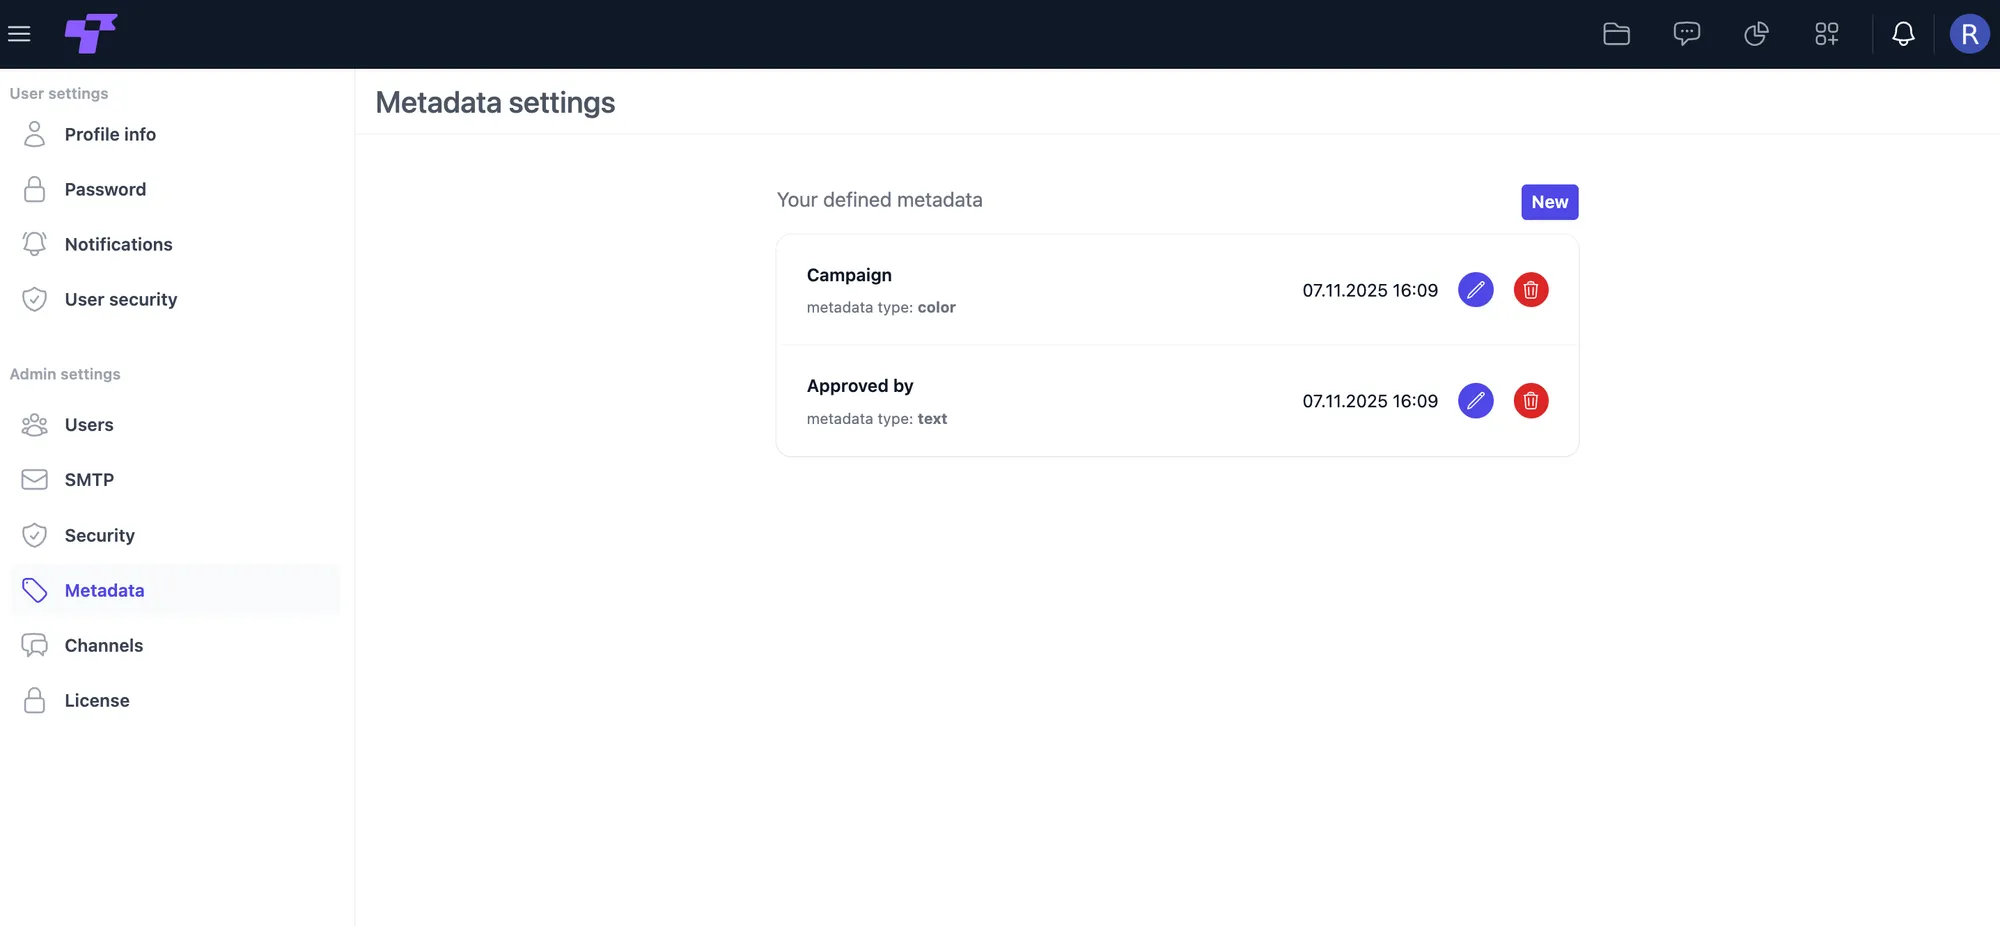
Metadata makes finding and working with data easier, allowing users to sort or locate specific documents.
Create a new metadata field
- Click the "New" button to open the metadata creation form.
- Enter a Metadata Name (e.g., "Approval Status" or "Confidentiality Level").
- Choose a Metadata Type from the dropdown menu:
- Text: Any text.
- Selection: Users can select from predefined options.
- Color: Assign a color-based label.
- Date: Allows users to pick a date.
- If the metadata type is Selection, enter the selection values (e.g., "Marketing," "Sales," "IT") and click "Add" to include them.
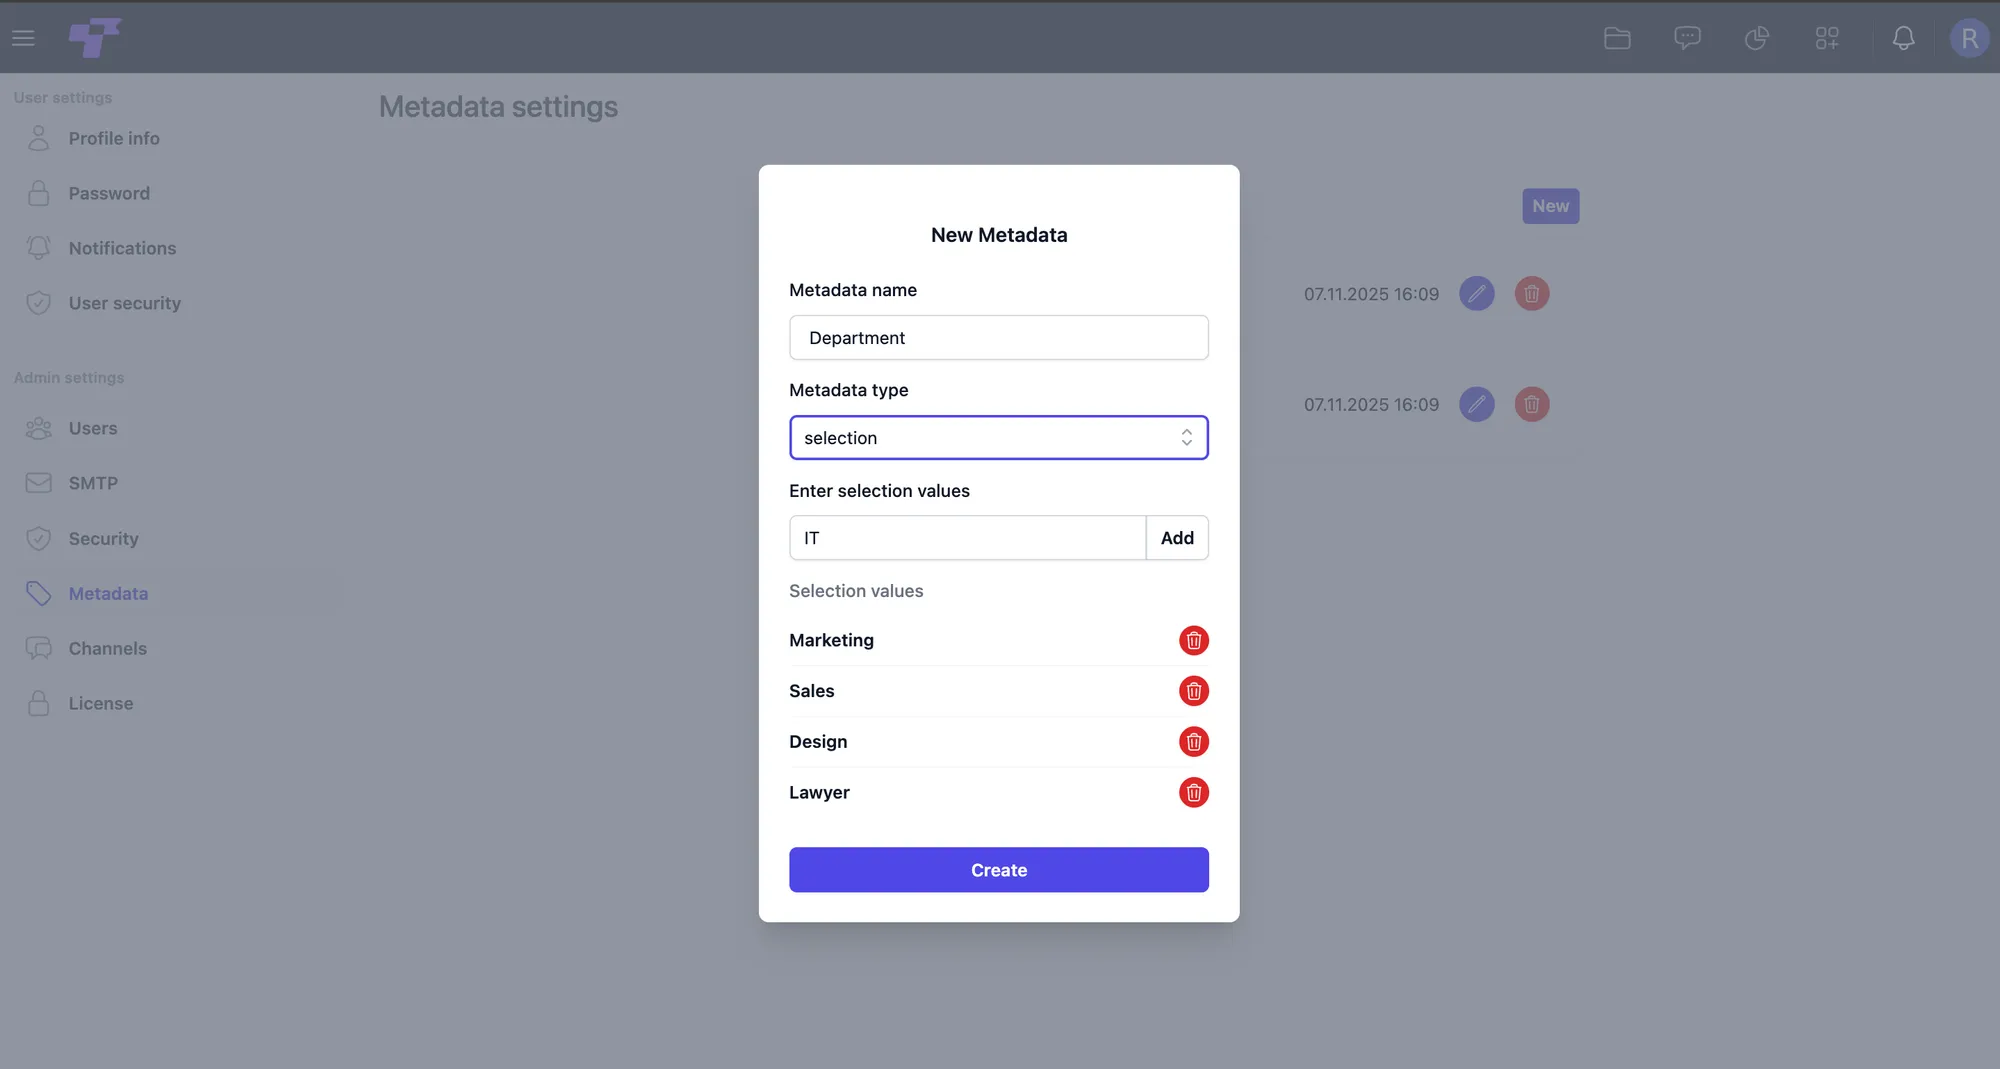
Click "Create" to finalize the new metadata field.
Channels
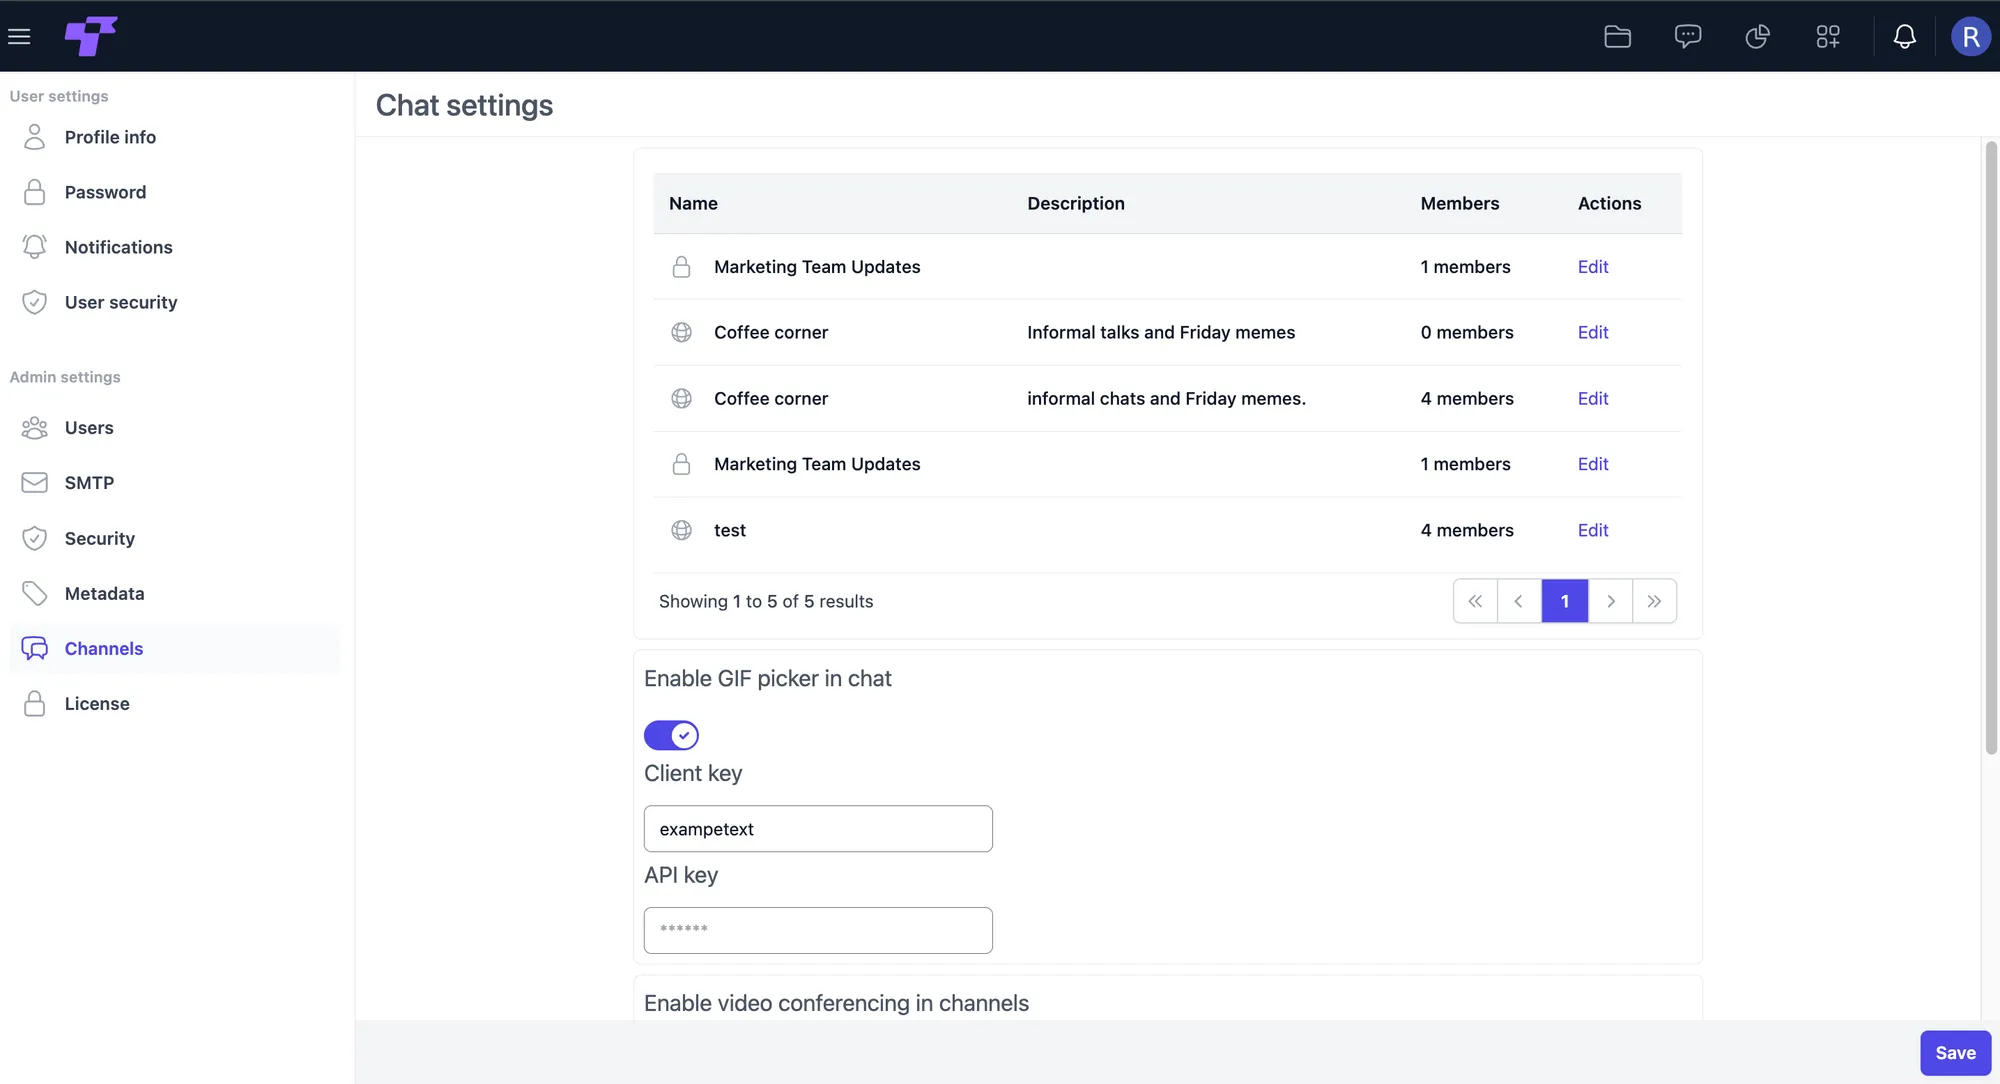
Here you can update channel names and descriptions, add or remove members, assign channel roles, and enable additional chat features like GIF search or video conferencing.
The channel overview displays all existing channels, their descriptions, number of members, and quick access to edit each channel.
Available actions
- Edit channel – modify name, description, and members.
- Enable GIF picker in chat – activate GIF search for all channels.
- Enable video conferencing – integrate video calls by adding a host, API key, and secret.
Chat features for channels
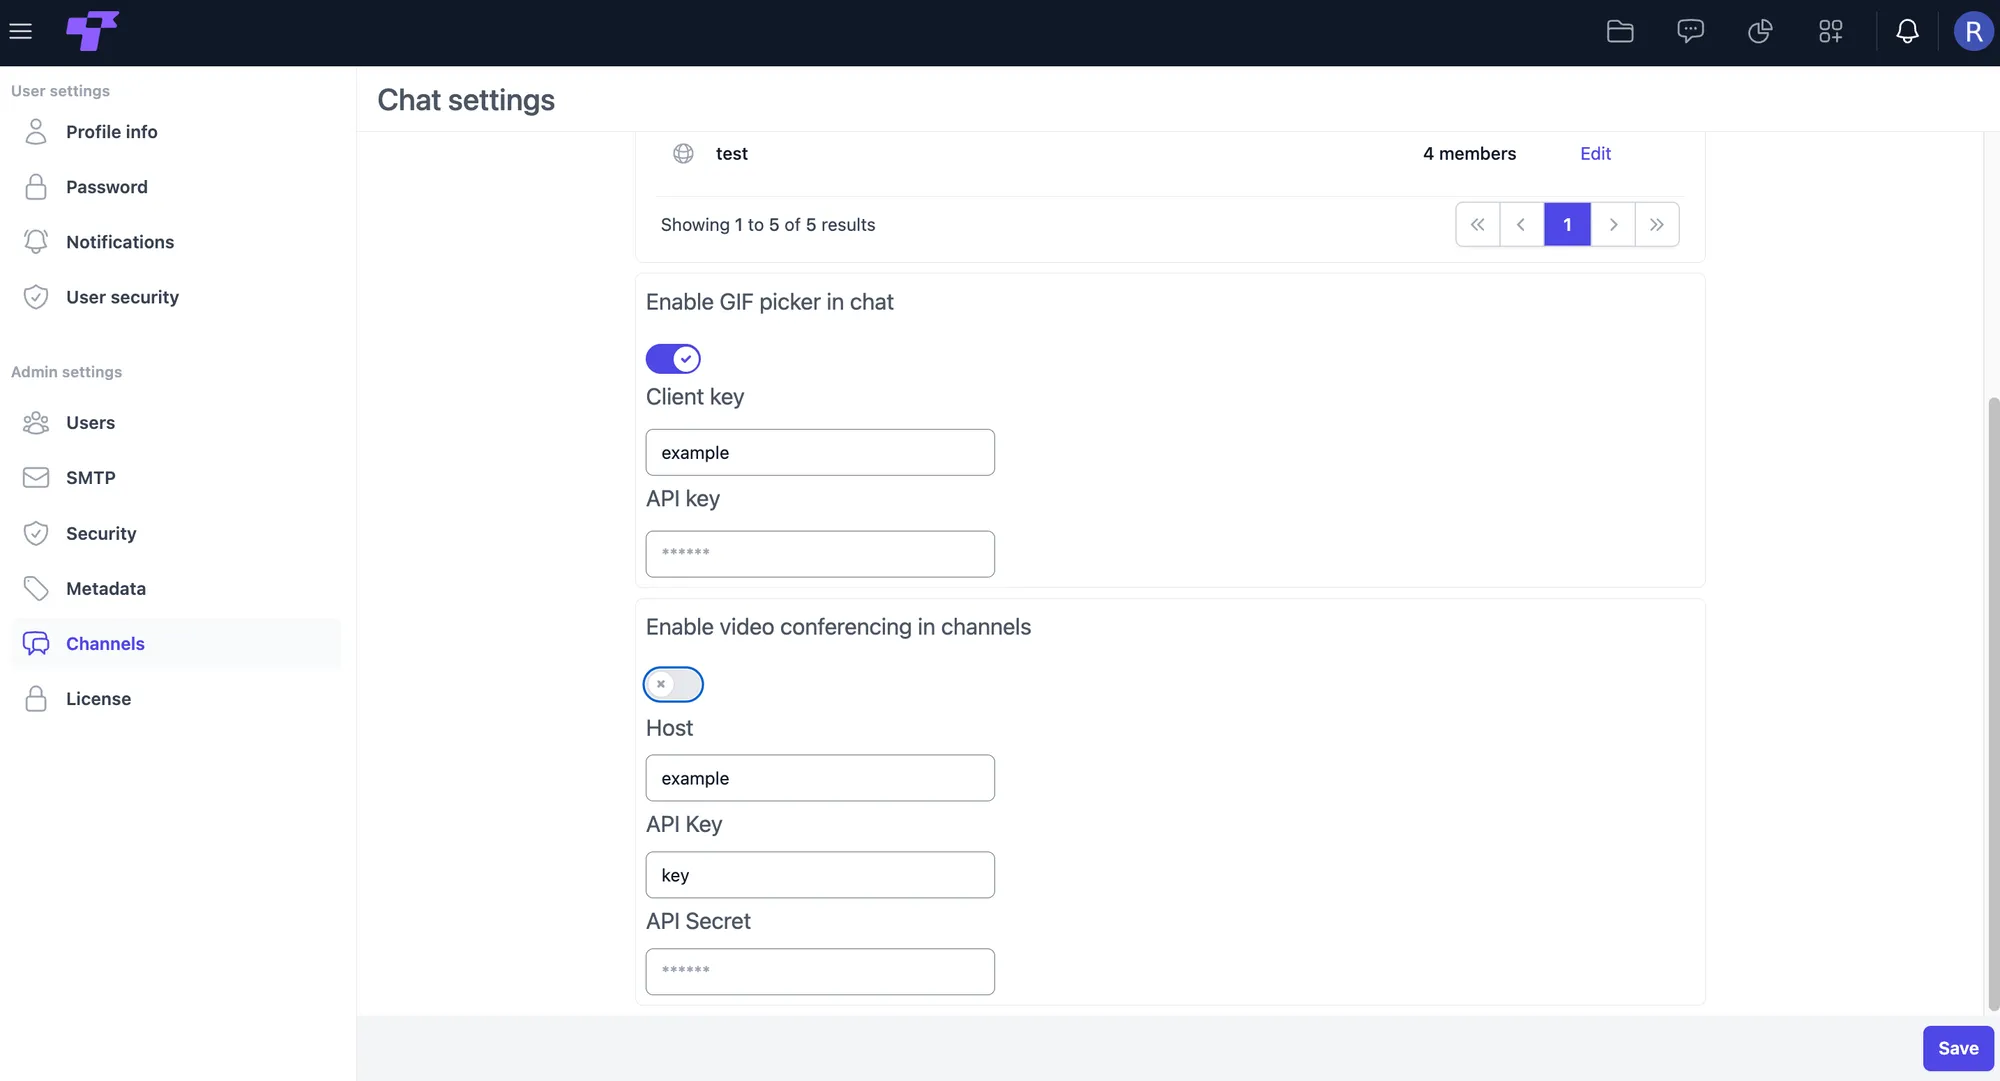
At the bottom of the Channels settings, administrators can enable additional features that enhance communication inside all workspace channels.
- GIF Picker: You can enable a built-in GIF picker that allows users to search and send GIFs directly in the chat. This requires providing your Client key and API key from your GIF provider. Once enabled, the GIF button appears next to the message input field in every channel.
- Video conferencing: If you want channels to support instant video calls, you can enable video conferencing. This section allows you to enter your Host, API Key, and API Secret for your video service provider. When video conferencing is active, users will see a camera icon inside the channel header and can start a call at any time.
Editing a channel
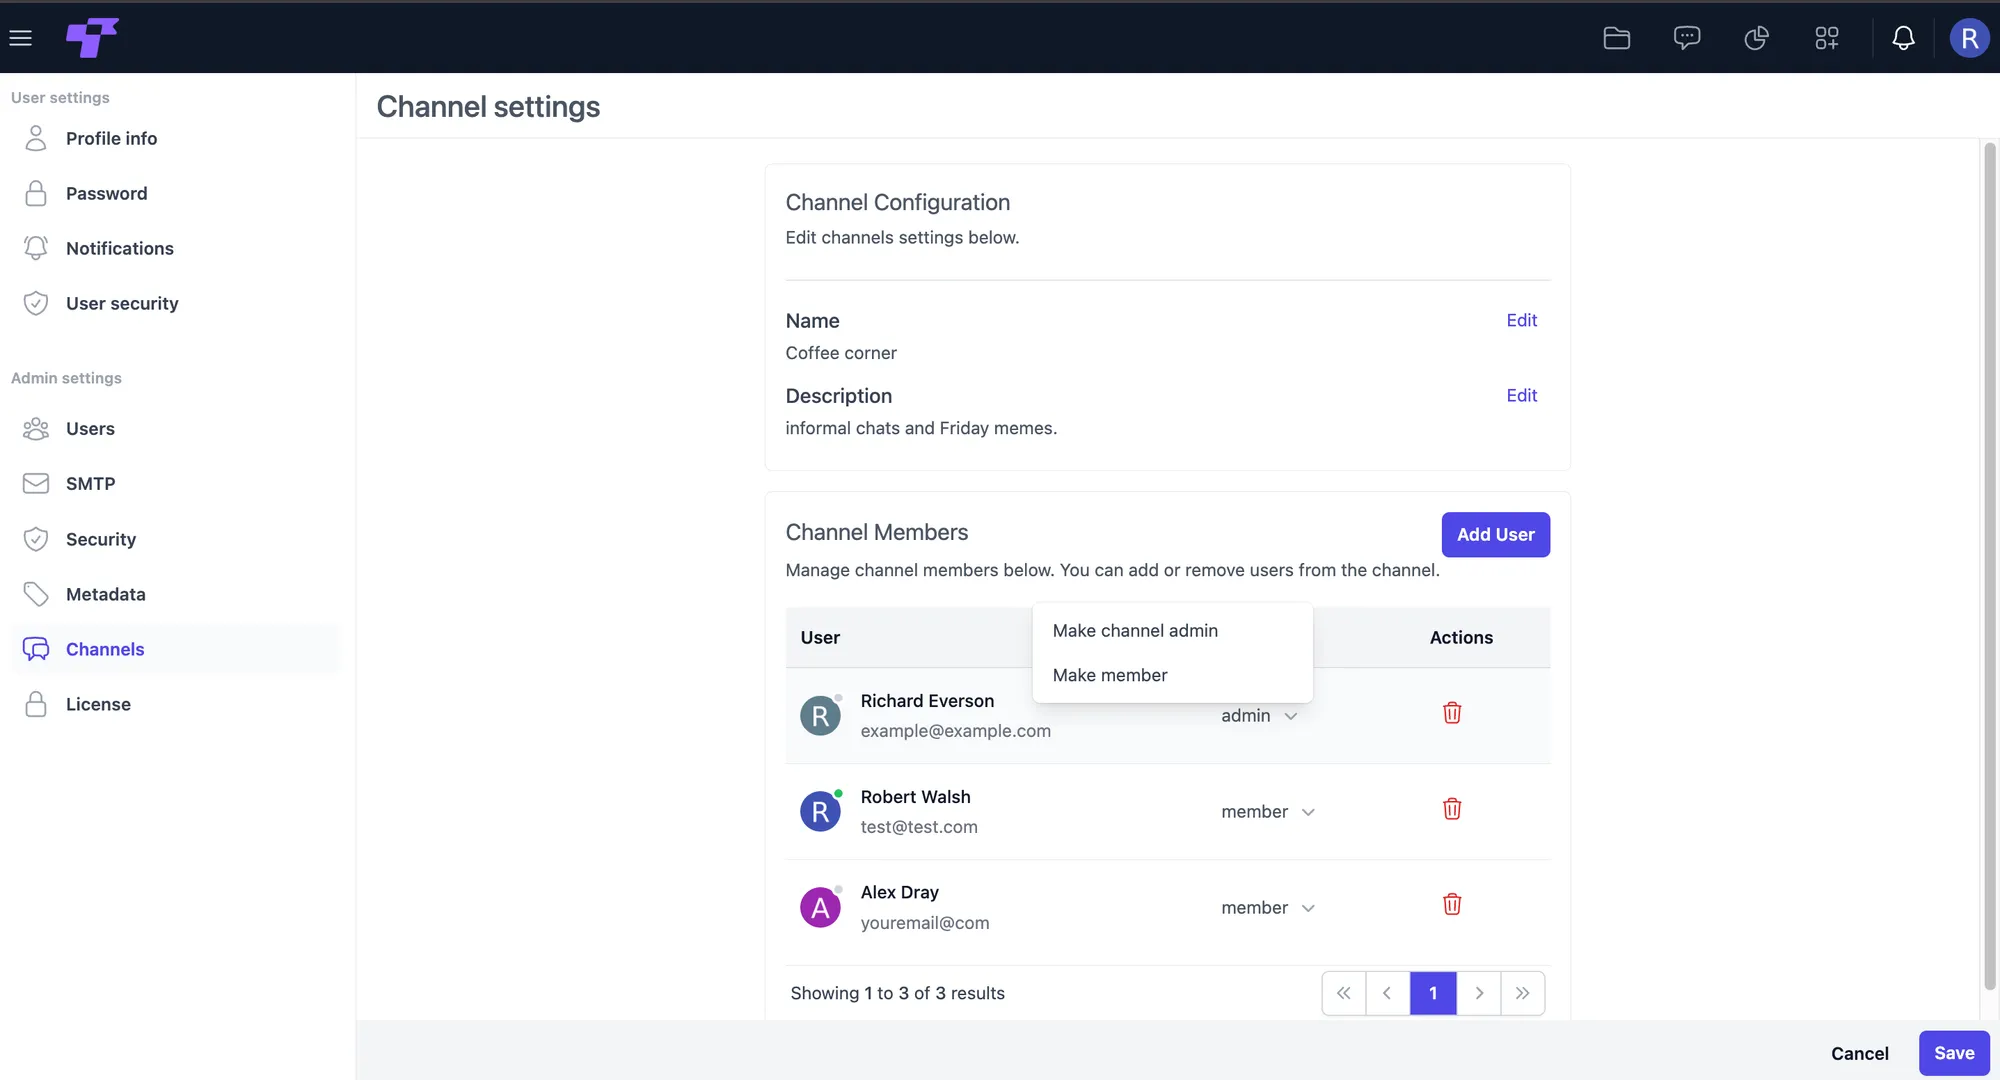
Click "Edit" next to a channel to open its settings.
In this view, you can update:
- Name
- Description
- Channel members (roles, add, remove)
Add a user to the channel
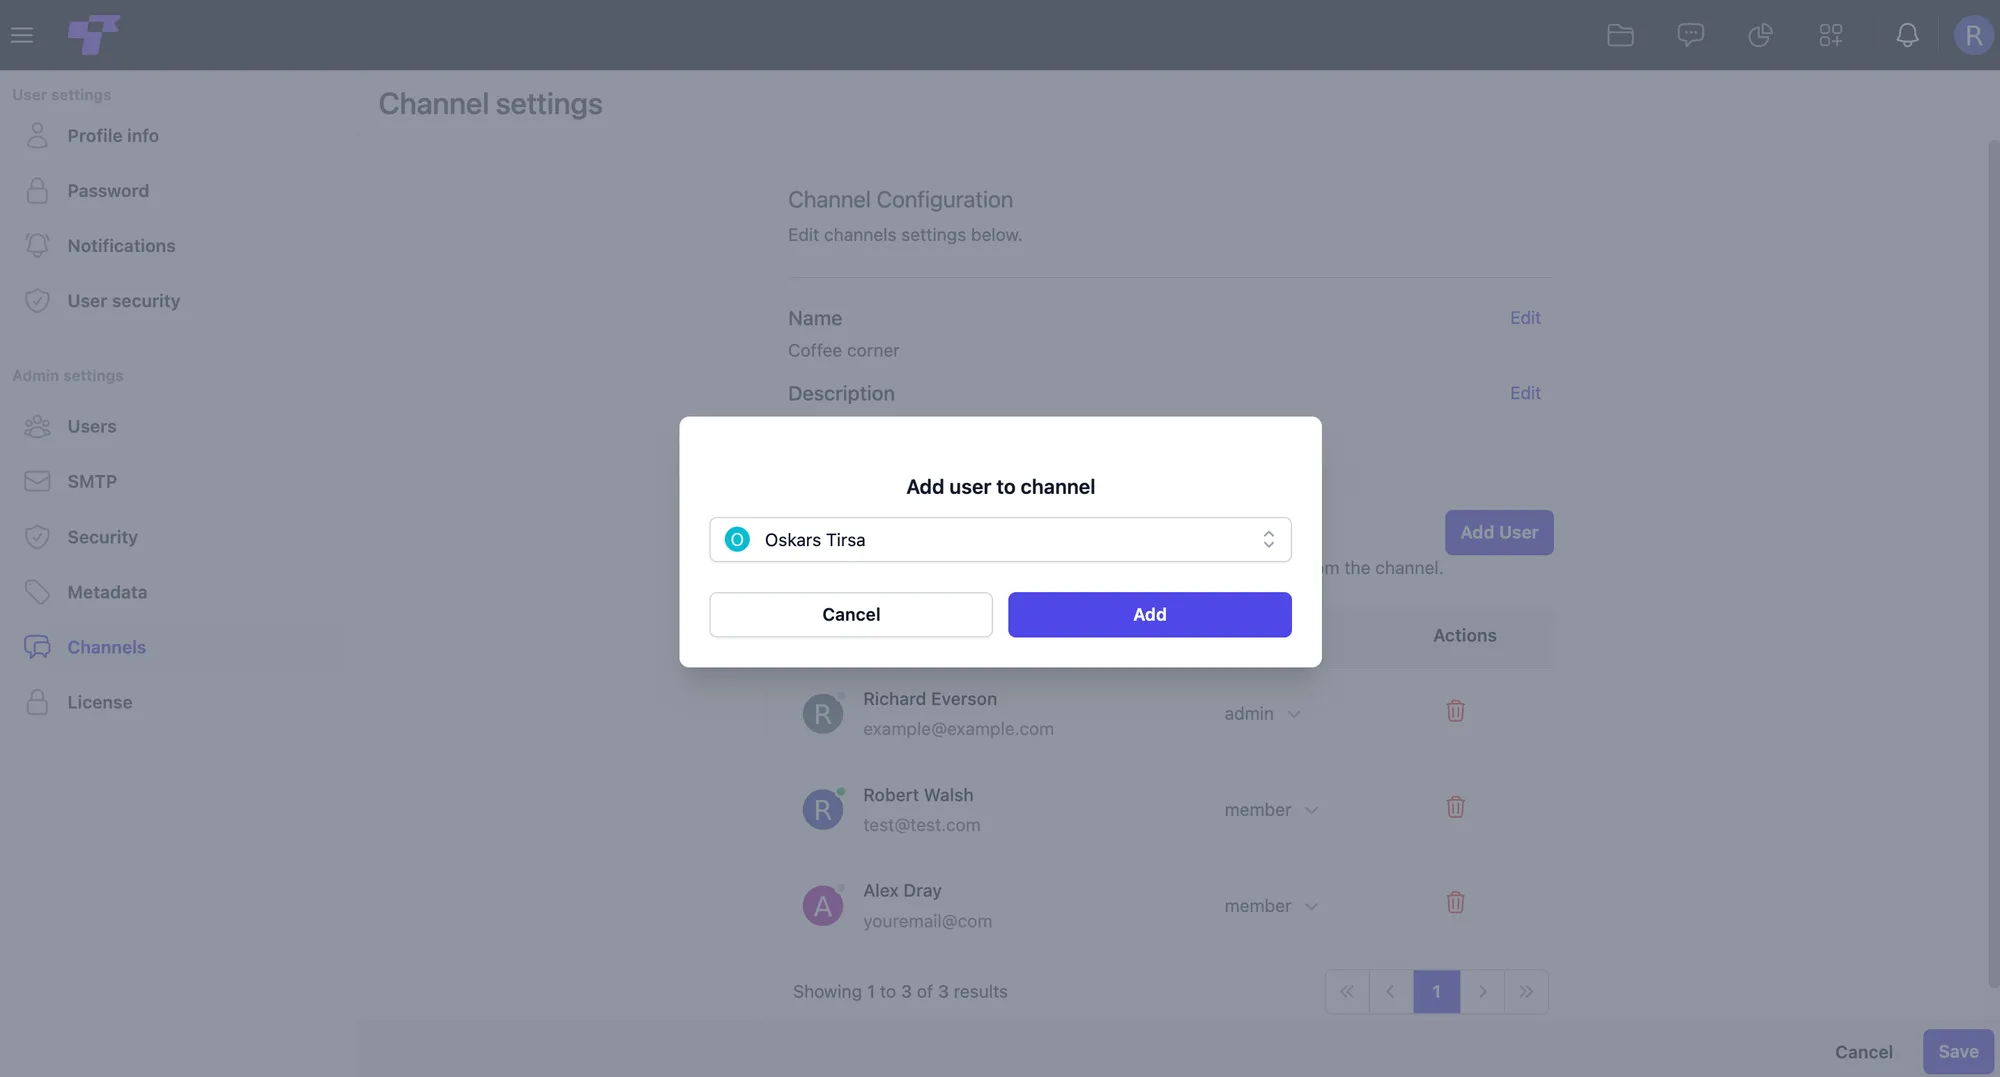
- Click "Add User".
- Select a user from the dropdown list.
- Click "Add".
Change a user's role
Channels support two roles:
- Admin – can modify channel settings and manage members.
- Member – regular participant.
To change a role:
- Click the dropdown next to the user's role.
- Choose "Make channel admin" or "Make member".
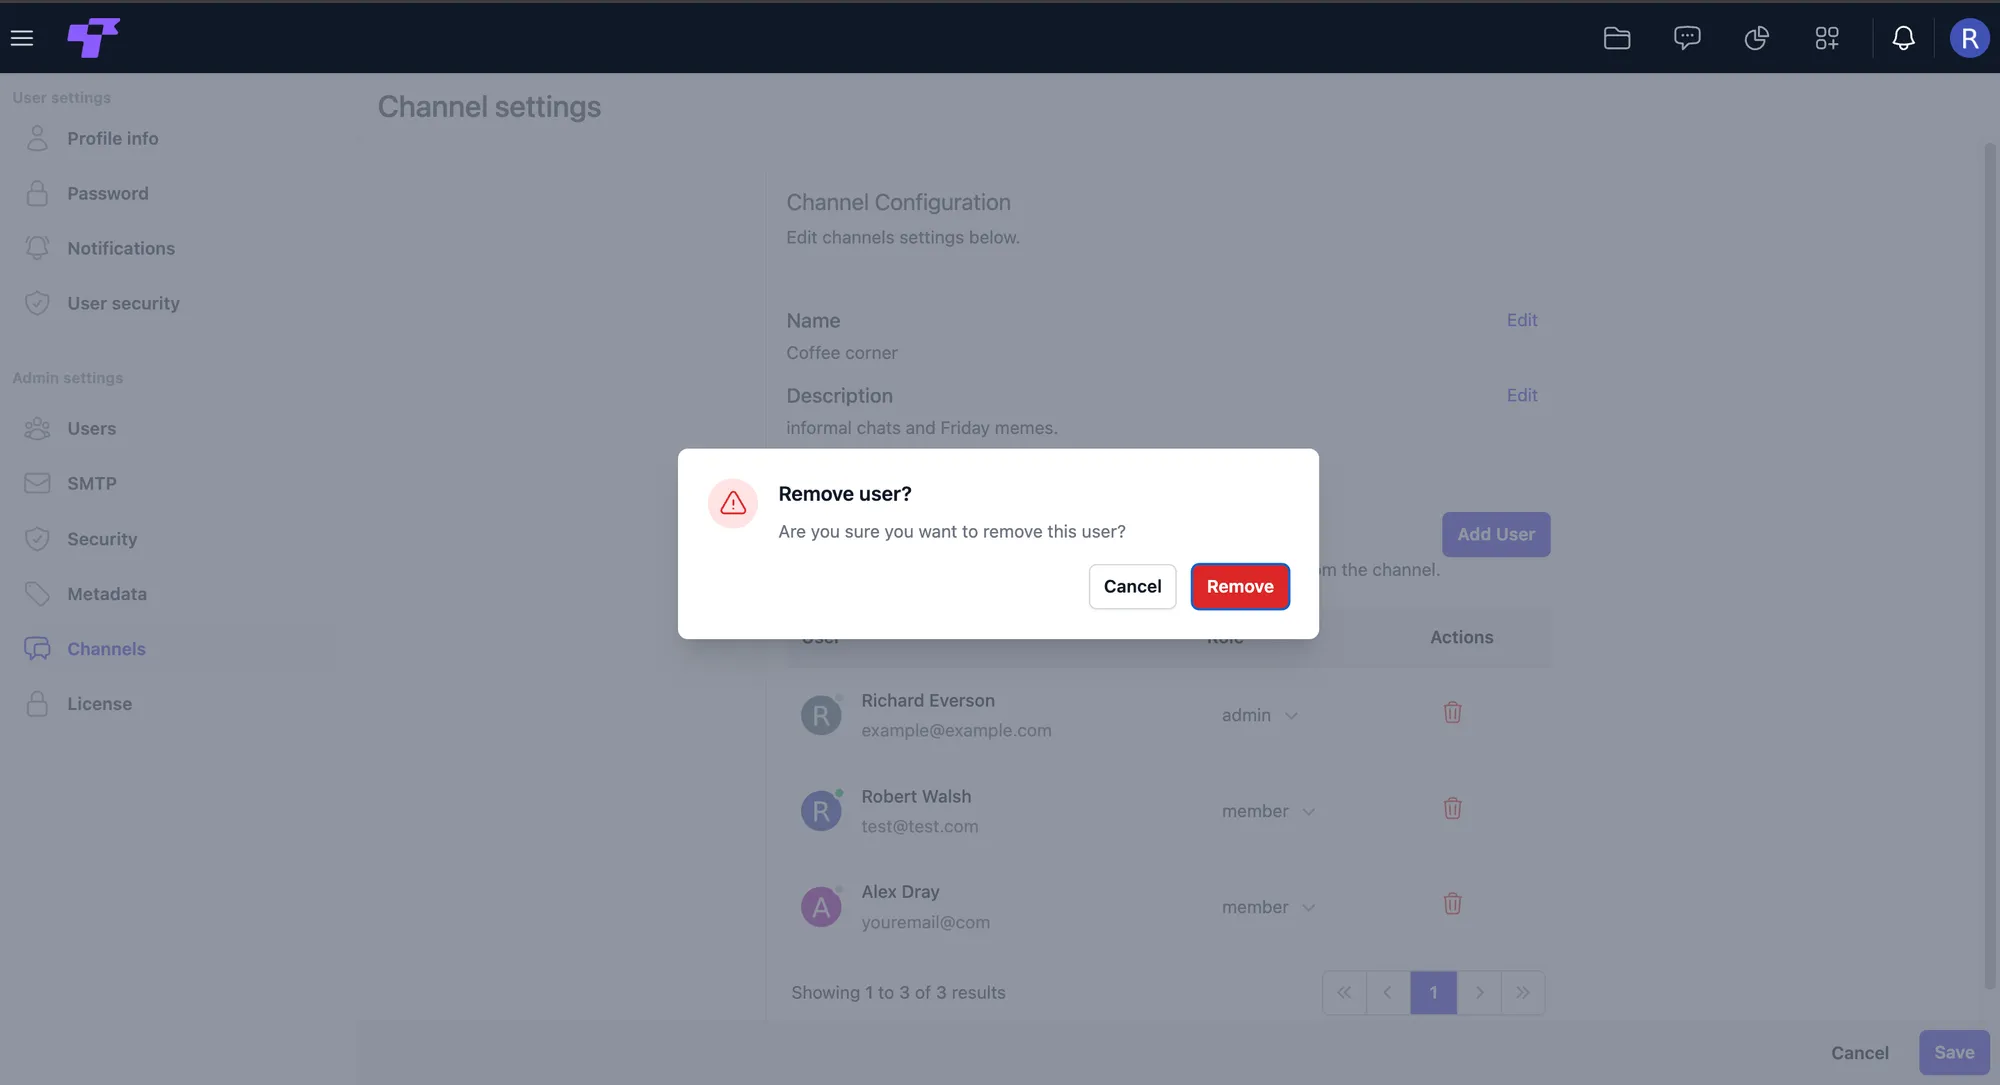
To remove a user, click the trash icon next to the user, then confirm by clicking "Remove".
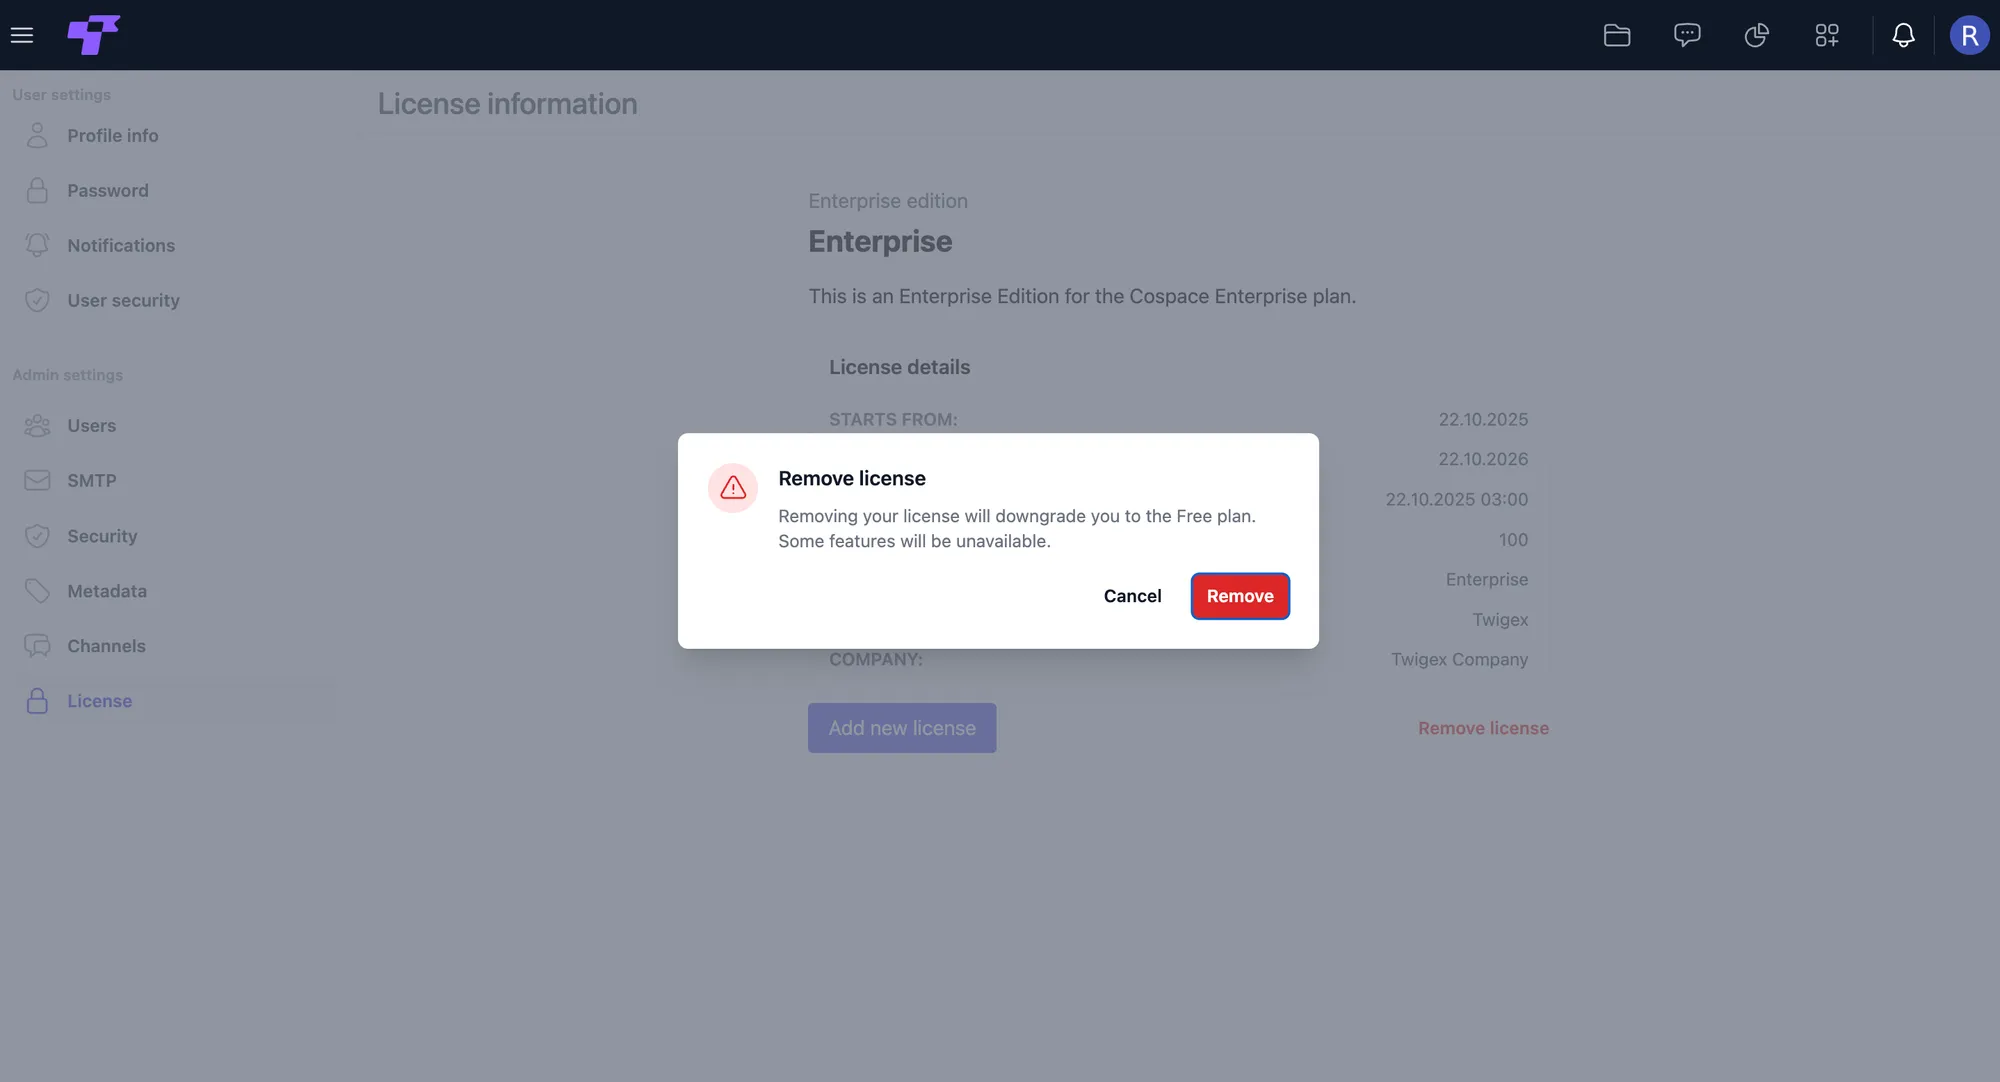
License
The License section provides an overview of your current Twigex plan, including activation dates, limits, and your company information. Administrators can review license details, add a new license key, or remove the current license.
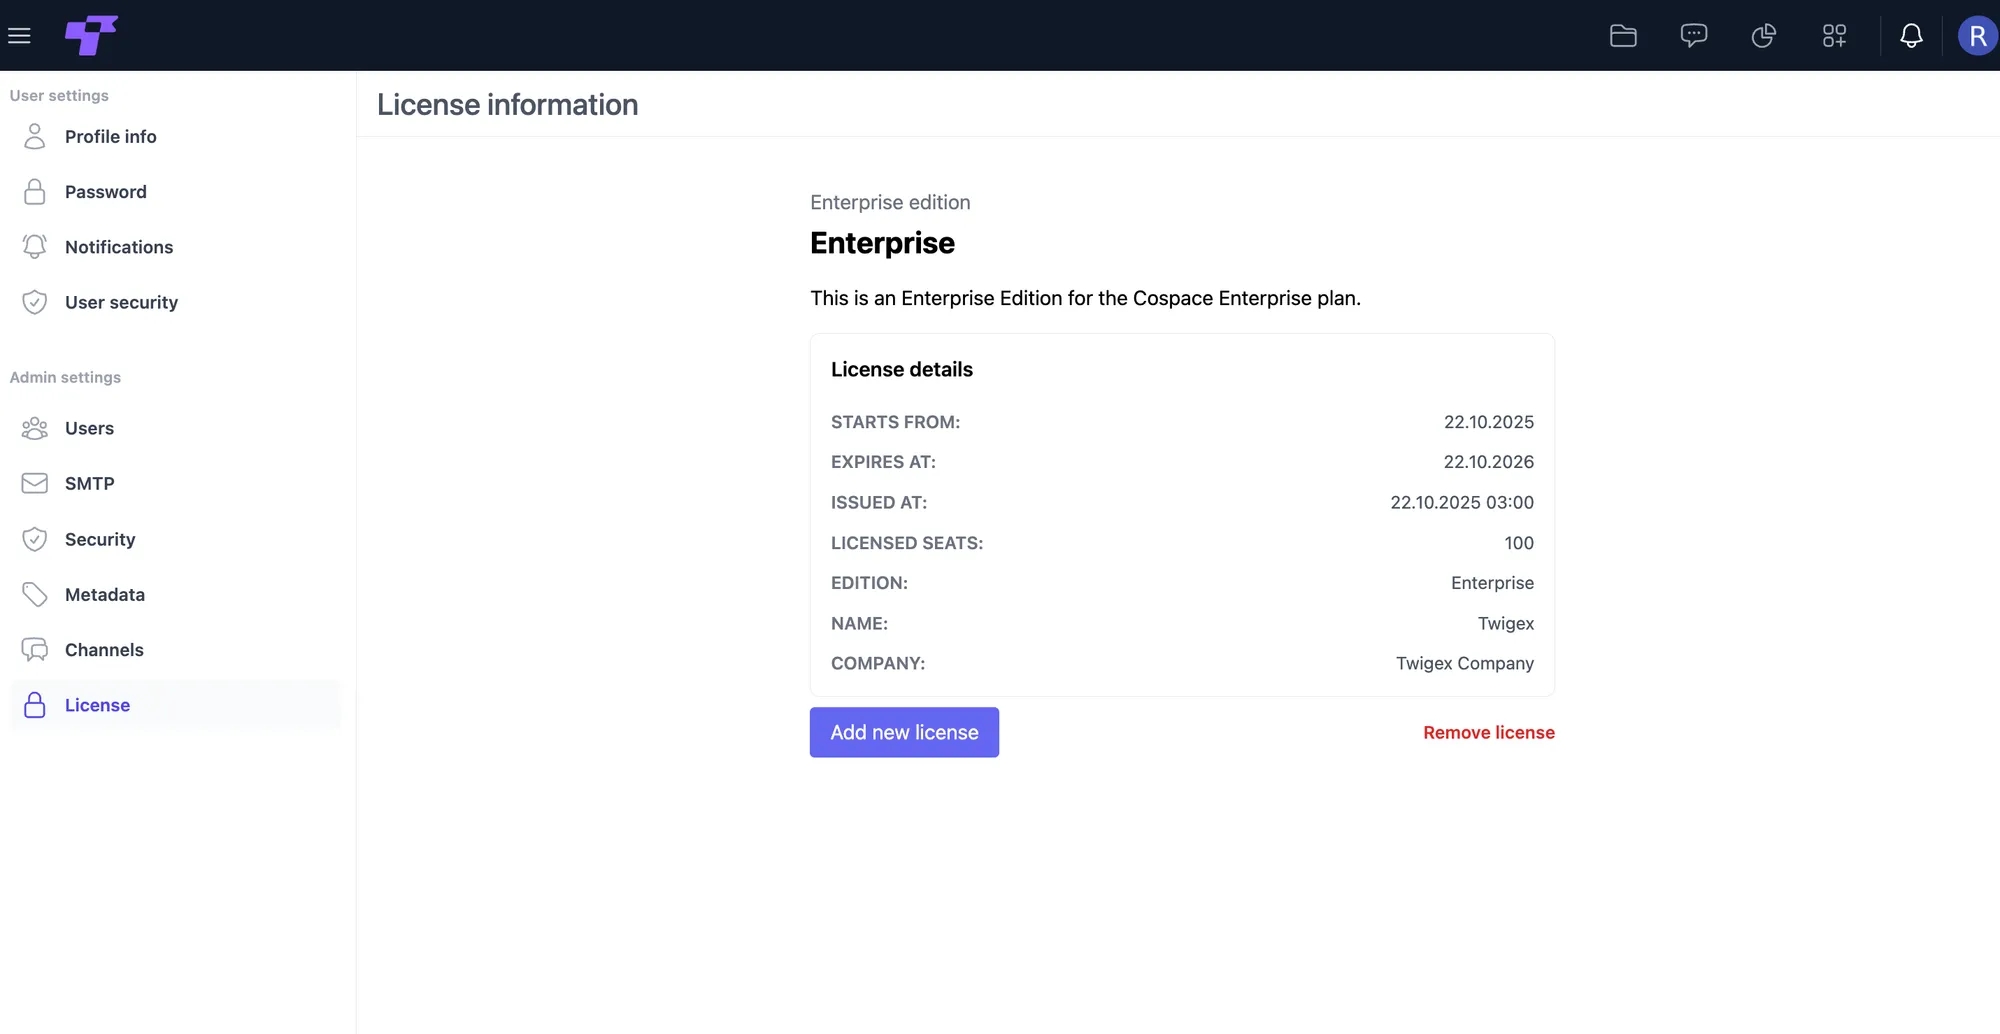
Removing the license switches your workspace back to the free Community Edition.
Without a license
- There is no limit on the number of users.
- The paid features are locked: role-based access control, user groups, custom roles, unlimited workspaces, AD/LDAP user sync, and single sign-on.