

Your first day in Twigex
On this page
For everyone on the team. About 15 minutes. Setting up Twigex for your organization? Start with Set up Twigex instead.
Sign in and set up your profile
Sign in with the password your admin gave you, or the one you set from the email. Then click your profile icon in the top-right corner, select Settings, and add a profile picture and the notifications you want.
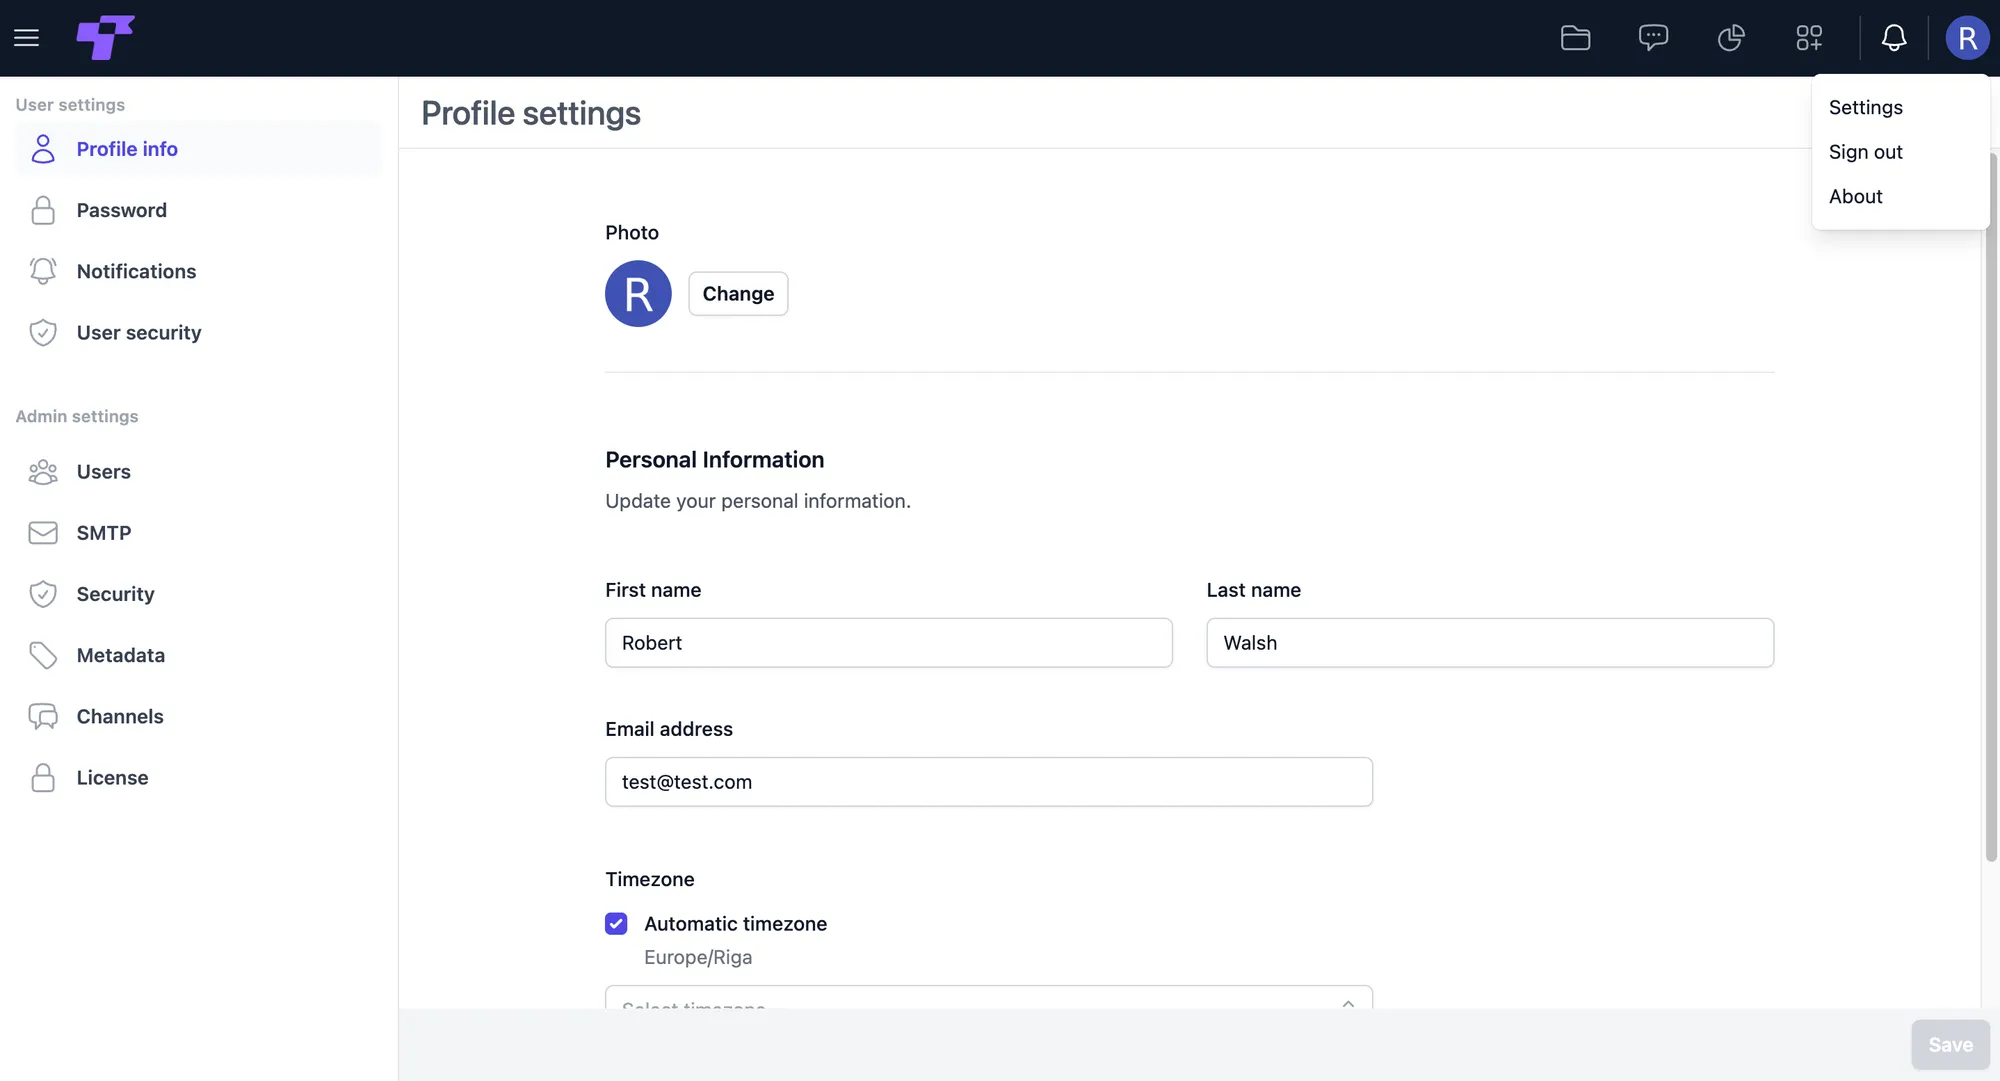
You're done when your name and photo show in the top-right corner.
Full guide: Profile info · Notifications
Upload and share files
- In Files, click + Upload new file and pick one or more files from your computer.
- To share one, click its share icon, choose the people in Assigned to, set what they're allowed to do, and click Share.
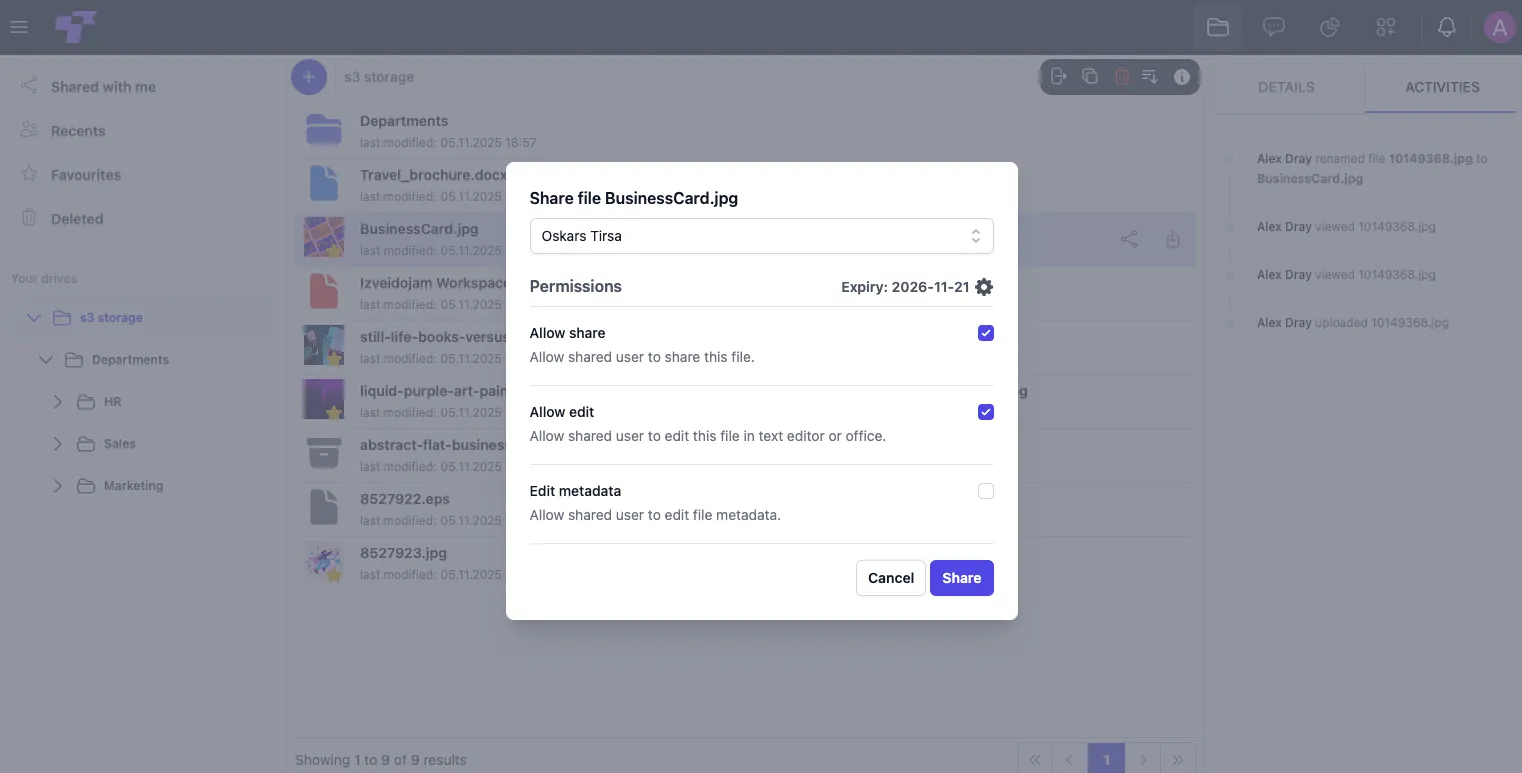
You're done when a teammate can open the file you shared.
Full guide: Uploading files · Share
Start talking
- In Chat, click Add channels in the sidebar and choose Create channel.
- Name it, and pick Public (anyone can join) or Private (invited members only).
- To message one person, click + next to Direct Messages and select them.
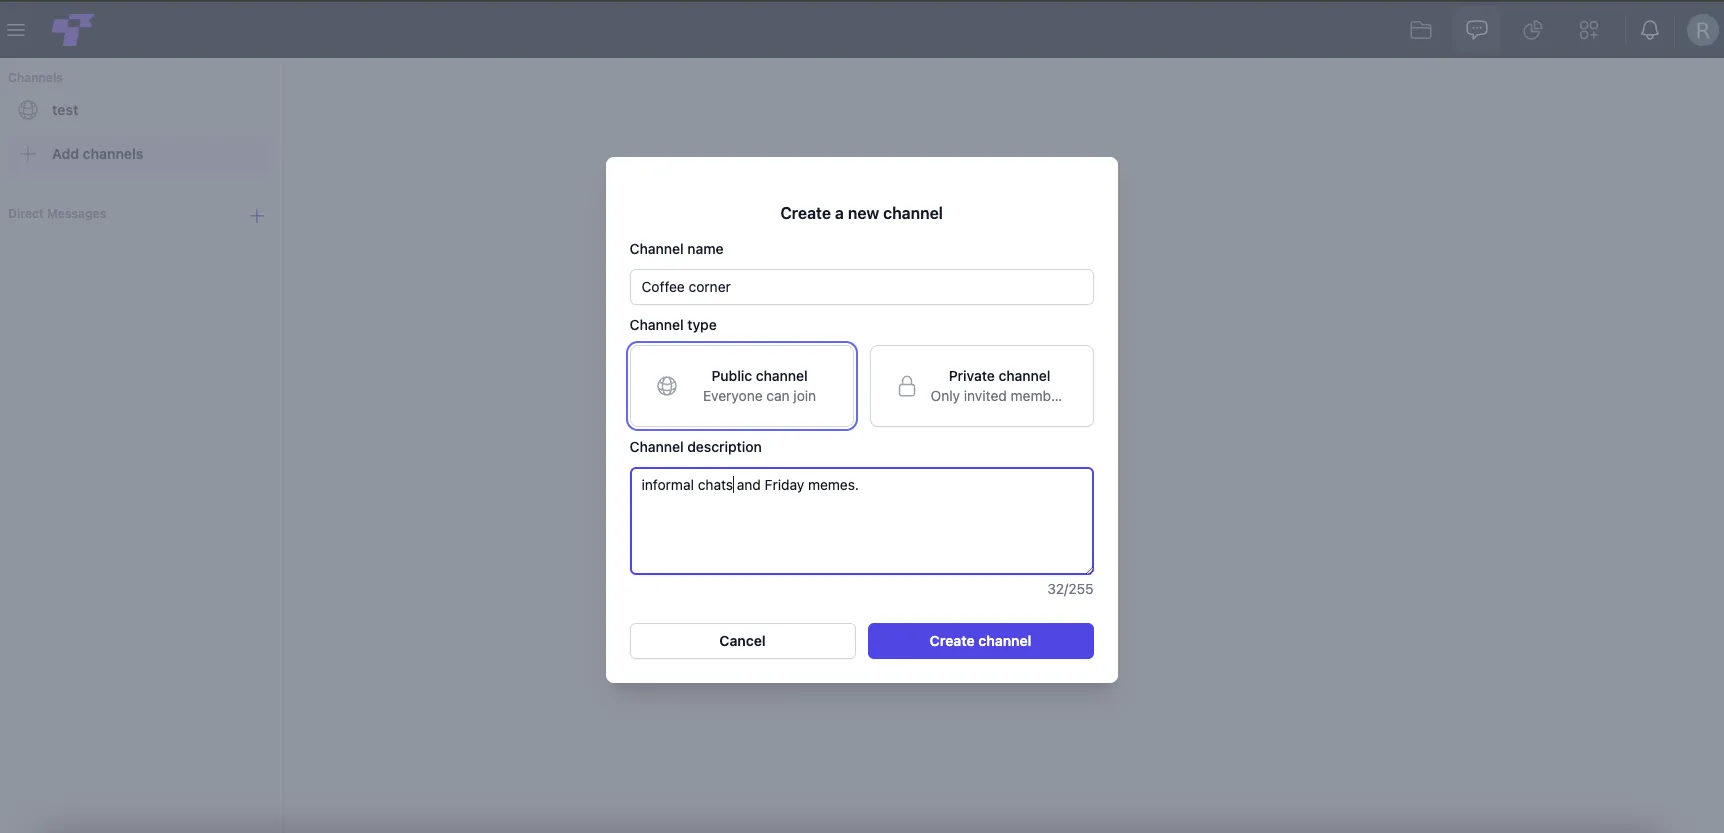
You're done when you've sent your first message.
Full guide: Create a new channel · Direct messages · Video chat
Create a workspace and add teammates
A workspace holds a team's folders, tables, and views.
- In Projects, click + Create workspace, enter a name (for example, Marketing), and click Create.
- Open Members, select the workspace, add your teammates, and click Add user(s) to workspace.
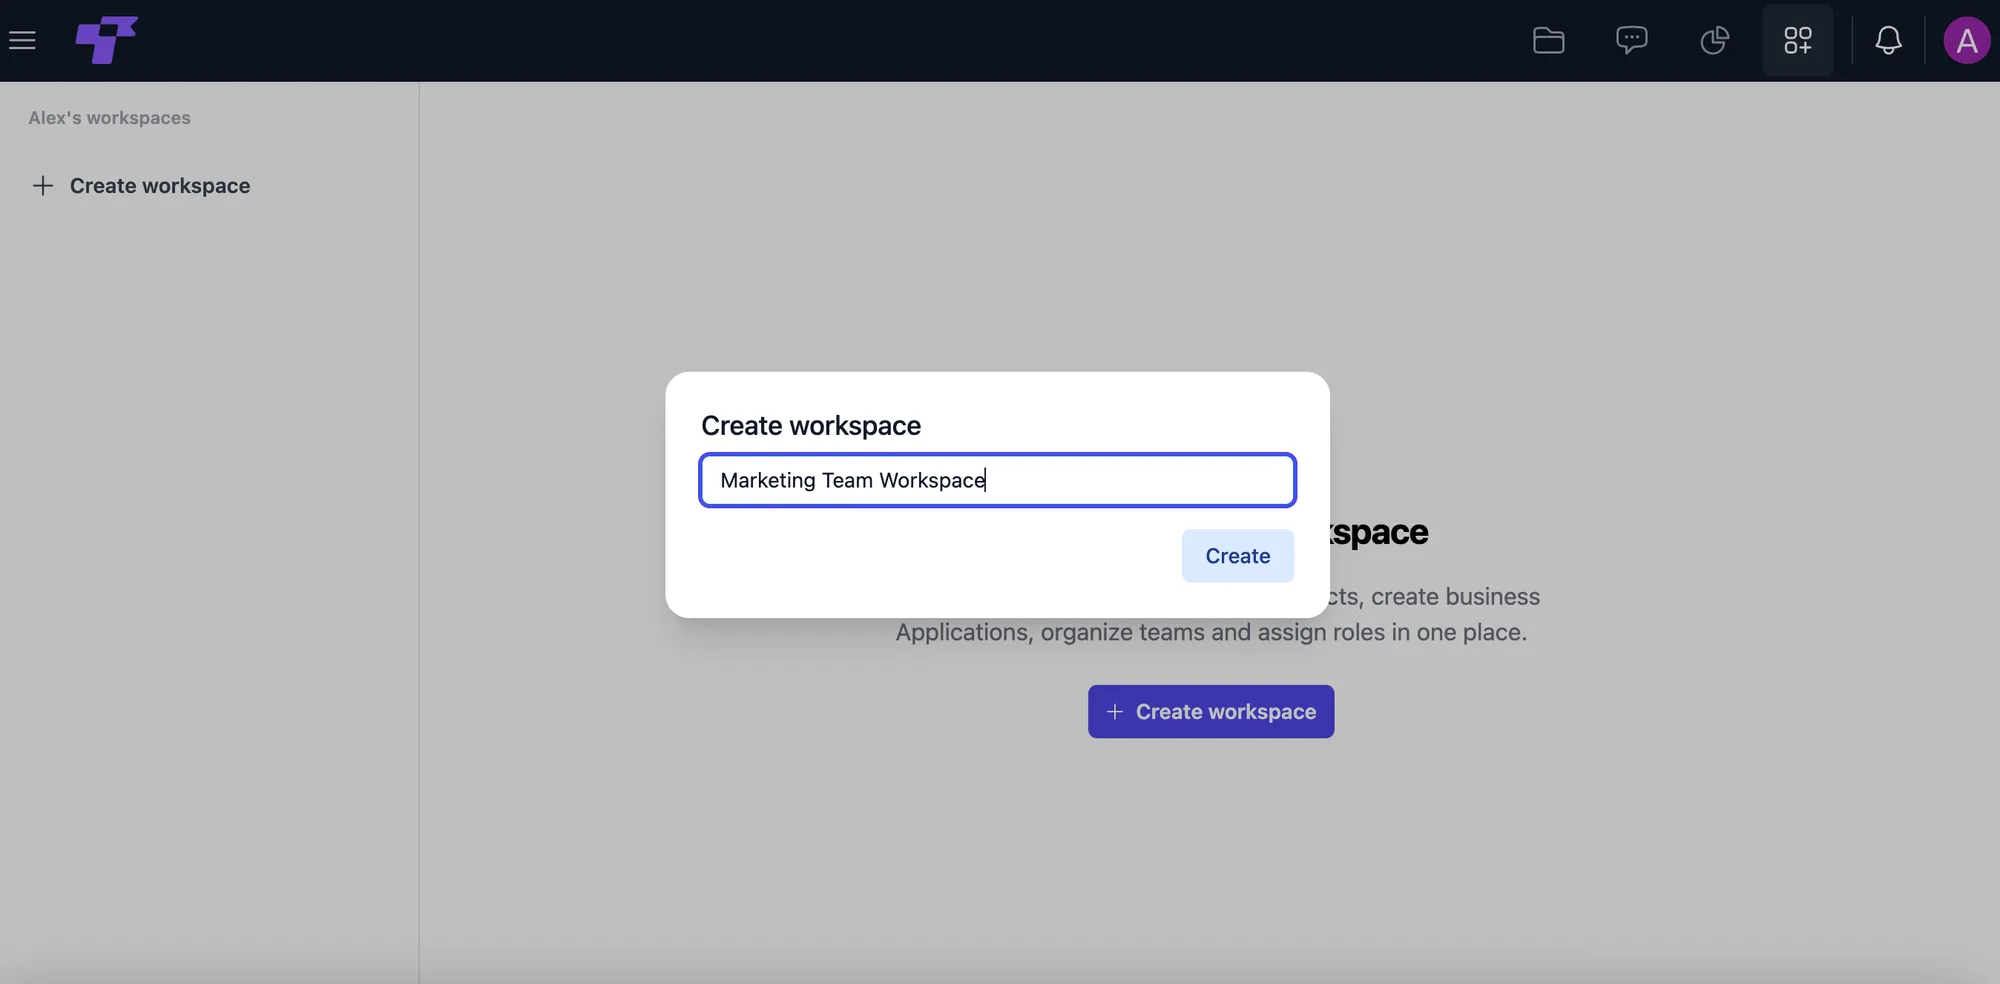
You're done when your teammates are listed under the workspace's members.
Full guide: Create a new workspace · Add users to a workspace
Create a folder and a table
Tables live inside folders, so create a folder first (for example, one per client or project). Then open it, click the green + button in the workspace header, select Create table, and give it a name.
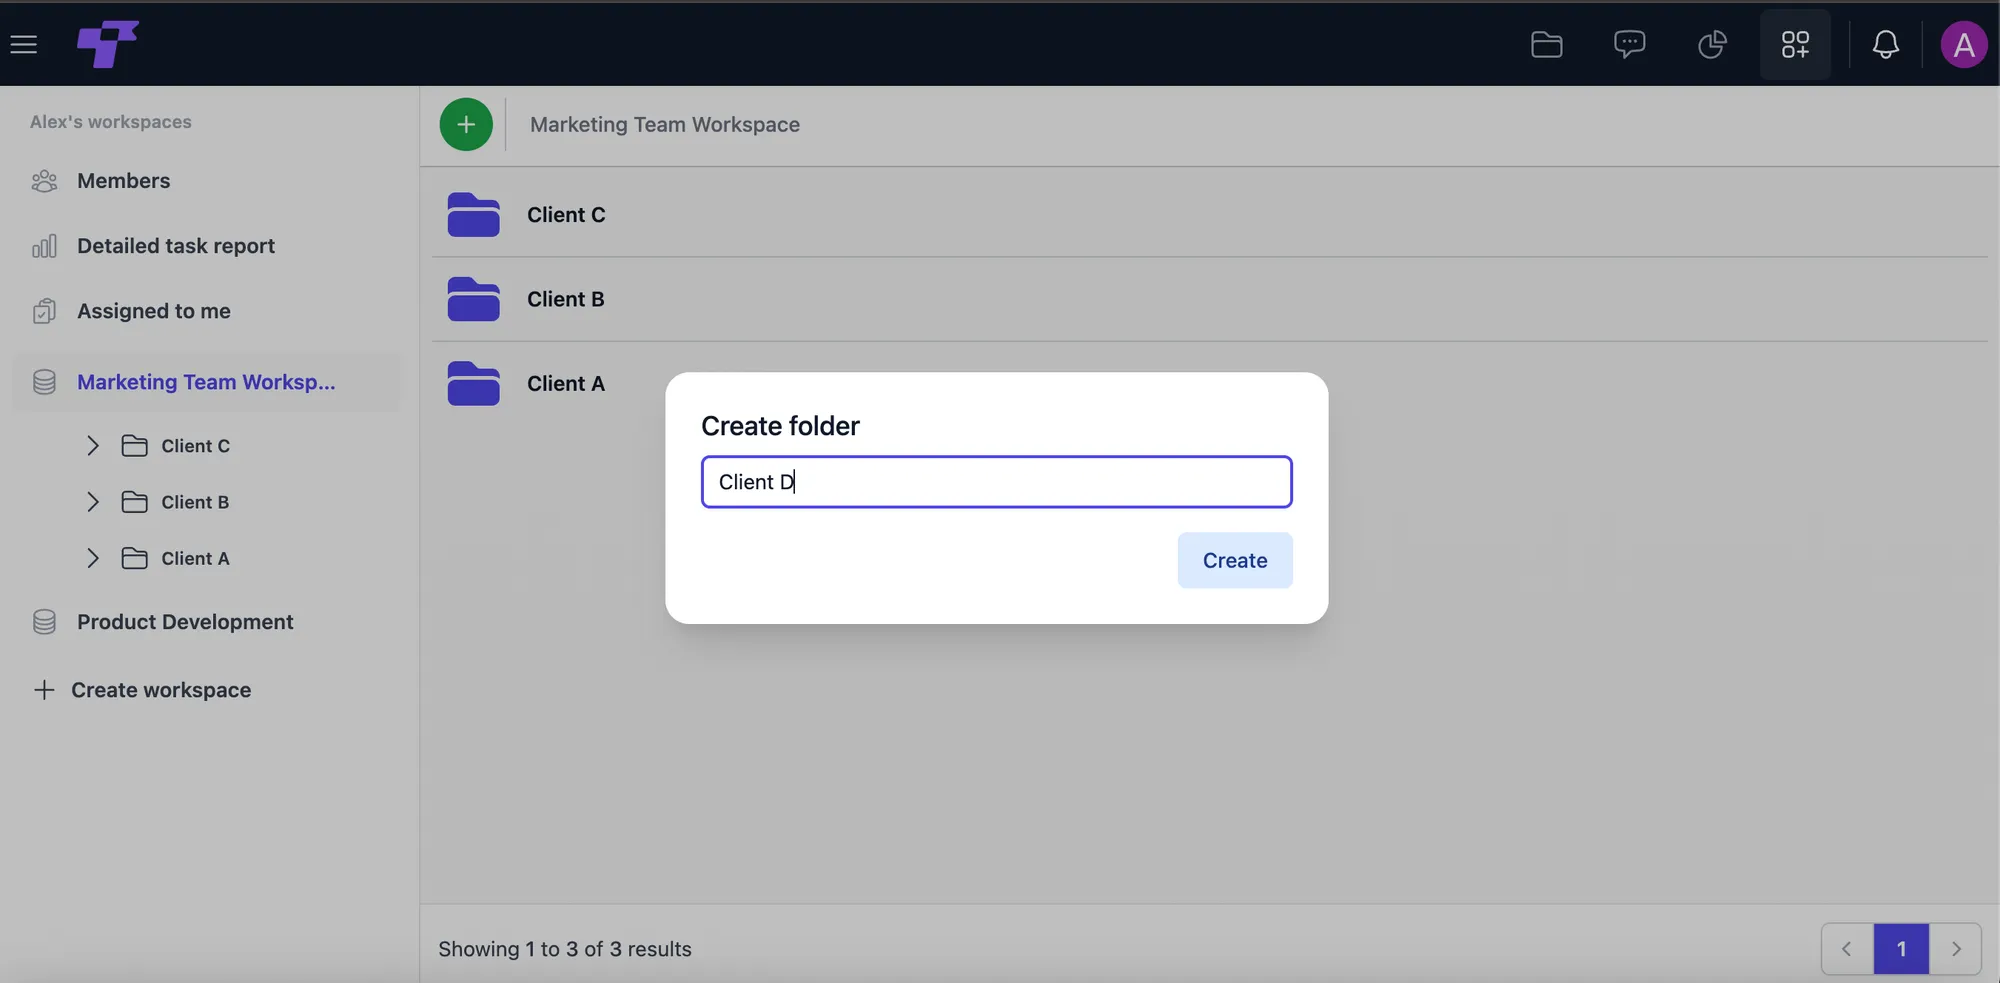
You're done when your new table opens, ready for tasks.
Full guide: Create a new folder · Creating a table
Add tasks and assign them
Add a few rows as tasks. Click the empty Assignee field to give each one an owner, and set a status such as To Do or In Progress.
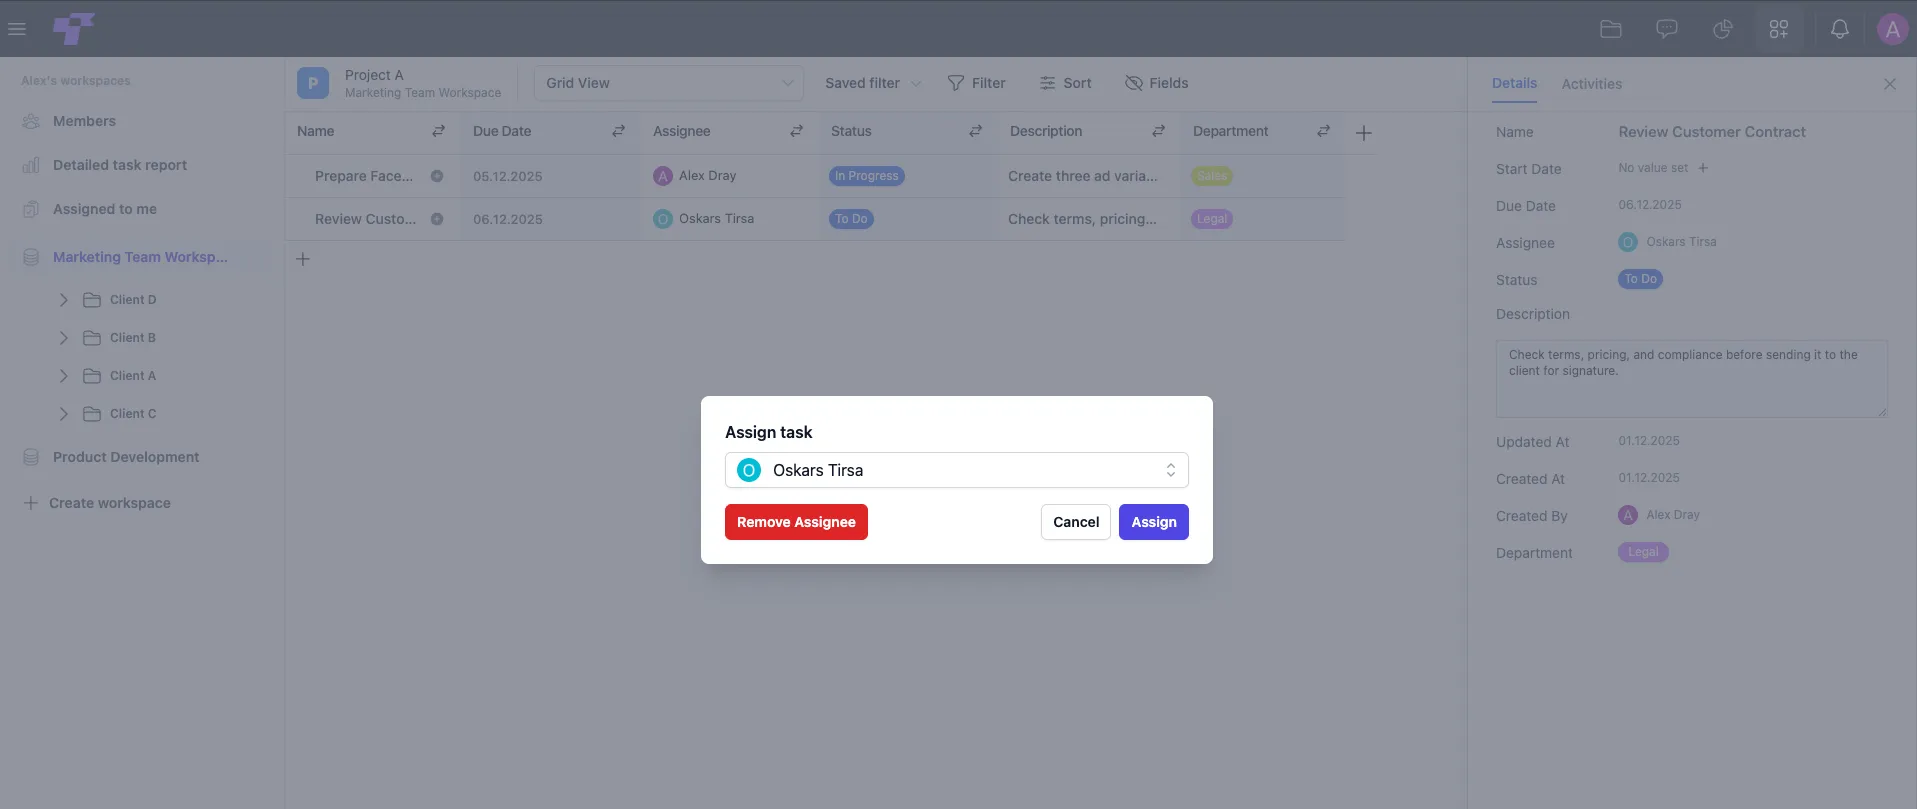
You're done when each task has an owner and a status.
Full guide: Assigning a task · Task status
See your tasks on a Kanban board
- Click the dropdown that says Grid View and select Kanban View.
- Choose Status as the group field.
- Name the view and click Create View.
Your tasks now appear in columns by status. Drag a task to another column to change its status.
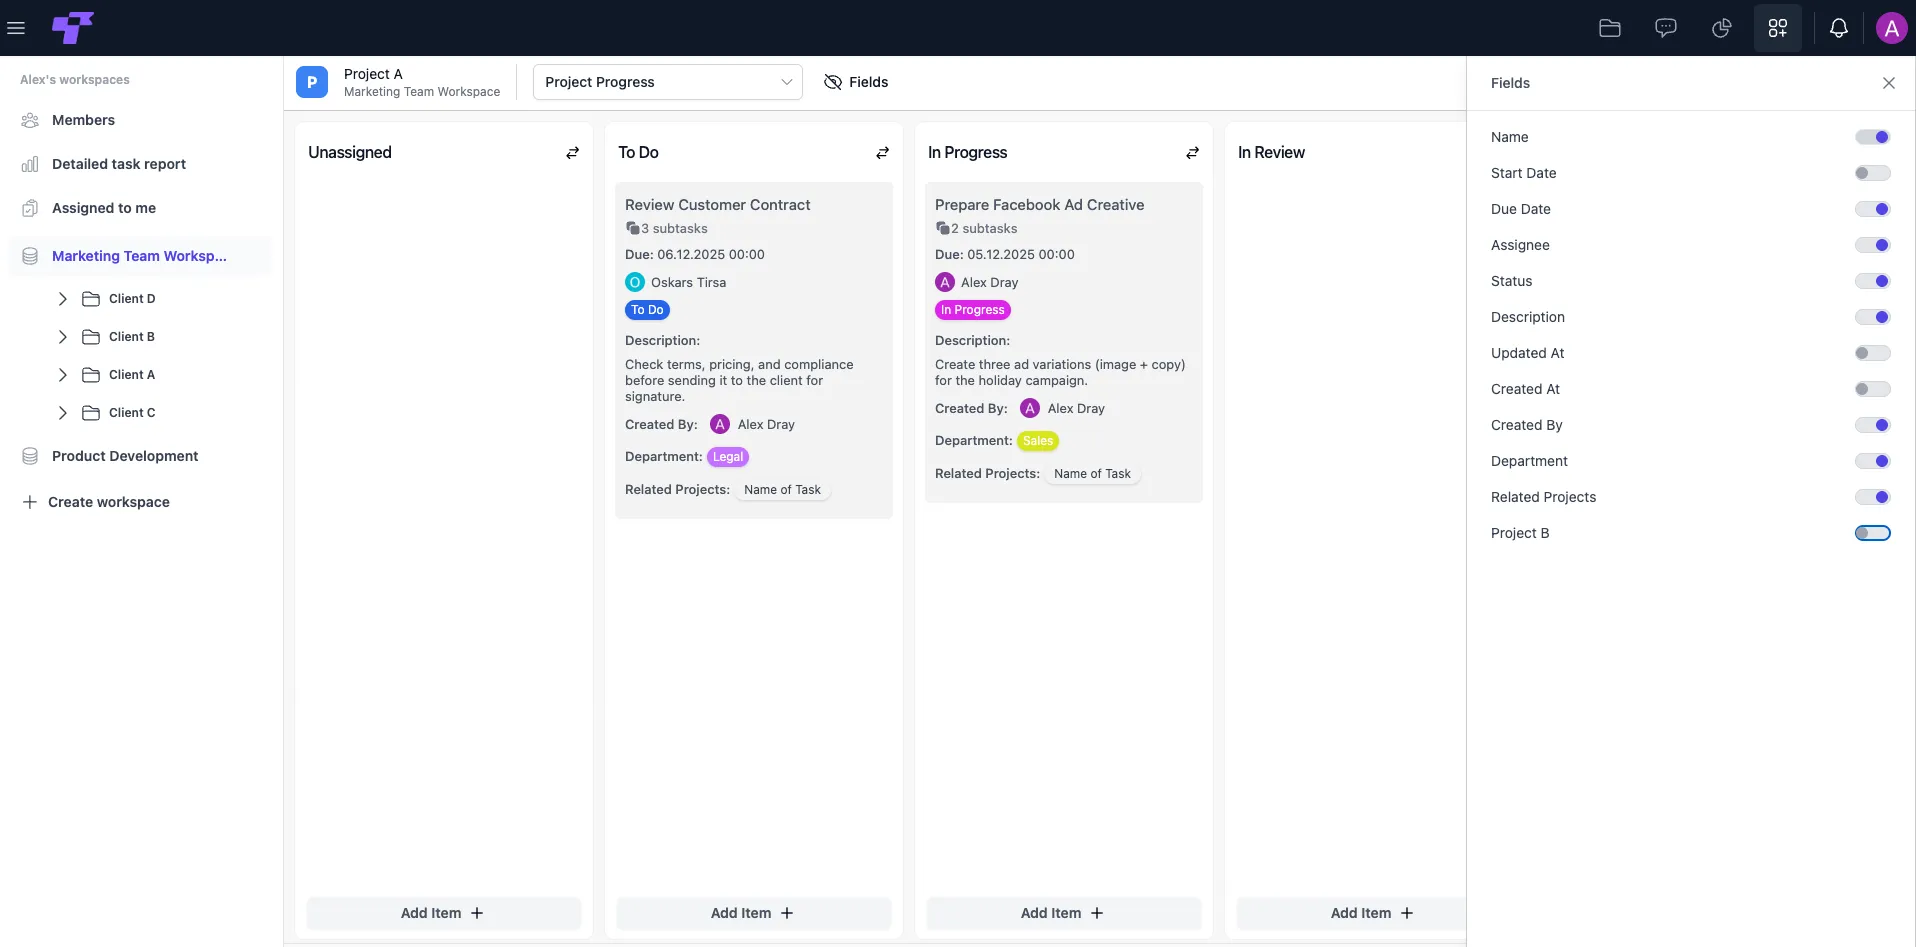
You're done when dragging a task changes its status.
Full guide: Creating a Kanban view
Build your first dashboard (optional)
If your team works with data, connect a database in Analytics, then create a chart and add it to a dashboard.
You're done when your dashboard shows your first chart.
Full guide: Set up a database connection · Creating a chart · Creating a dashboard
What's next
You've covered the basics. From here, explore each area in depth: Files, Chat, Apps & Projects, Analytics, and Settings. Stuck on something? Ask on r/twigex.