

Files
On this page
Overview
You can access your files from your computer, laptop, or mobile phone. All you need to do is log in to your Twigex account.
This section covers how to upload, organize, and manage files in Twigex. To access your files, click the folder icon in the main sidebar.

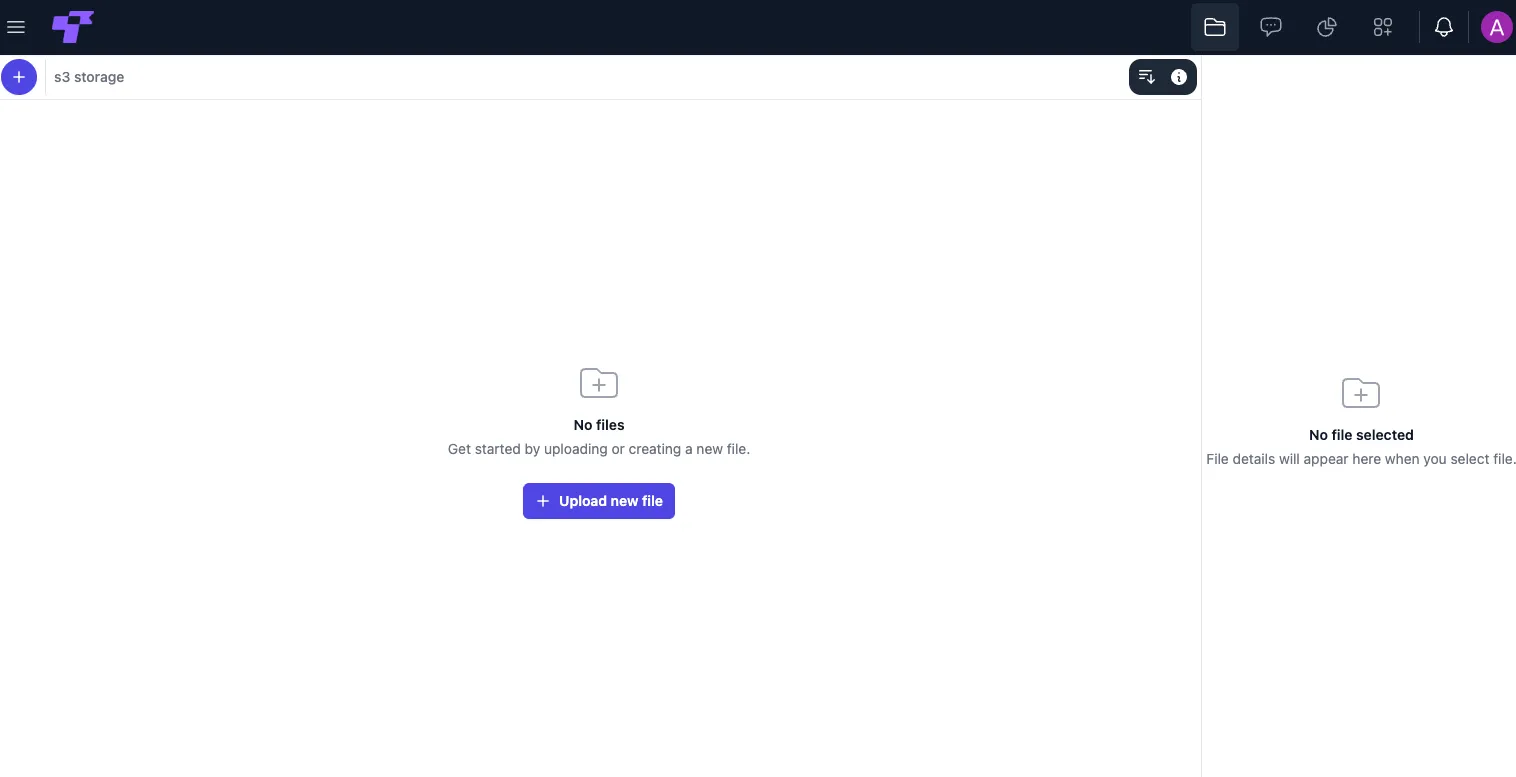
When you open Twigex Files, you'll see a simple layout for managing and organizing your files.
Click the three-line (☰) menu icon in the top-left corner to show or hide the sidebar for a cleaner workspace view.
Sidebar
Hidden sidebar
Open sidebar
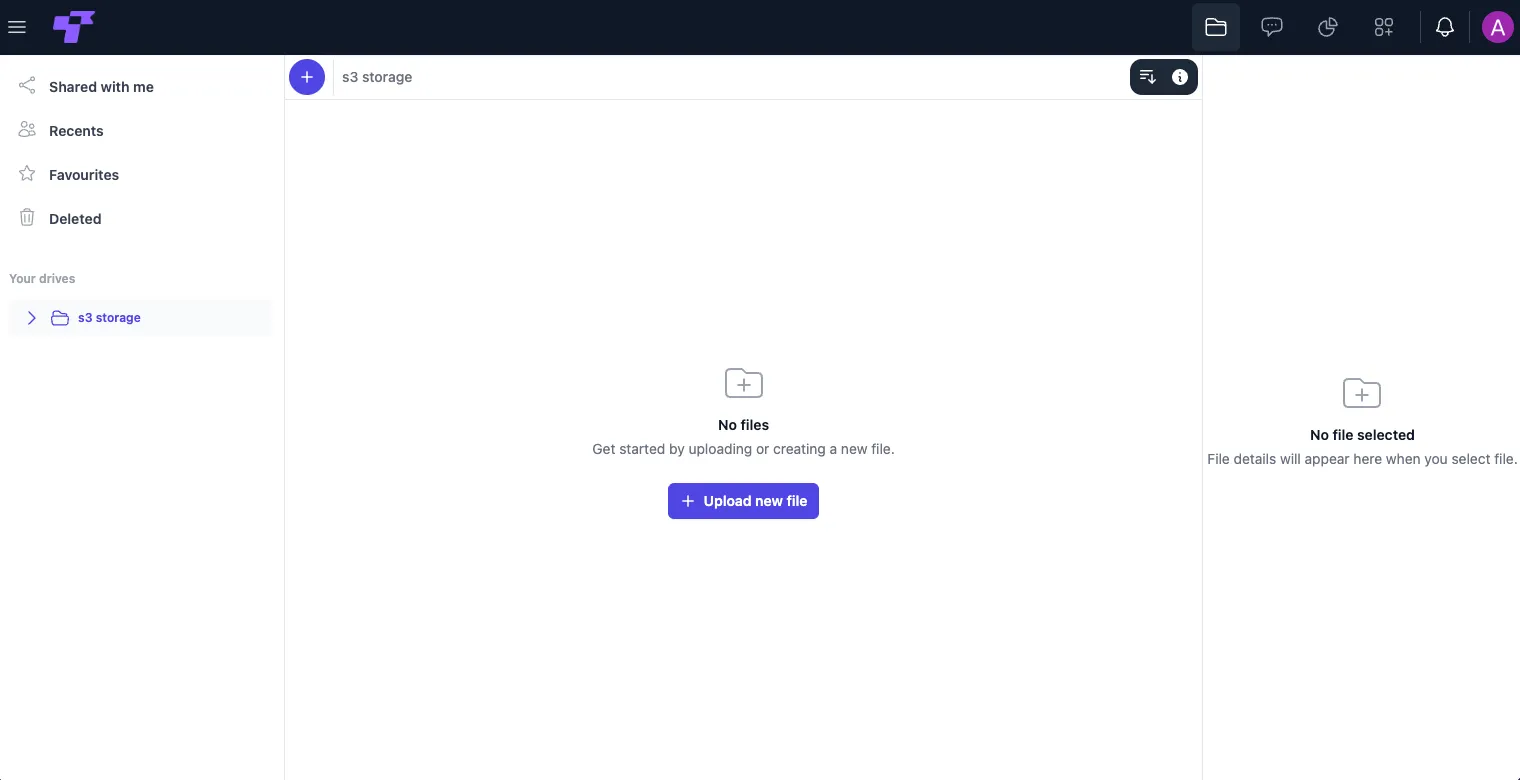
Here's what each section in the left sidebar does:
- Shared with me: Shows files and folders shared with you by others.
- Recents: Lists files and folders you recently opened or worked on.
- Favorites: Stores files and folders you've marked as important for quick access.
- Deleted: Contains files you've deleted, where you can restore or permanently remove them.
Uploading files
Initial upload
If your drive is empty, click the "+ Upload new file" button in the center of the screen.
- A file selection window will open on your device.
- Select one or multiple files you want to upload from your computer.
- Click Open to complete the upload. (The exact button label may vary by operating system — for example, Choose or Upload instead of Open.)
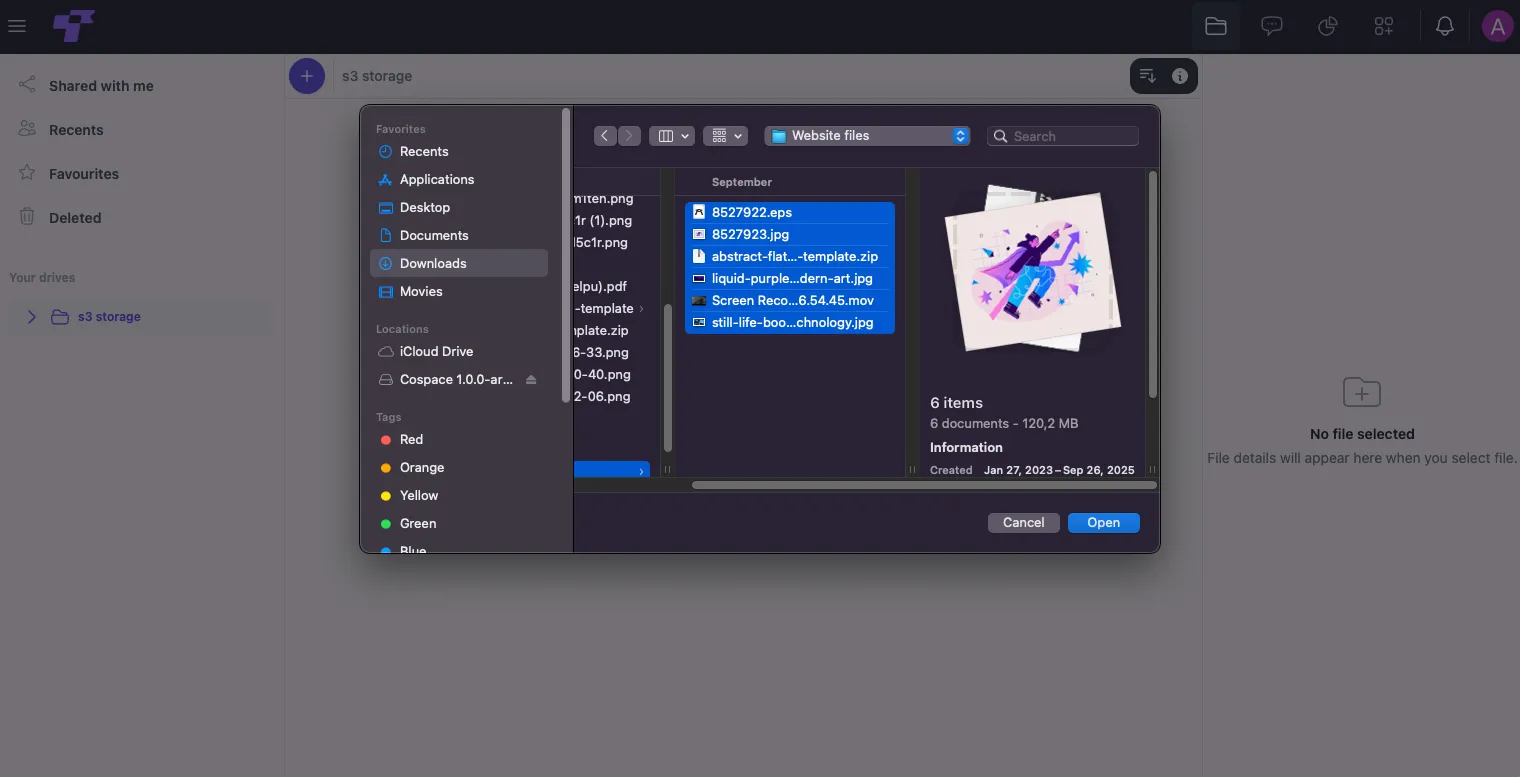
You can upload as many files as you need in one go.
Create or upload new files
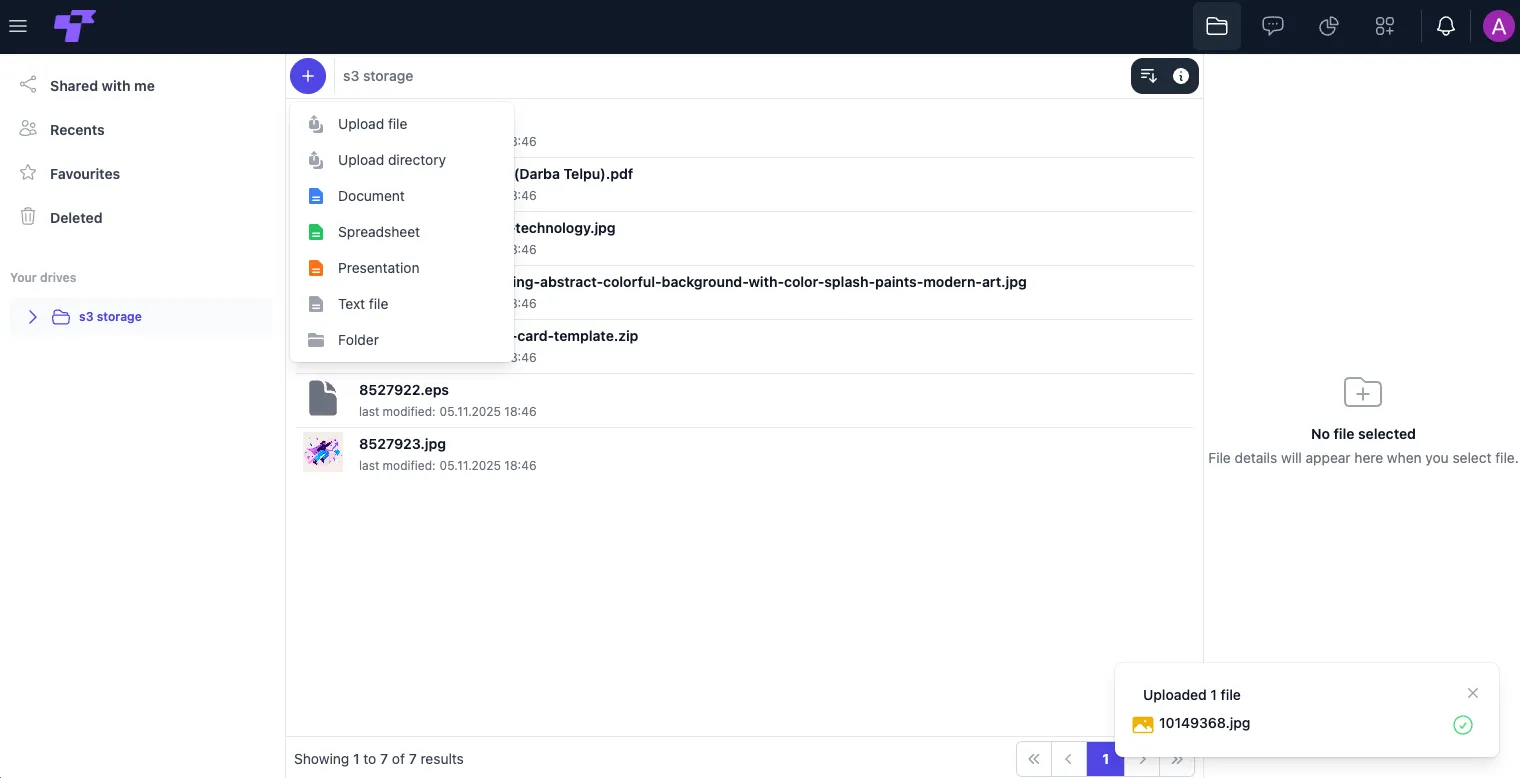
- Click the + button at the top to open the dropdown menu with the following options:
- Upload
- Upload File: Upload individual files from your computer.
- Upload Directory: Upload an entire folder and its contents.
- Create
- Document: Create a new word-style file directly within Twigex.
- Spreadsheet: Create a new spreadsheet file.
- Presentation: Create a presentation file.
- Text File: Create a plain text file.
- Folder: Create a new folder to organize your files.
- Upload
- Select the file type you want to create (e.g., Document, Spreadsheet, Presentation, etc.), then follow the on-screen prompts. For example, when creating a new file, you'll be asked to enter a name and then click Create to confirm.
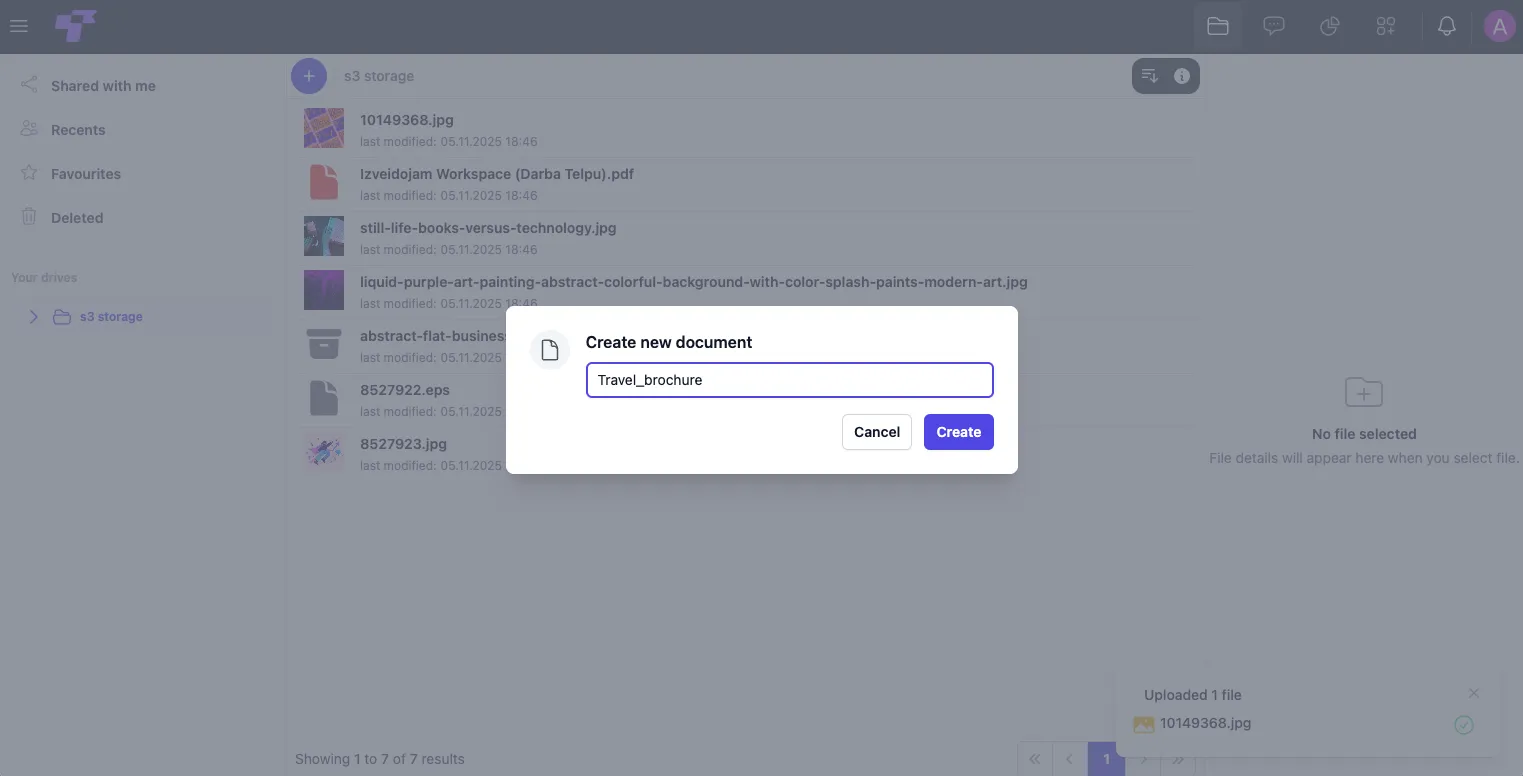
- Enter the file name and click Create to confirm.
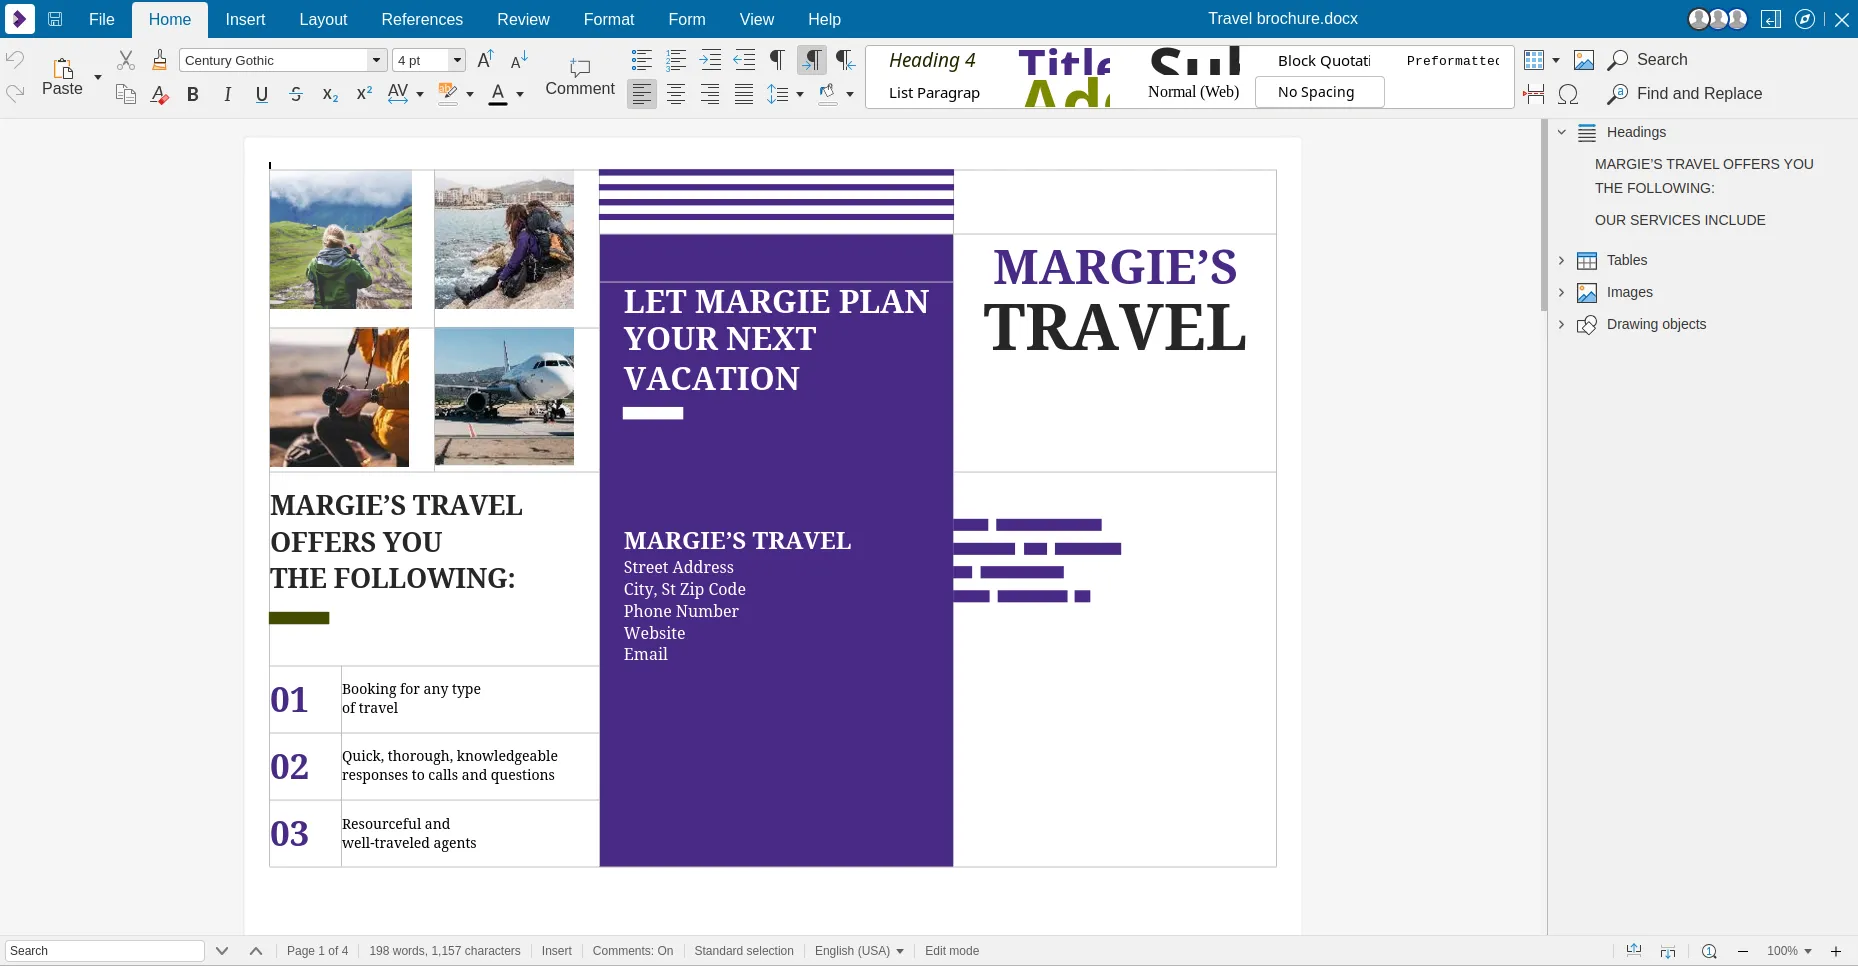
To exit the document editor and return to the files section, click X in the top-right corner of the editor.
Your document is automatically saved, so you don't need to manually save changes.
File controls
To access file controls, right-click the file you want to manage.
You can select all files at once using the Select All option in the top-right of the file list, or by holding right-click and dragging.
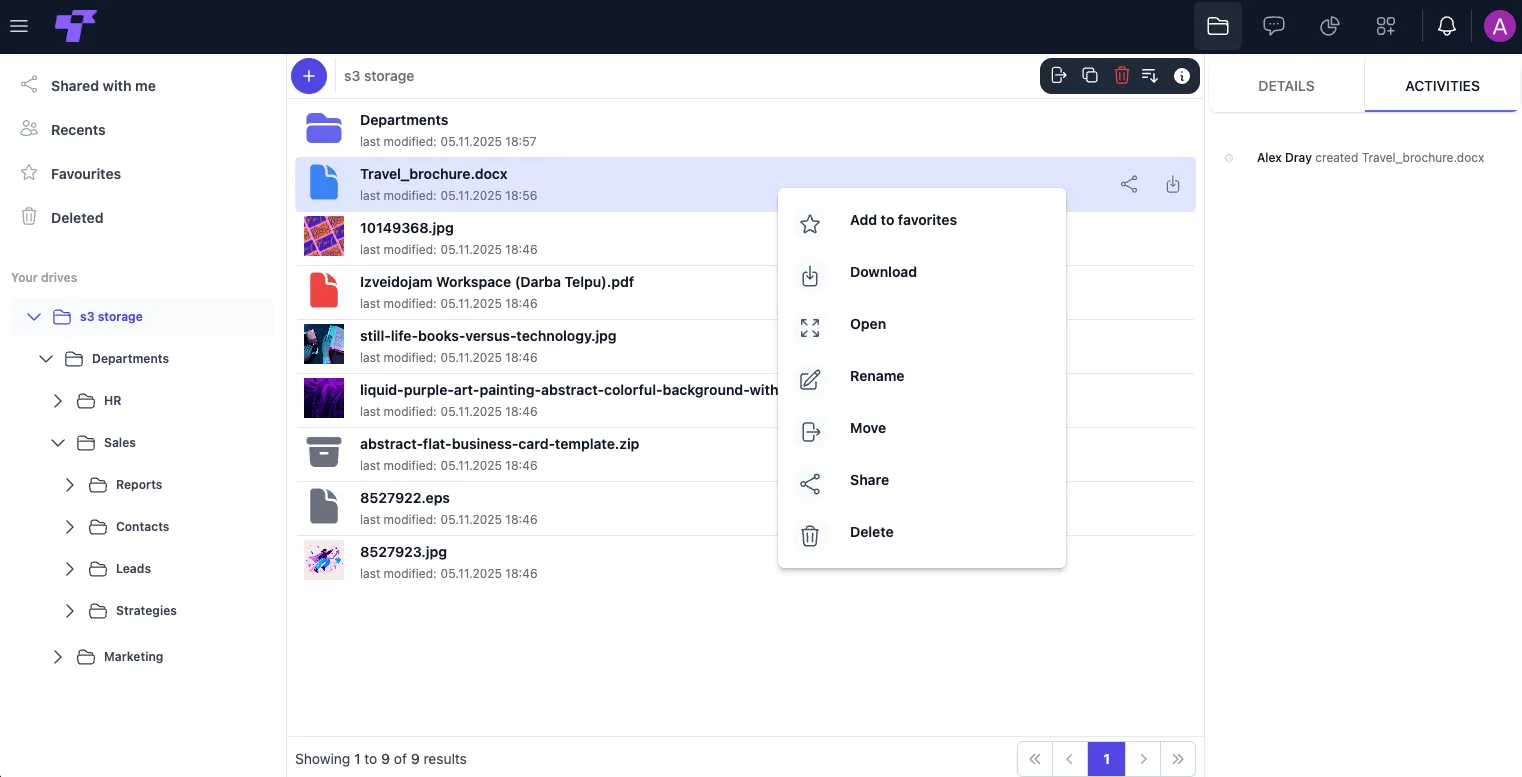
Add to favorites
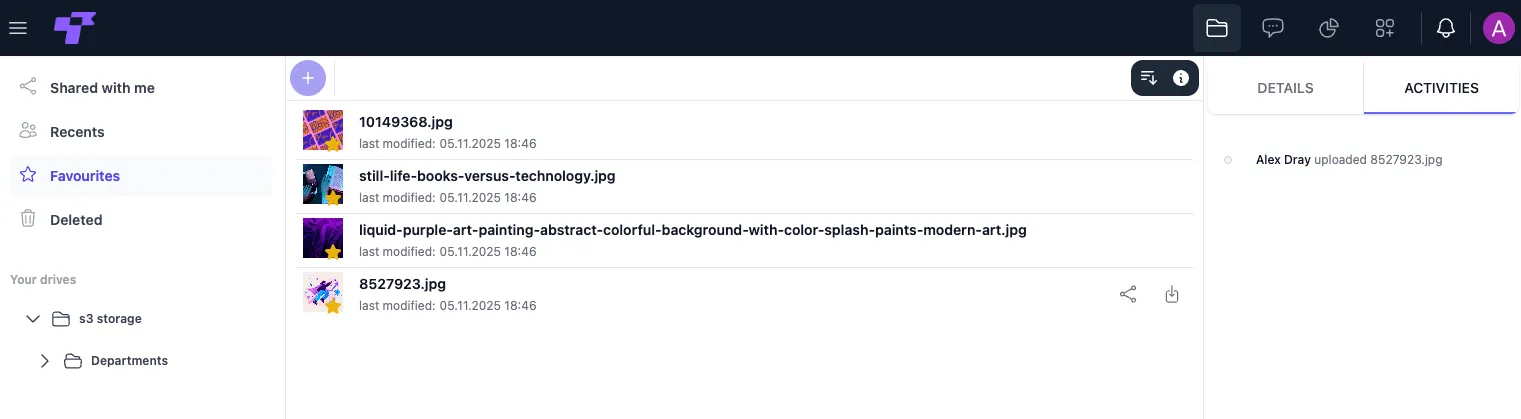
Click ⭐ Add to favorites to mark a file as a favorite. You can quickly find all your favorites in the Favorites section of the left sidebar.
Download
Click Download to save a copy of the file to your device.
 You can also click the download icon, located on the right side of every file in your Files dashboard.
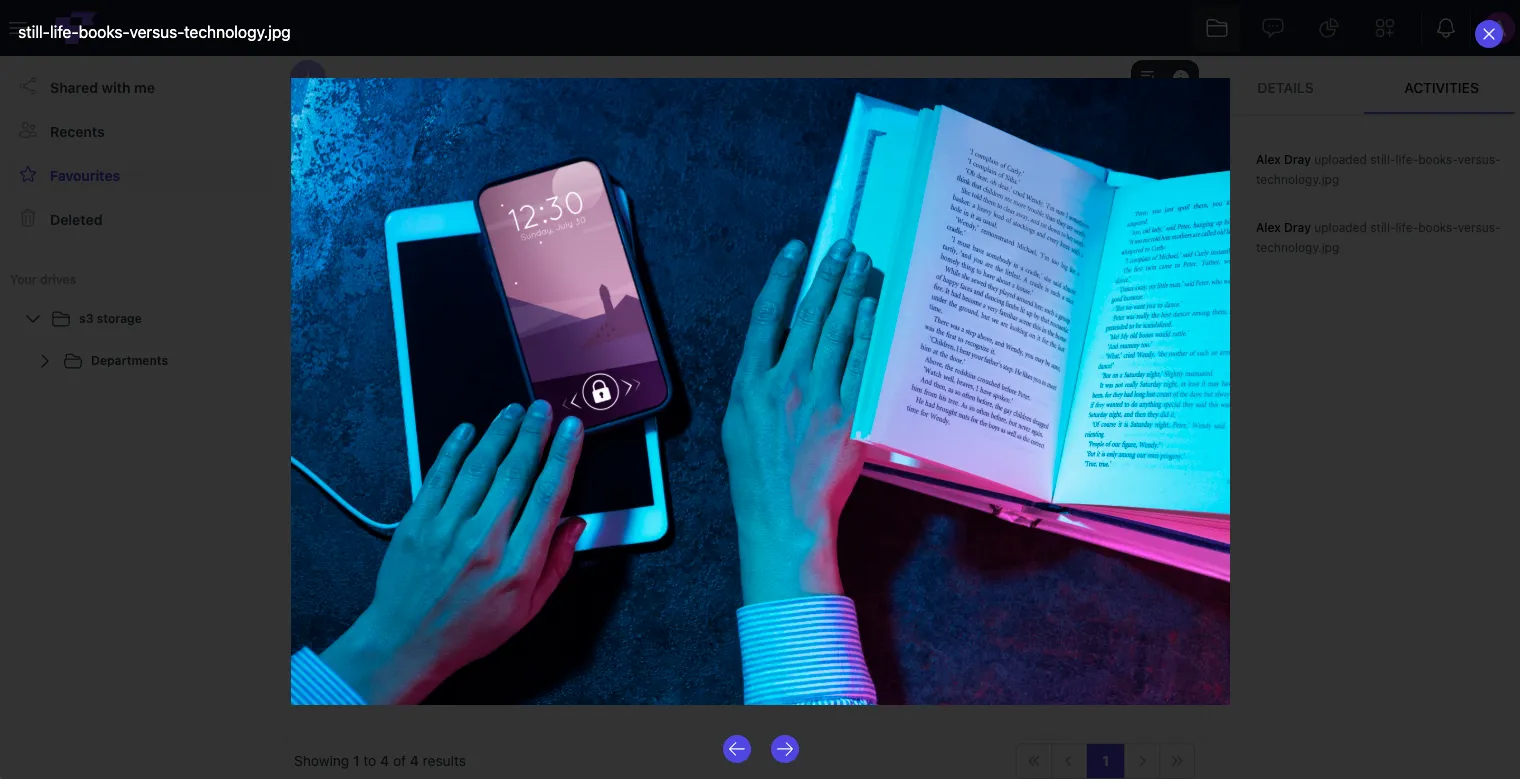
Open
Click Open, or double-click the file, to open it. You can edit the file inside Twigex or simply preview it.
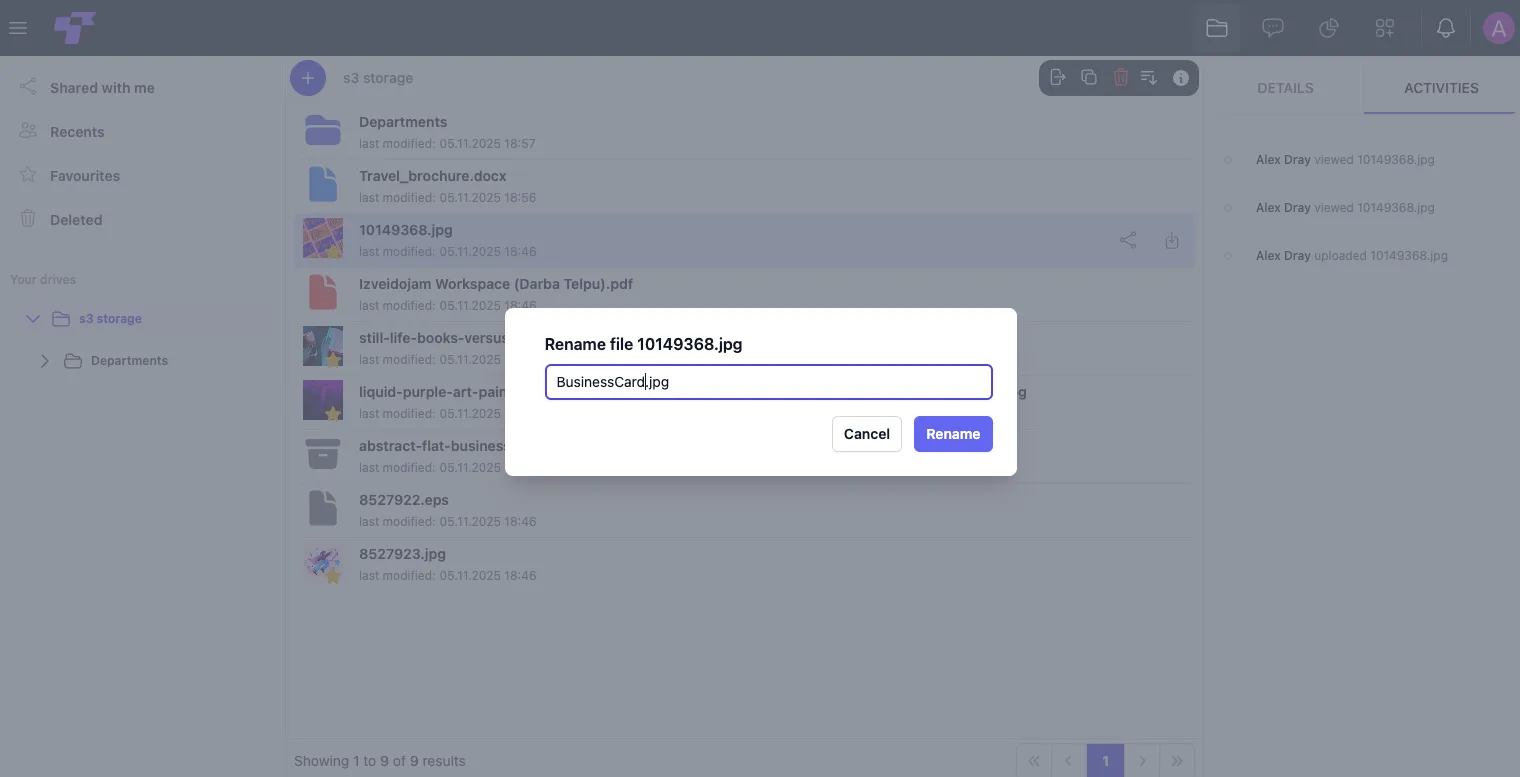
Rename
Select Rename to change the file name. Enter the new name and click Rename to save your changes.
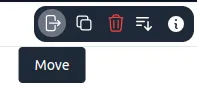
Move
There are two ways to move files:
Using the Move button
- Click Move to relocate the file.
- Navigate through the available folders and select the target location.
- Click Move to finalize the action.
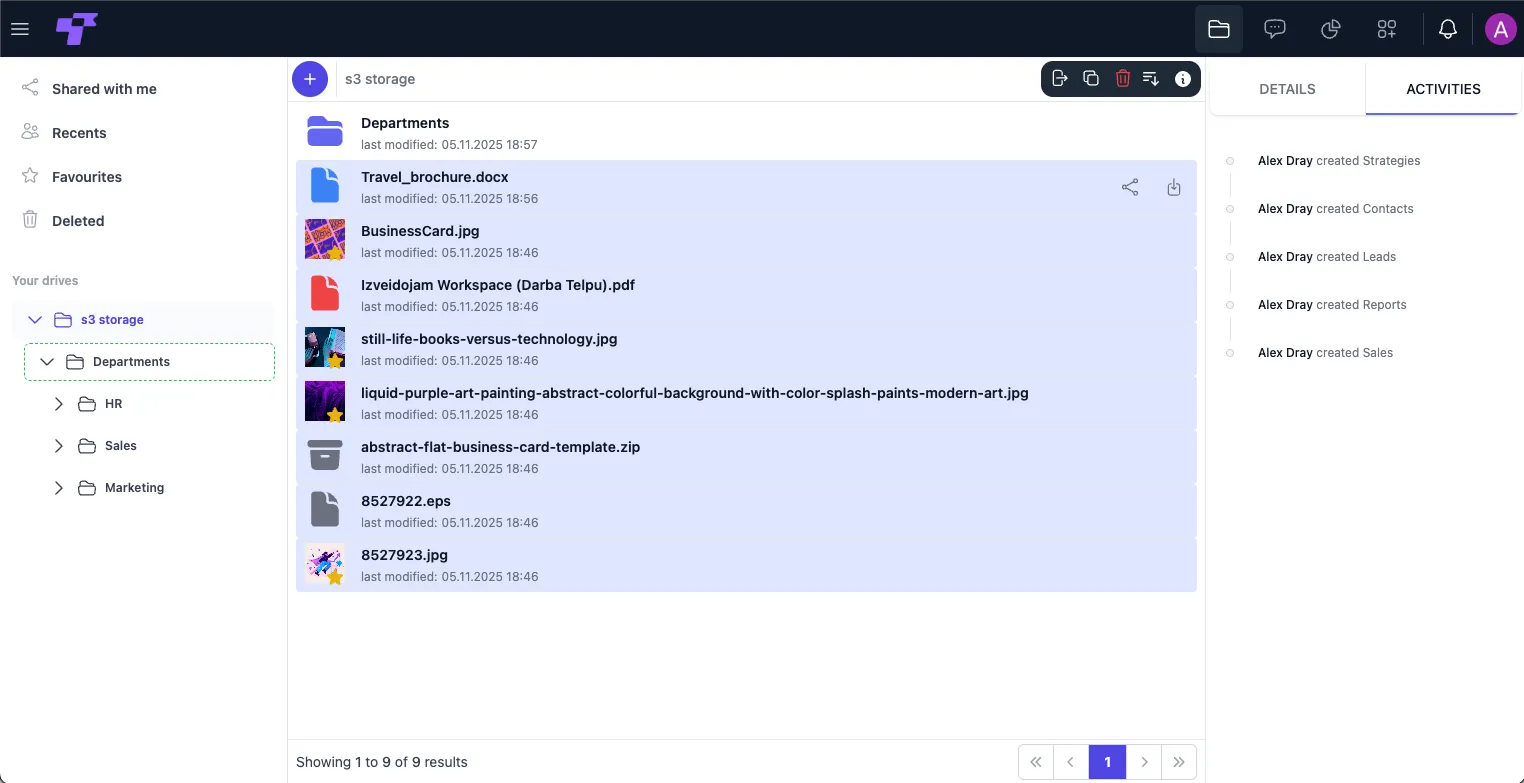
You can also use the Move button in the top-right corner to move selected files.
Hold down the Ctrl (Windows/Linux) or Command (Mac) key to select multiple files one by one.
Using drag and drop
- Click and hold the mouse button, then drag over multiple files to select them (or use Ctrl/Command to select individual files).
- Drag the selected file(s) and drop them into the desired folder.
You can also choose to drop them in the folder tree view.
Remember, you can also move a folder inside another folder!
Share
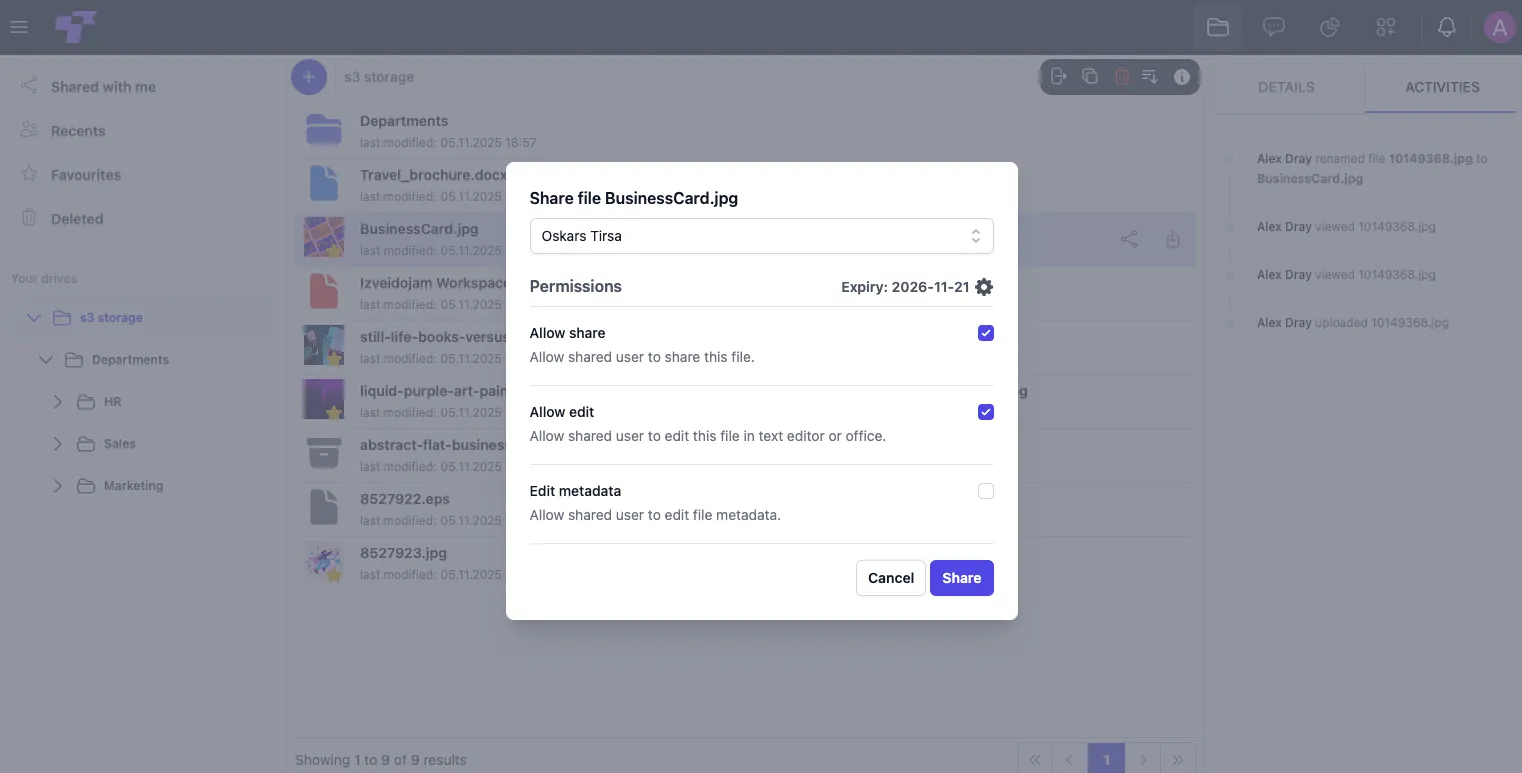
- Click the share icon. A pop-up window will appear.
- Select the users you want to share the file with from the Assigned to dropdown menu.
- Set an expiry date (optional) — choose a date if you want access to expire automatically.
- Set permissions:
- Allow share – Enable users to share the file with others.
- Allow edit – Allow users to edit the file in a text editor or office tool.
- Edit metadata – Grant permission to modify file metadata.
- Click Share to apply the settings, or click Cancel to discard the changes.
Delete
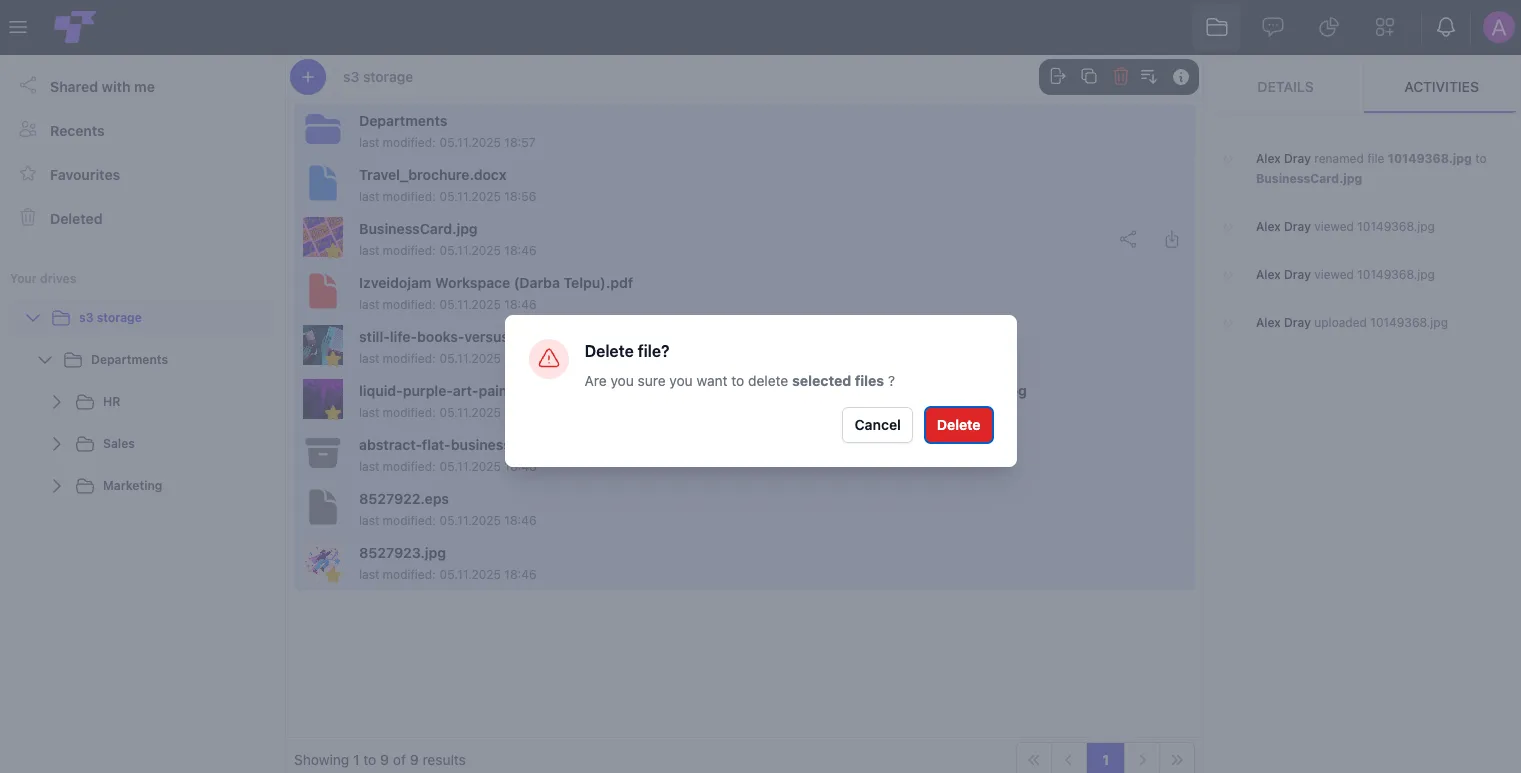
- Select one or multiple files you wish to delete.
- Click the trash bin icon at the top, or right-click the selected files and choose Delete.
- A confirmation window will appear asking you to confirm the action. Click Delete to remove the selected files.
Deleted files are moved to the Deleted section in the left sidebar. You can restore them if needed before they are permanently removed.
Restoring files
- Click the Deleted section in the left sidebar to view all files that have been removed.
- Click the restore icon next to a file to move it back to its original location.
- Click the trash bin icon next to a file to permanently delete it.
- To permanently delete all files, click the trash bin icon at the top of the page.
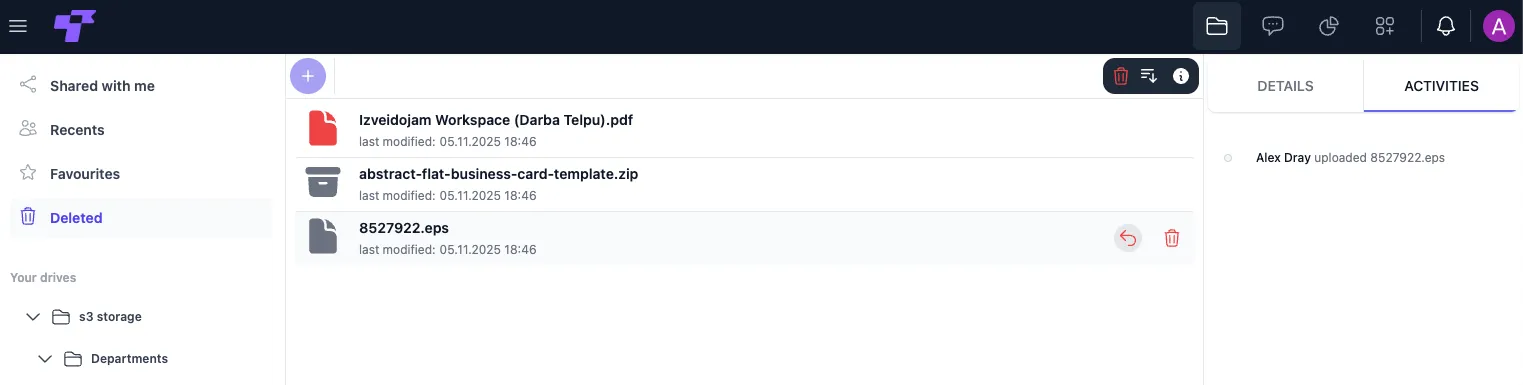
Even in the trash, you can still see all file details and activity.
Once you empty the trash, the files are permanently deleted and cannot be restored.
Details and activities
Click the info icon in the top-right corner to open the details panel.
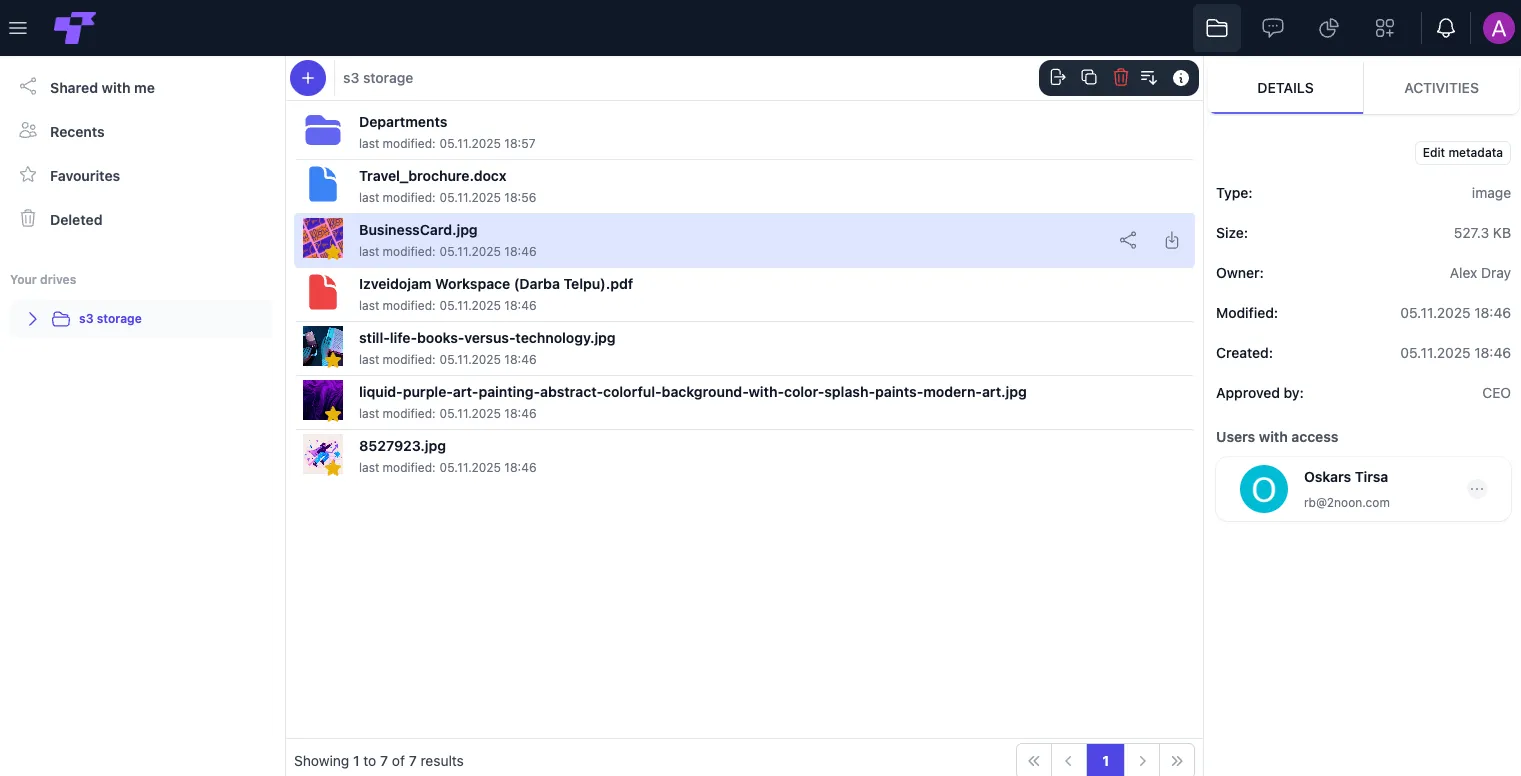
Basic file information
- Type: Indicates the file type (e.g., Word Document, Image, PDF).
- Size: Displays the file size.
- Owner: Shows the user who uploaded or owns the file.
- Modified Date: The last time the file was updated or edited.
- Created Date: The original upload date of the file.
Edit metadata
Metadata types can only be created or managed by admins.
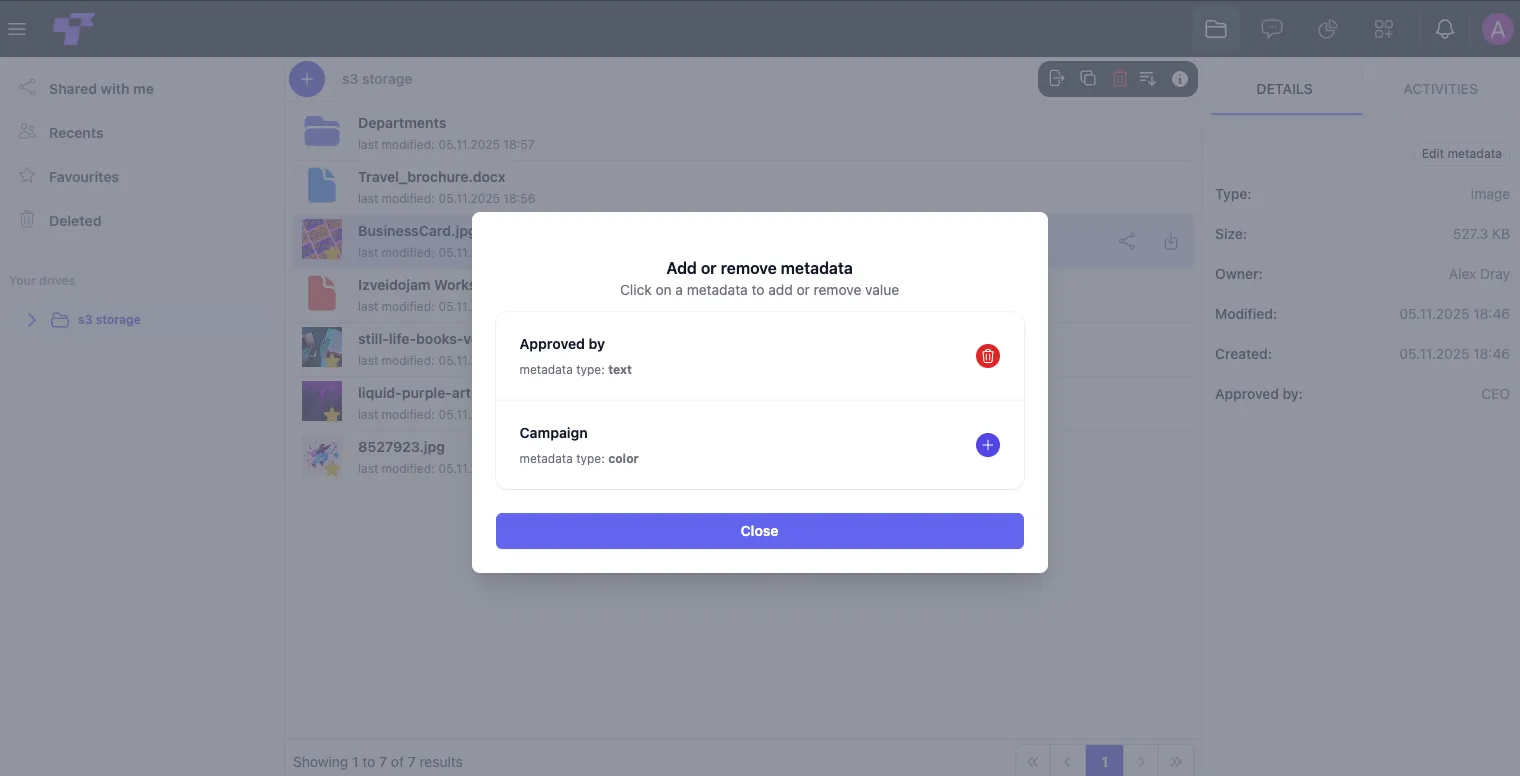
- Click Edit Metadata to open the metadata management pop-up.
- Click the + button next to a metadata type to add a value, or the trash icon to remove it.
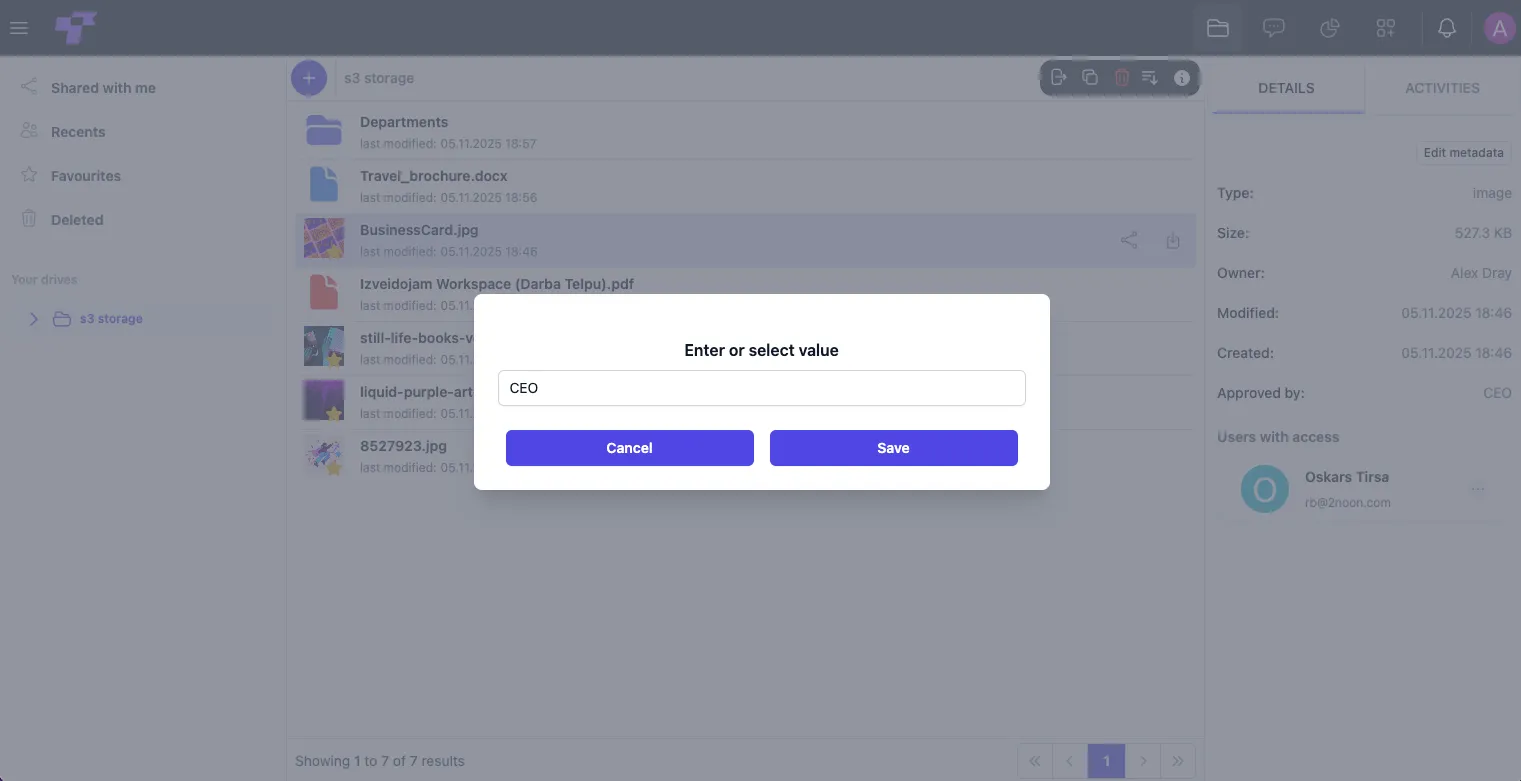
- Right-click the desired metadata field and select Add a value.
- Click Save, then close the pop-up to save your changes.
Users with access
The list of users with access is displayed in the Details section, under Users with Access.
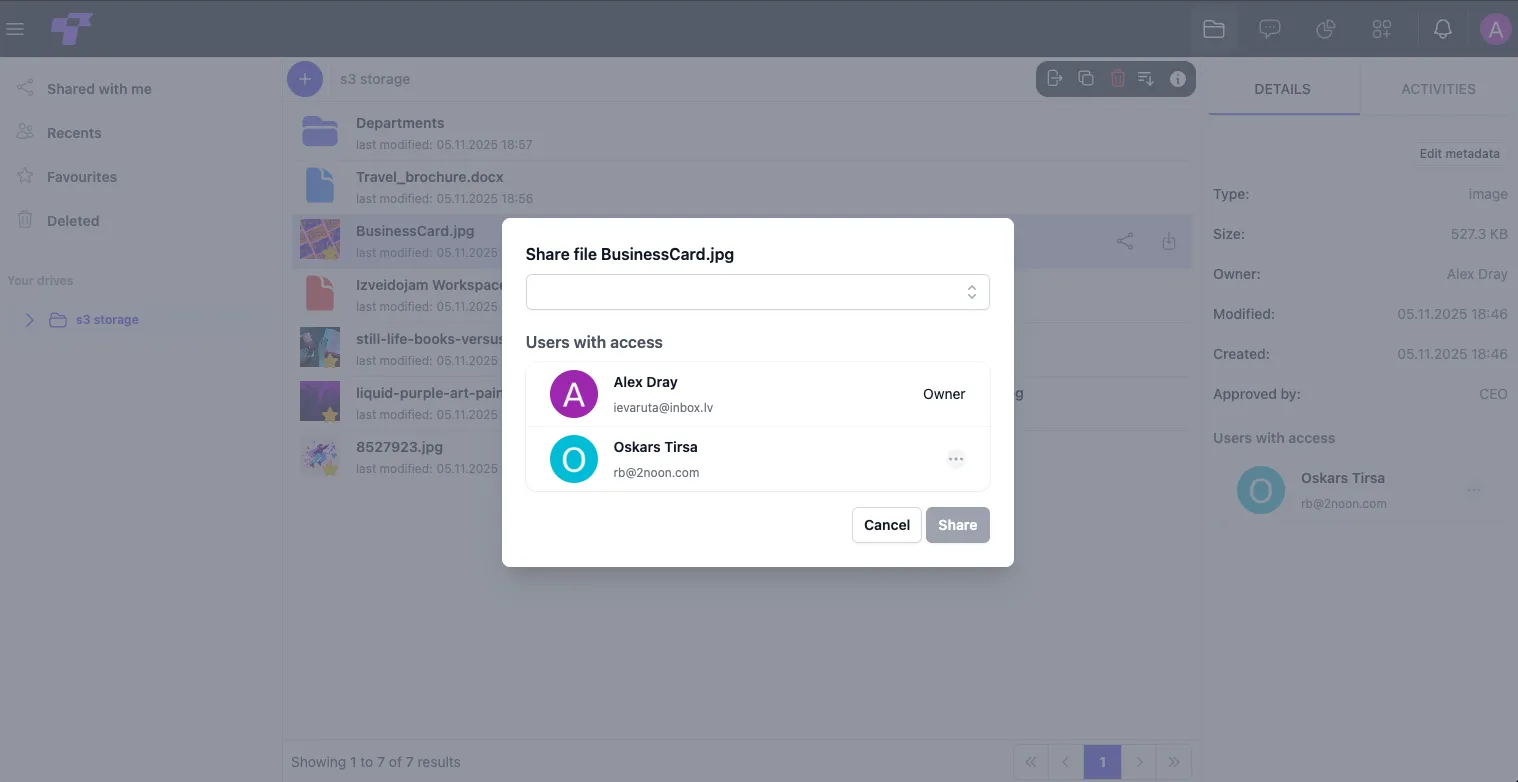
- Click the three-dot (⋮) icon next to a user.
- Select Edit Permissions and adjust the access level.
- Select Unshare to remove access.
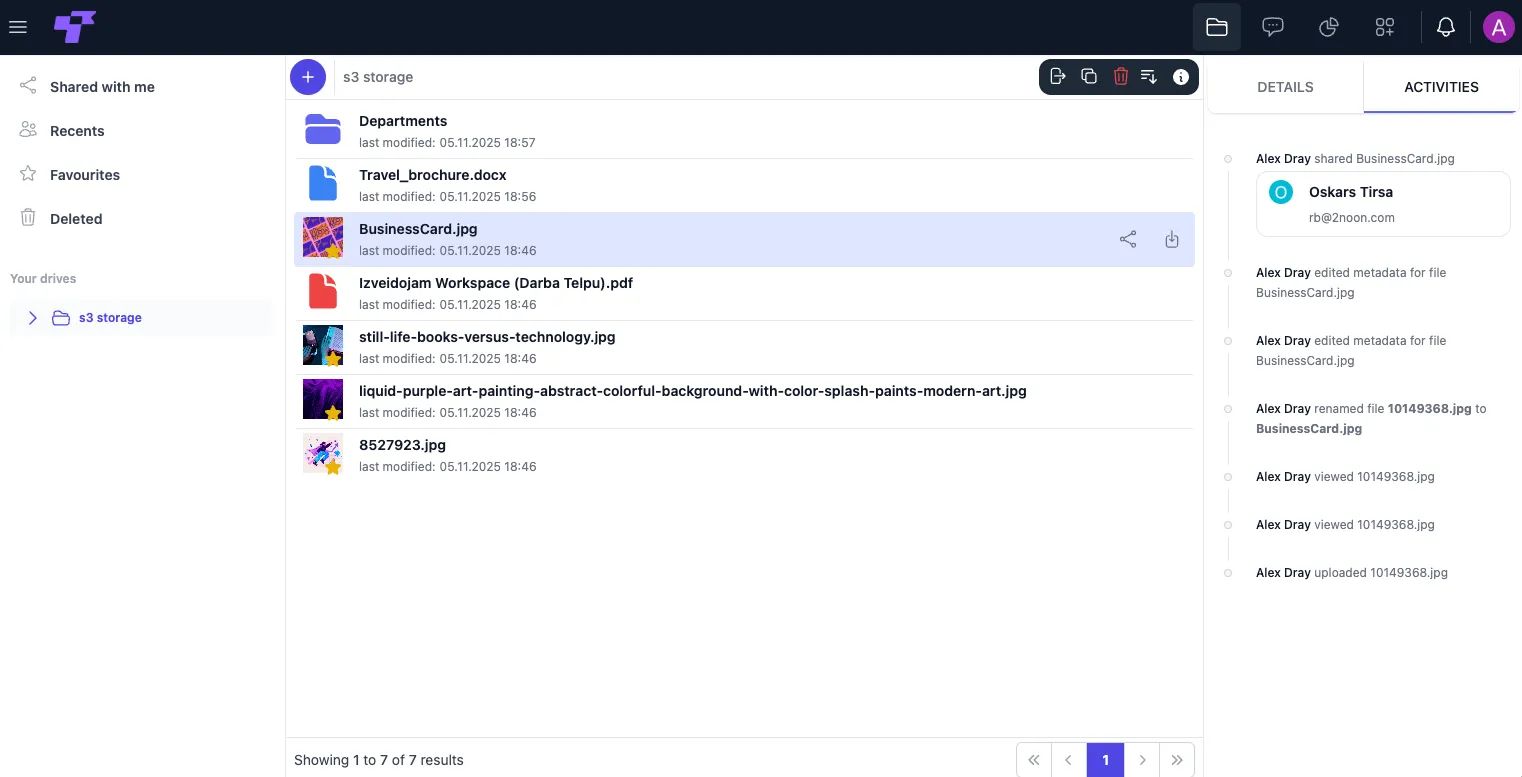
Activities
On the info menu, switch to the Activities tab to see what actions have been taken on the selected file — such as who edited, renamed, downloaded, or shared it.
Sorting
- Click the sorting icon at the top-right of the file list.
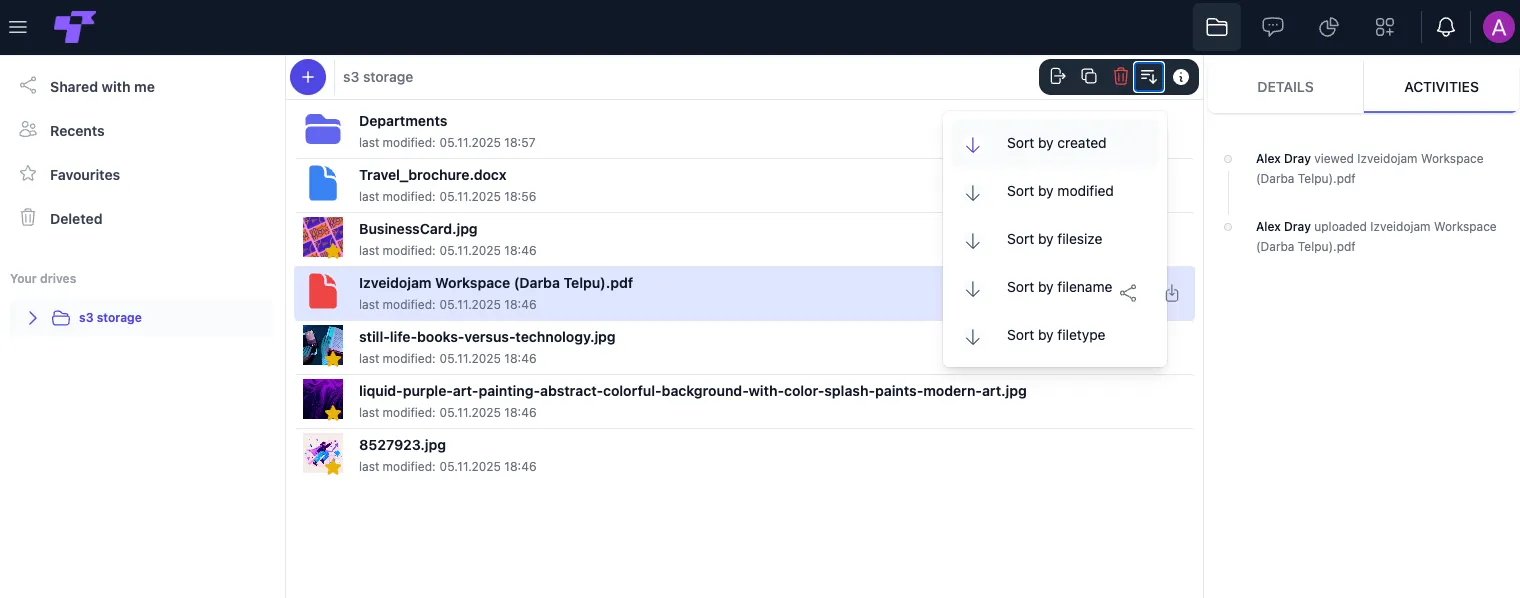
- Choose a sorting option:
- Sort by Created: Arrange files based on when they were originally created.
- Sort by Modified: Order files by the most recent edits.
- Sort by Filesize: Display files from largest to smallest (or vice versa).
- Sort by Filename: Alphabetically sort files from A-Z or Z-A.
- Sort by Filetype: Group files by type, such as documents, images, or PDFs.